Operating Information
2-4
CSA7404B, TDS7704B, TDS7404B, TDS7254B & TDS7154B Service Manual
Follow these steps to power on the instrument.
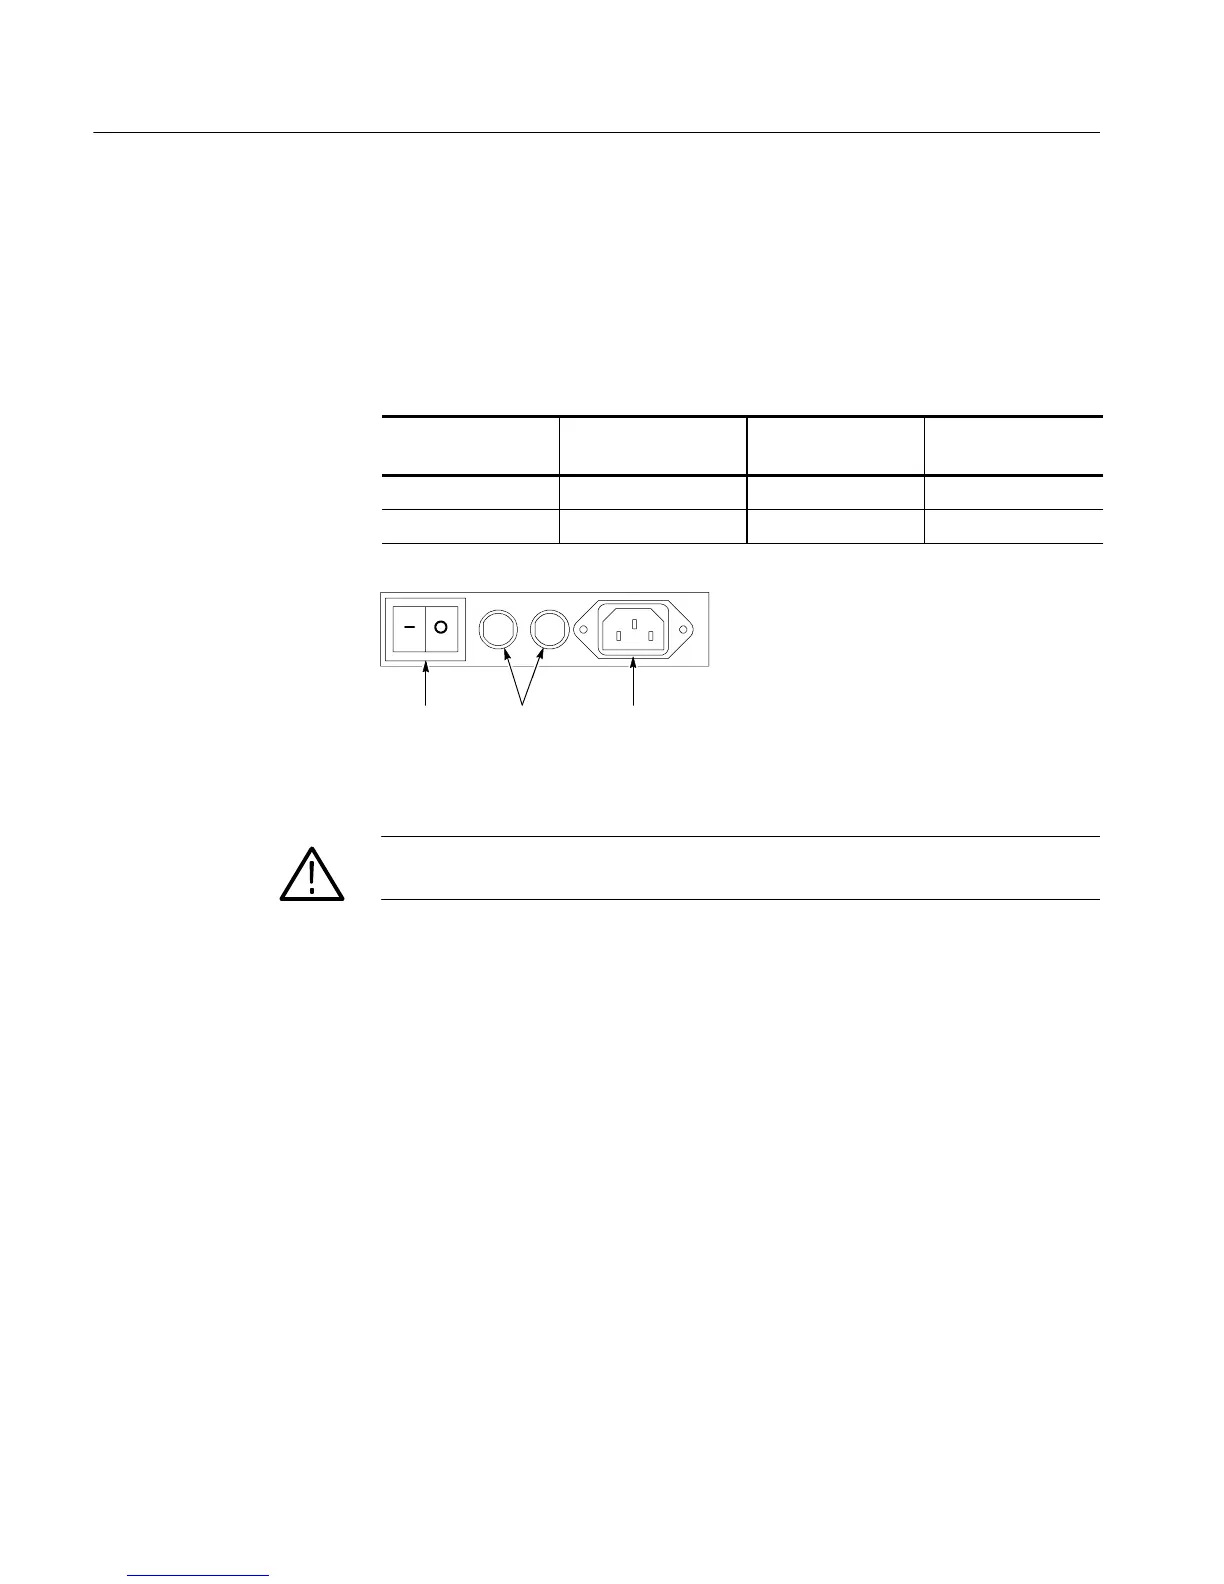
1. Check that the line fuses are correct for your application. B oth fuses must be
the same rating and type. Fuse types require a unique cap and fuseholder. See
Table 2--2 and Figure 2--2.
Table 2- 2: Line fuses
Fuse type Rating Fuse part number
Cap & fusehol der
part number
0.25 x 1.250 inch 8 A, fast blow, 250 V 159-0046-00 200-2264-00
5x20mm 6.3 A, fast blow, 250 V 159-0381-00 200-2265-00
Fuses AC powerPower switch
Figure 2- 2: Line fuse and power cord connector locations, rear panel
CAUTION. Connect the keyboard, mouse, and other accessories before applying
power to the product.
2. Connect the power cord.
3. If you have an external monitor, connect the power cord and power on the
monitor.
4. Turn the Power switch on at the rear panel. (See Figure 2--2 for switch
location.)
5. If the instrument does not power on, press the On/Standby switch to power
on the instrument (see Figure 2--3 for the switch location).
6. Wait for the boot routine and low-level self test to complete.
Power On the Instrument
 Loading...


