84 | Section 5
♦ Set up an outbound route so that you can make calls out
Then we’ll use the VX web interface to use the line that we created and then make a test call.
Finally, we’ll create a trunk from the PSTN and route calls from that trunk to our extension, all
by using the web GUI. We’ll go a step at a time from this point.
Create an extension or two
To get comfortable with Asterisk, create an extension or two to use for testing. You can use the
extension to test your connection with the VX and just to check for signs of life. You deserve to
experience some action after all that work loading and configuring.
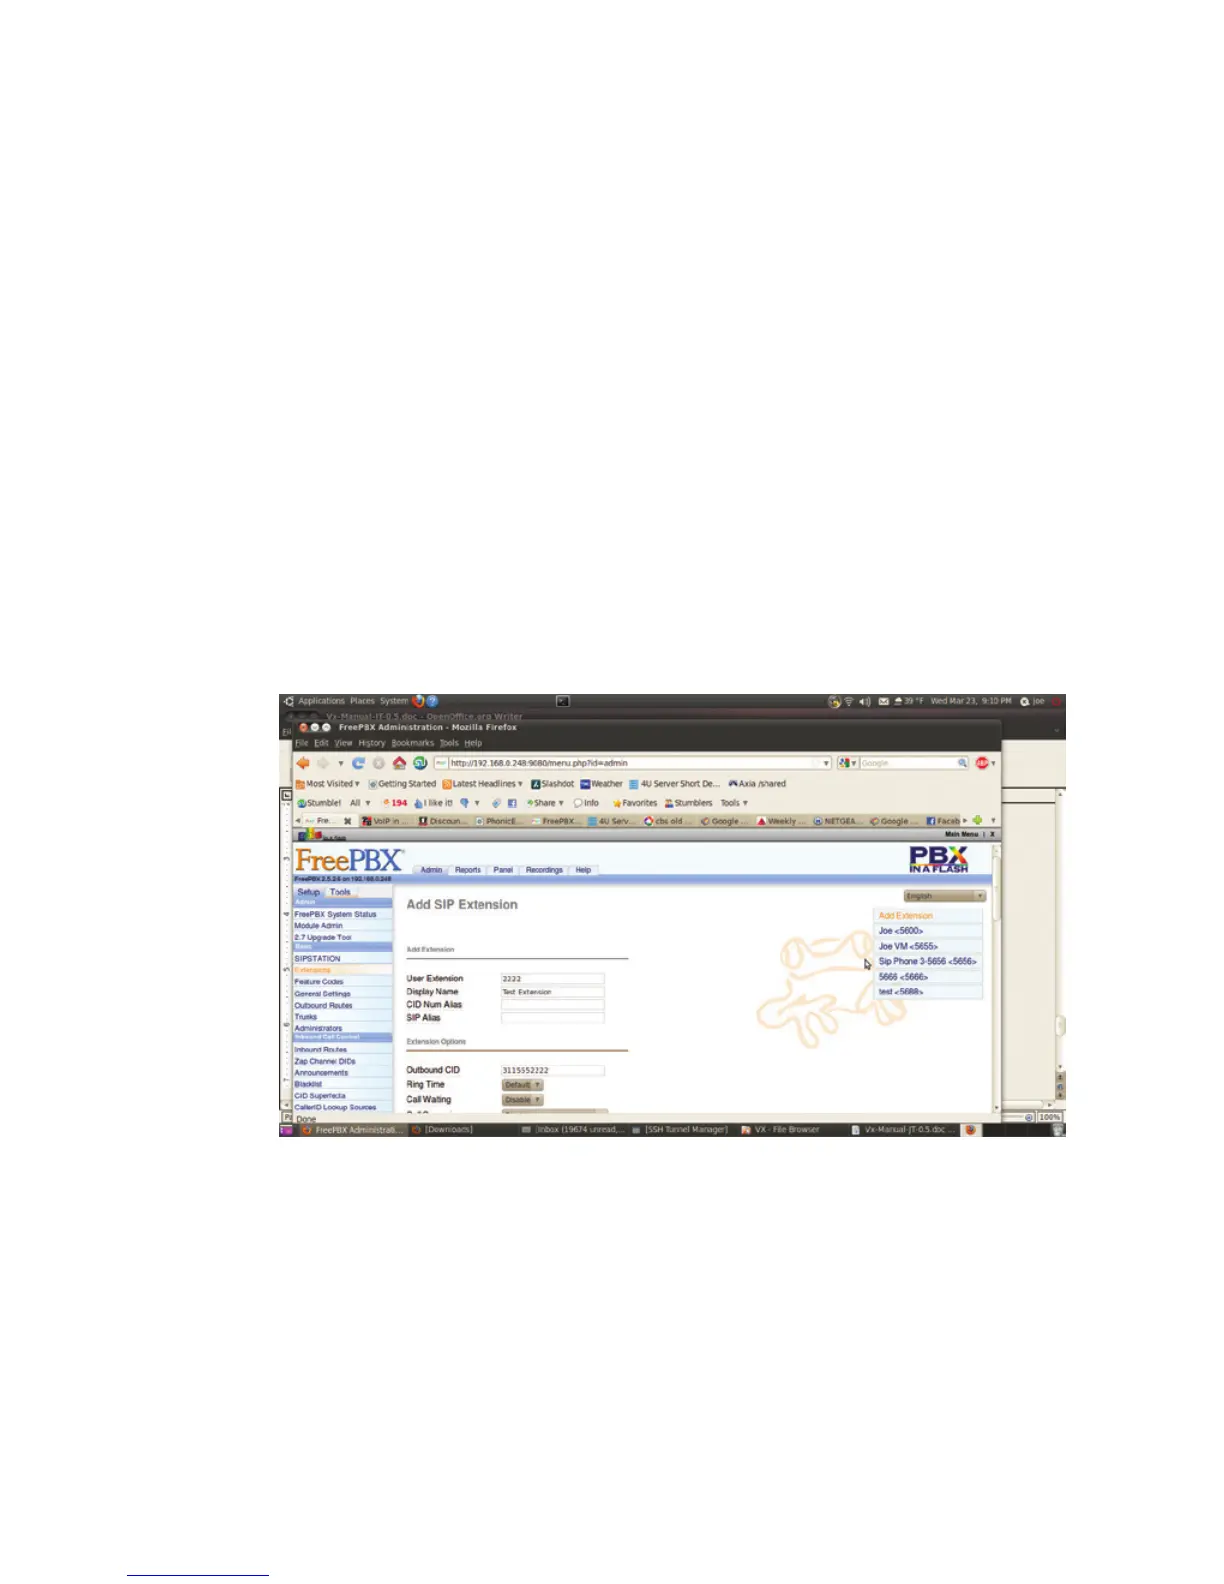
Click on Extensions and then click on Add Extension. The “Device field will default to Generic
SIP Device. Accept this by clicking on the Submit button. Then, Fill in the extension number
you’d like to use, then the display name and outbound caller ID. This is what callers will see
when you call them from this extension. Interestingly, it can be just about anything. Some
phone companies screen to be sure that you’re sending a properly formatted area code and
phone number, while others will take anything - a 4 digit extension, a single digit, your lucky
lotto numbers, whatever.
Scrolling down the page some more we see some more options. Most of these are optional,
except for “secret”. By default the ‘nat’ field is set to “Yes”, be sure to change it for use with
the VX or any extension to be used “inside” your firewall. This is another name for password.
Scrolling further...