User Guide
152
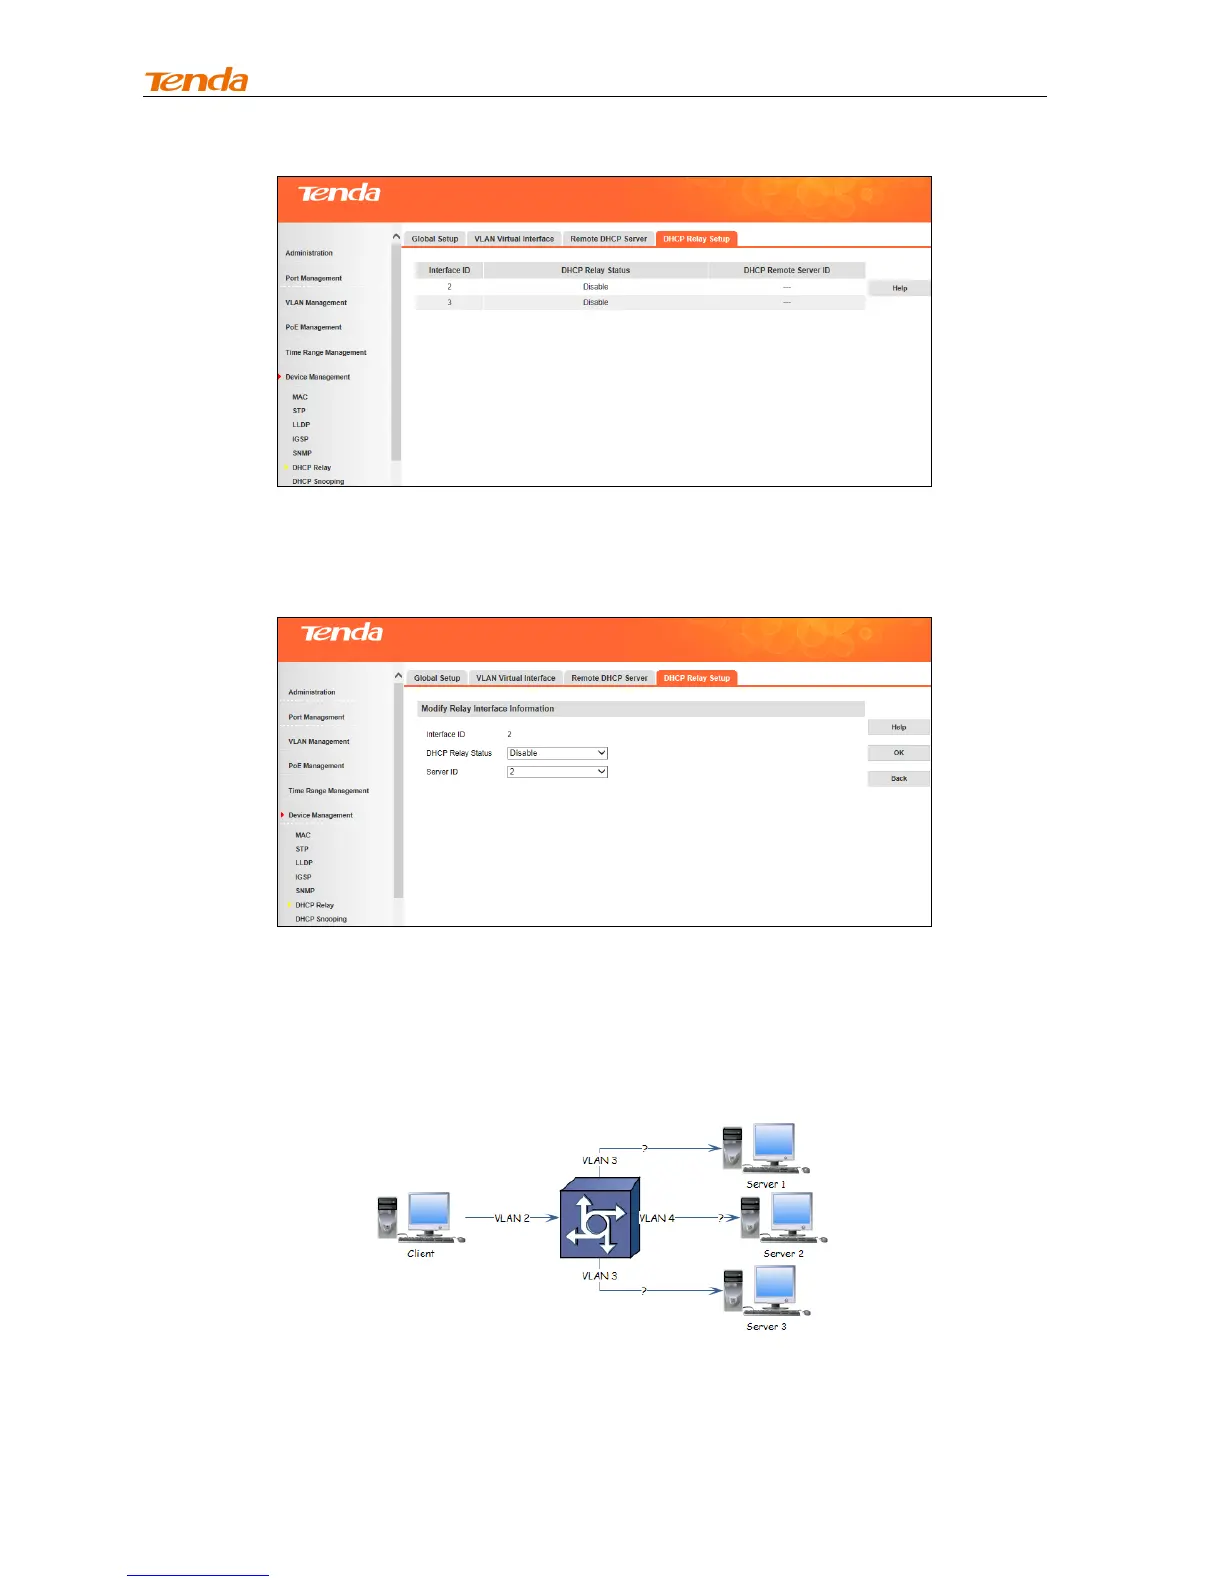
2. Click the corresponding interface ID, say 2, and the interface ID corresponds to the existing VLAN
virtual interface ID.
3. Select Enable from the DHCP Relay Setup drop-down list.
4. Select Server ID, say 2, and click OK. DHCP relay on VLAN virtual interface 2 is enabled.
When all DHCH relay settings are finished, clients connected to all servers in VLAN 2 can obtain IP from
the DHCP IP pool in VLAN 3.
For more details, see below:
Each VLAN virtual interface has a corresponding VLAN ID. When Client sends out DHCP REQUEST
packets, for switches without DHCP relay settings, these packets will be forwarded to other ports in VLAN
2.
 Loading...