3-14
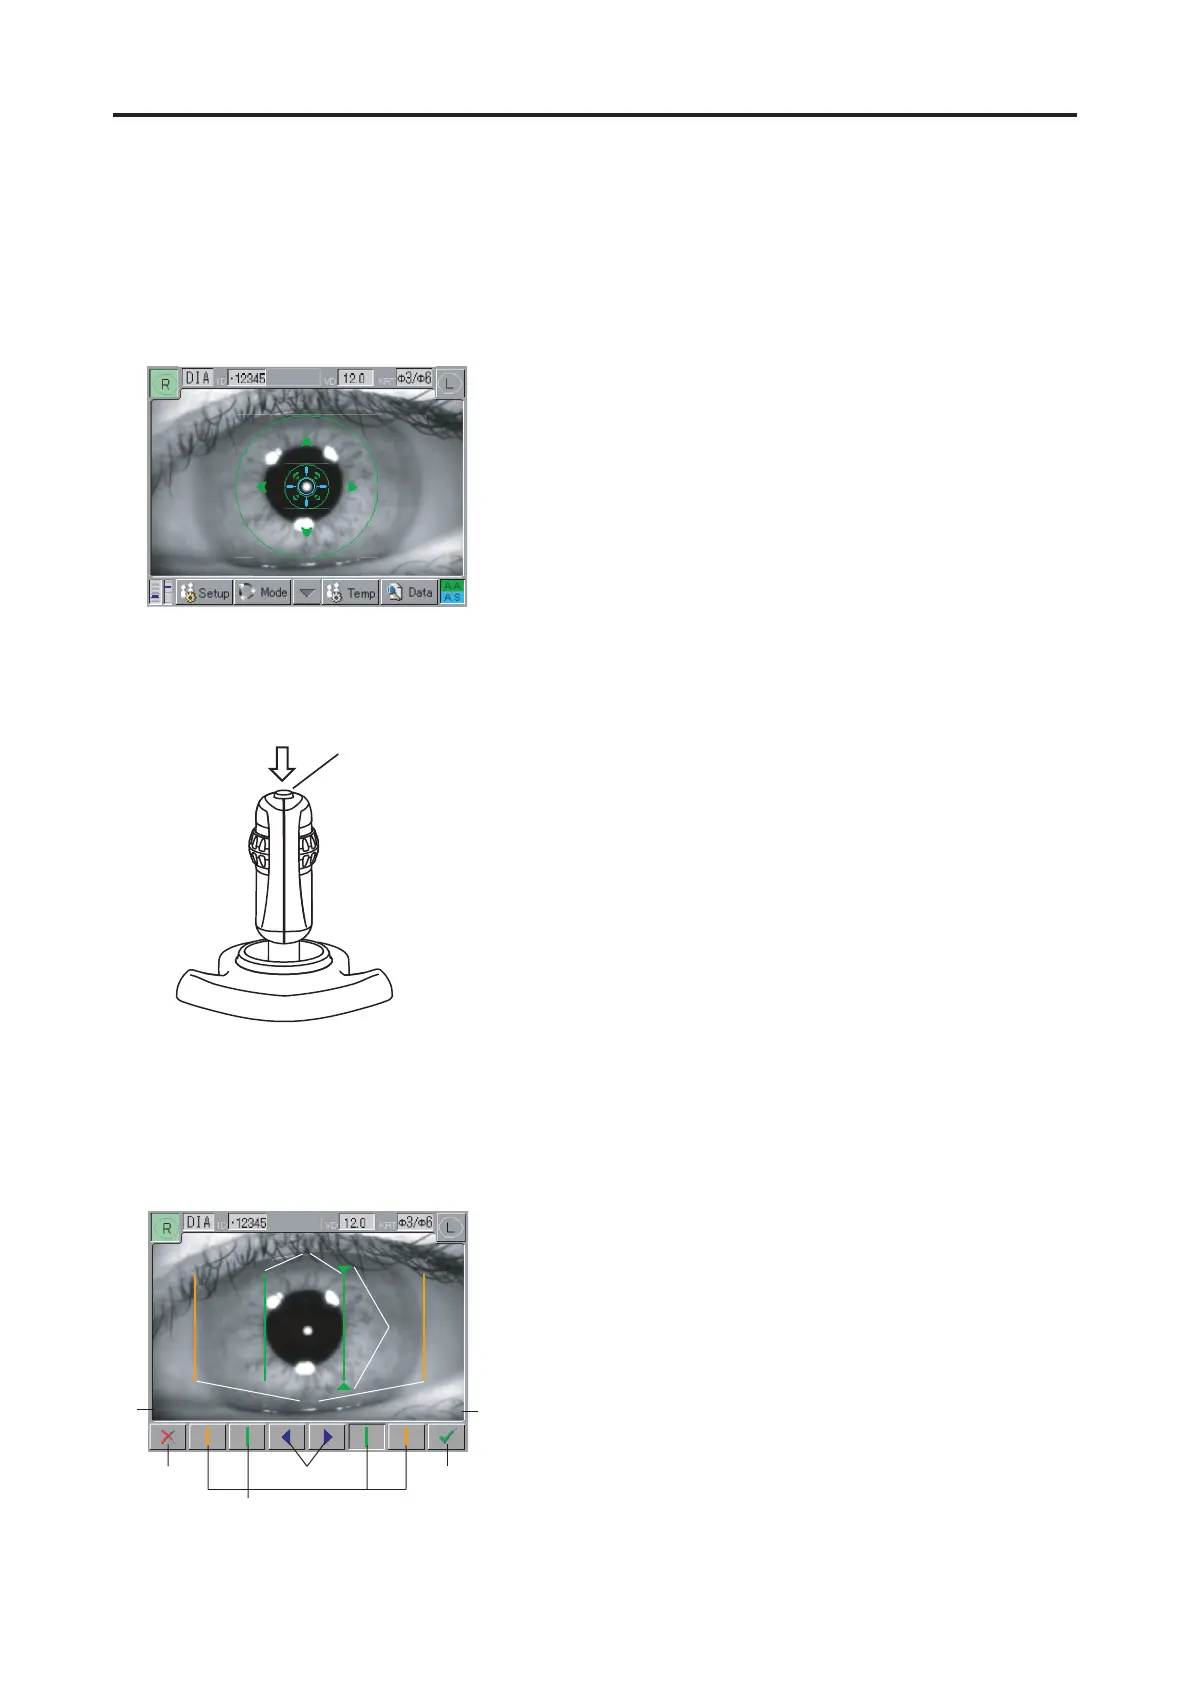
3.3.4 Corneal diameter and pupillary diameter measurement mode
Acquire the image of the anterior ocular segment and align
the cursors to the pupil or both ends of the cornea, to measure
the distance between the cursors, with which the sizes of the
pupil and the cornea are measured.
<Measuring procedures>
1) Select the "DIA" measurement mode. (See "3.2.2 Se-
lection of measurement mode and setting of measuring
conditions".)
2) Give alignments (See "3.2.4 Alignment procedures".)
and next press the Measurement Switch $ to acquire
the images of the anterior ocular segment.
3) If such images are acquired, the cursor for pupillary
diameter measurement % is colored in green and that
for corneal diameter measurement & is colored in or-
ange. (Fig. 2) After this, adjust each cursor so as to
meet the sizes of the corneal diameter and the papillary
diameter. The active cursors marks are accompanied
' at the upper and lower parts of the cursors, of which
cursor are moved left and right by pressing the CUR-
SOR MOVE button (.
4) The active cursor is selected by pressing the CURSOR
SELECT button ).
5) The distance between the cursors for corneal diameter
measurement is shown in the CORNER * and that
between the cursors for pupil diameter measurement is
shown in the PUPIL +.
6) Press the OK button ,, so the measurement results
will be saved in the memory and the initial screen (Fig.
1) will be returned. If the Cancel button - is pressed,
the initial screen (Fig. 1) will be returned without giv-
ing any operation.
7) The calculated value will be printed out by pressing PRINT
button after OK button ,.
Ԙ
ψ
ψ
ψ
ψ
ψ
ψ
ψ
ψ
䌃䌏䌒䌎䌅䌒ޓ䋱䋲 䋮䋰䌭䌭 䌐䌕䌐䌉䌌䇭䋴䋮䋵䌭䌭
ԡ
ԙ
Ԛ
ԛ
Ԝ
Ԟ
ԟ
Ԡ
(Fig. 1)
(Fig. 2)
(Fig. 3)
3.3 MEASUREMENT
 Loading...