3-8
3.3 MEASUREMENT
Advise the Patient not to blink while measuring
eye.
If the Patient's eye has too many blinks or such an
abnormal condition of corneal disease, not be able
to perform measurement by auto shot. If so, try by
manual measurement.
3.3.1 Refractive power measurement mode
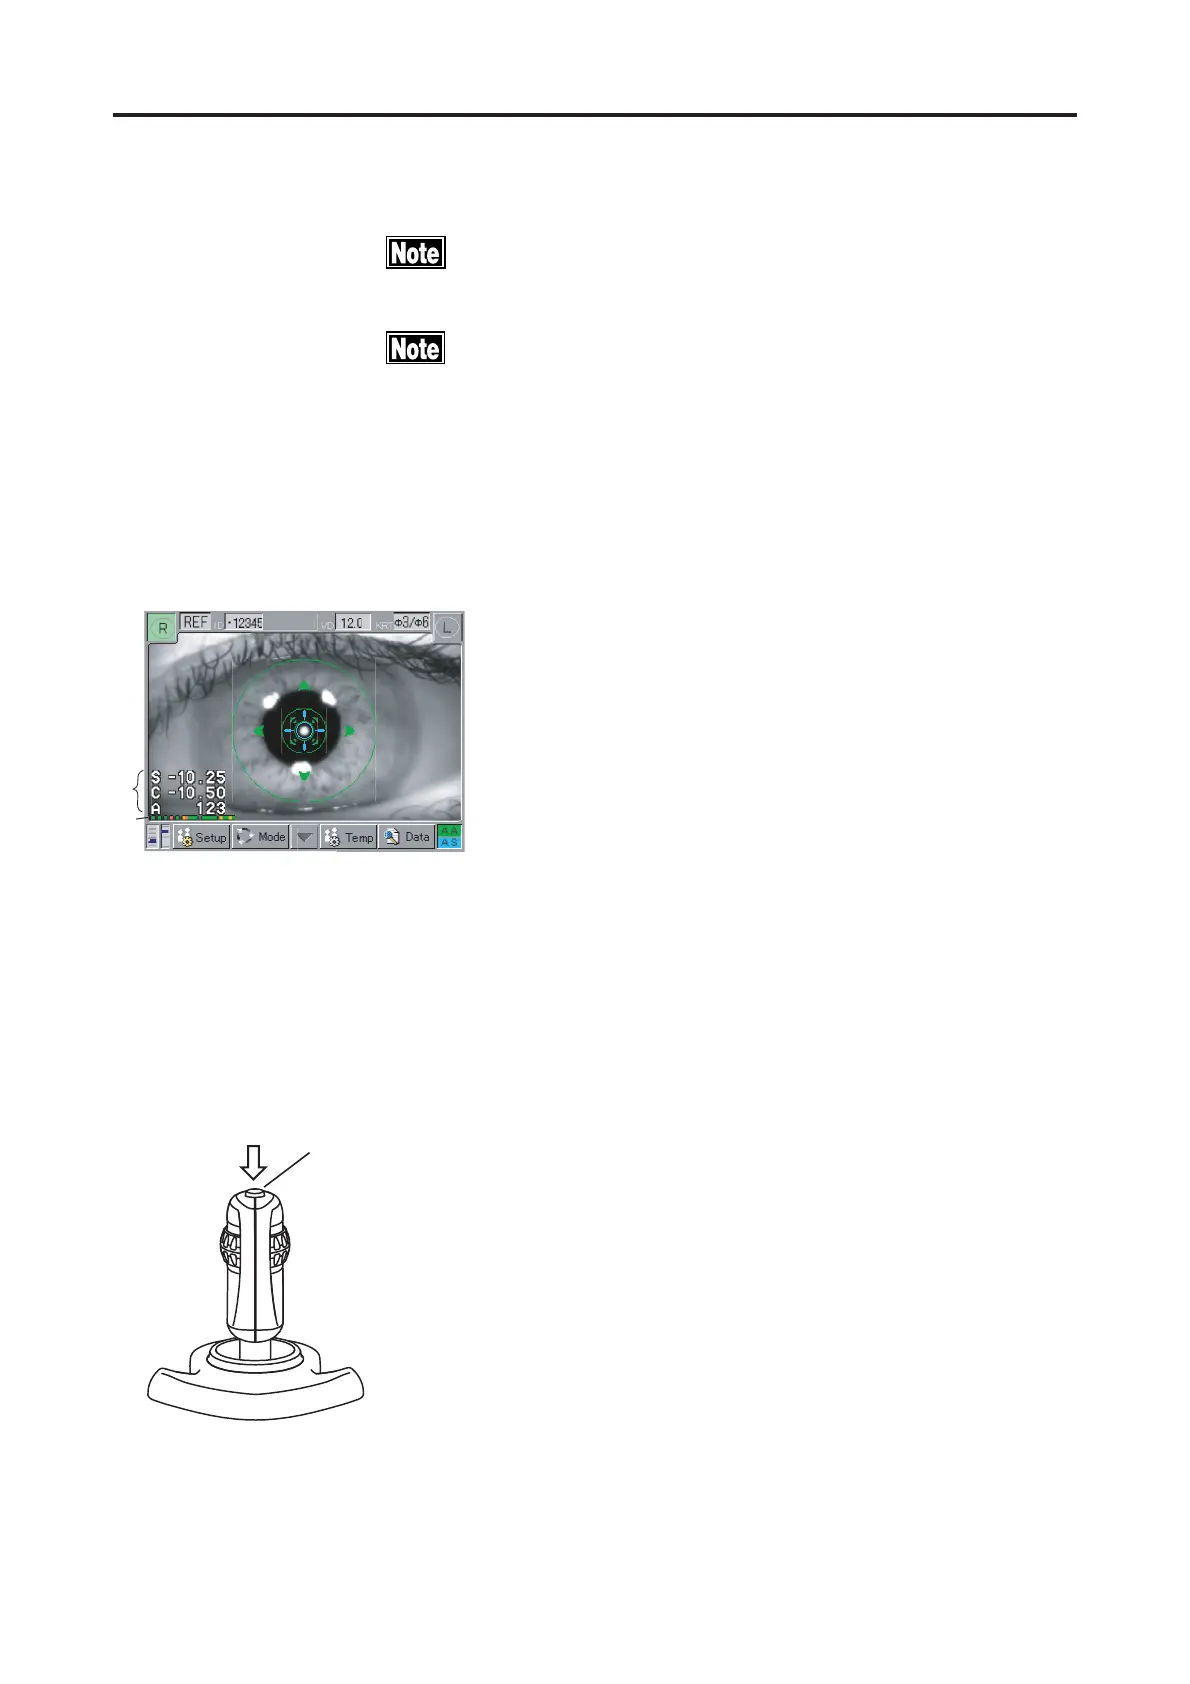
<Refractometer Measurement Screen>
The latest measurement data $ are displayed in the left
lower part of the Monitor.
Each data indicate below.
S: spherical refractive power
C: cylindrical refractive power
A: astigmatism axial angle
These numeral data are indicated by color "White" "Yel-
low" "Red" in order of reliability.
A dot marks below numeral data indicate the number of
memorized measurement data %. A dot increase in order
left to right. The colors of a dot displayed in three colors
of "Green", "Yellow", and "Red" in order of reliability.
Print out error message correspond to these colors "No
mark", "e", "E" in order of reliability.
Twenty (20) data of refractometer measurements are memo-
rized. If more than 20 data are acquired, memorized data
will automatically be deleted from the oldest one or from
"Red" "Yellow" color data in order low reliability.
<Measuring procedure>
1) Select the measurement mode of "REF". (See "3.2.2
Selecting of the measurement mode and setting of the
measurement conditions")
2) First make alignment and next press the Measurement
Switch & to start measurement. (See "3.2.4 Align-
ment procedure".) If the Auto Shot is set, measure-
ment will automatically start at the time when align-
ment has been completed and will continue measure-
ment until a set number of measurements (3 to 5 times)
are completed. As for setting procedure of Auto Shot,
see "3.7.1 Setting procedure of Auto Shot".
Ԙ
ԙ
(Fig. 1)
Ԛ
(Fig. 2)
3.3 MEASUREMENT
 Loading...