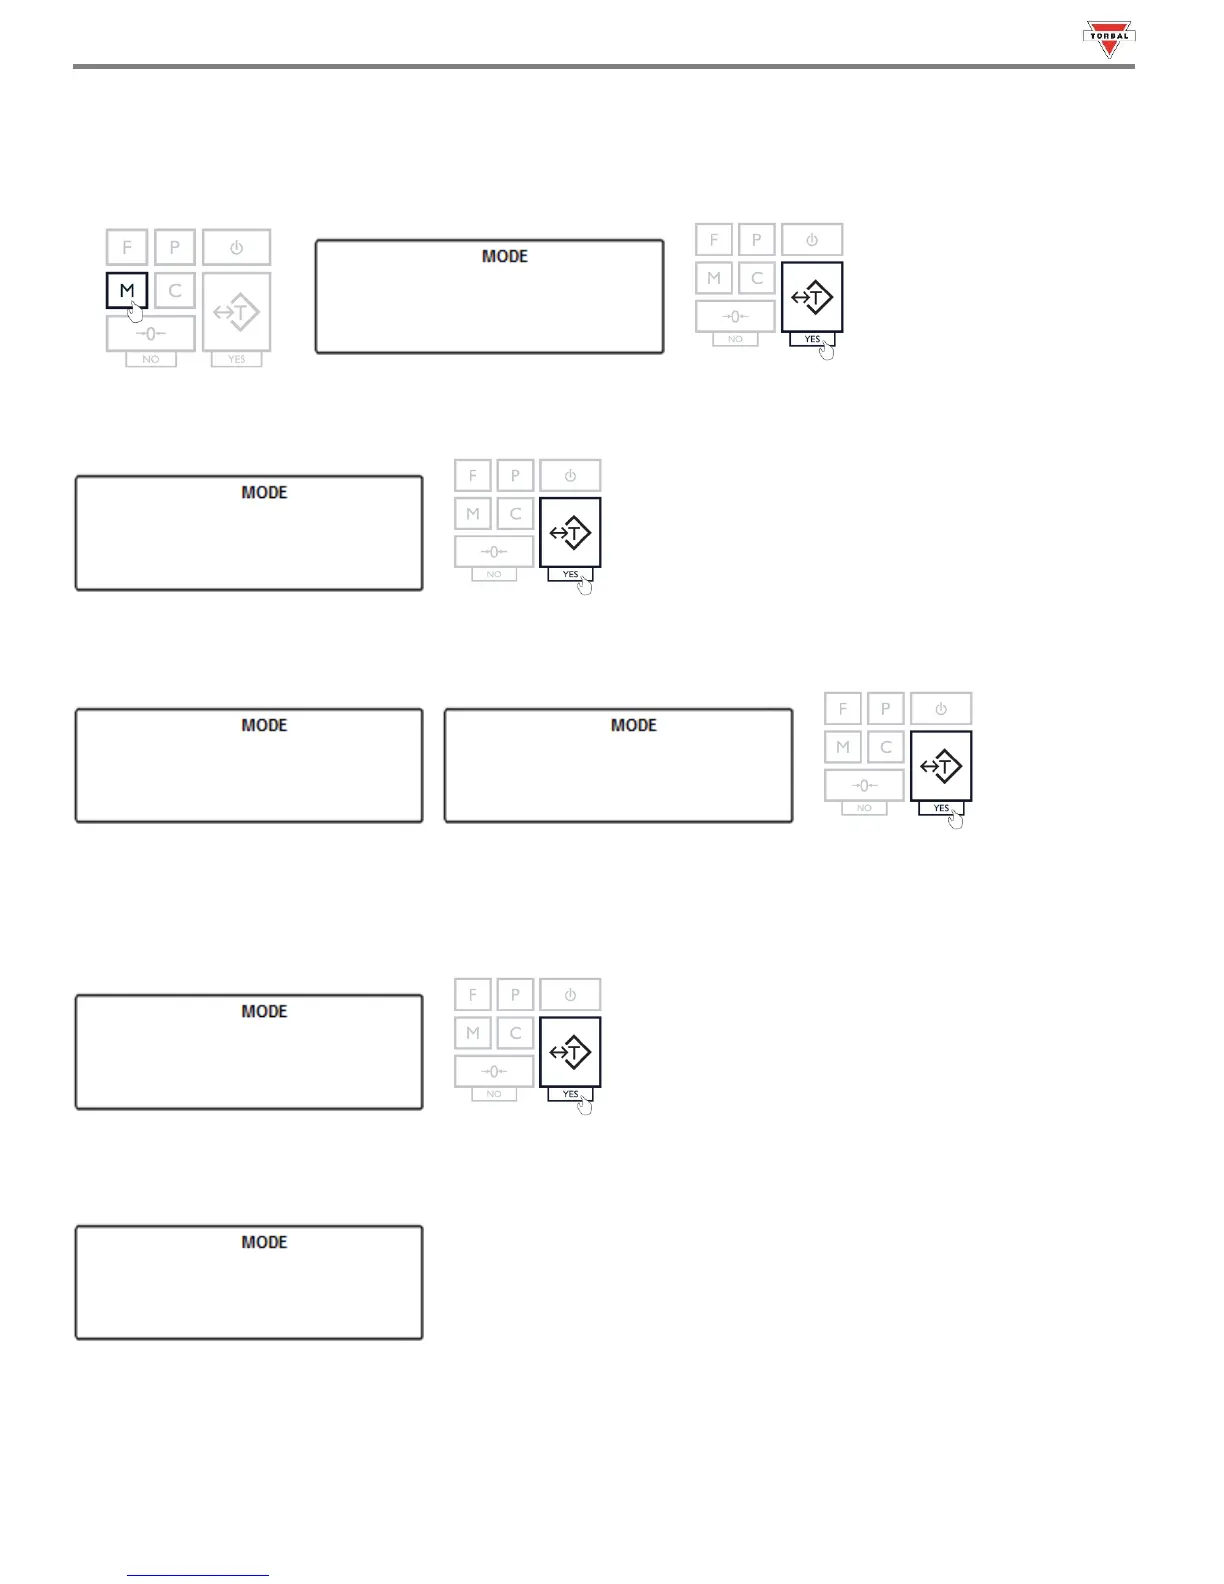
To enable and configure GLP data printing, follow the steps below.
1. Press the “M” key. Select “” by pressing the “T” (YES) key.
31
2. Select “SET” by pressing the “T” (YES) key.
3. To enable GLP, press the “T” key when “” is displayed. To disable GLP, press the “T” key when “” is displayed.
4. Once enabled, configurable options including Unit ID (), User ID (), Project No. () will
display. Select an option by pressing the “T” key.
Example (Selecting Model):
5. A dash will be displayed, indicating you may assign a value.
Note: ID numbers can consist of up to six digits.