4
© 2013-2017 TOSHIBA TEC CORPORATION All rights reserved
e-STUDIO2006/2306/2506/2007/2307/2507/2303A/2303AM/2803AM/2309A/2809A
DISASSEMBLY AND REPLACEMENT
4 - 53
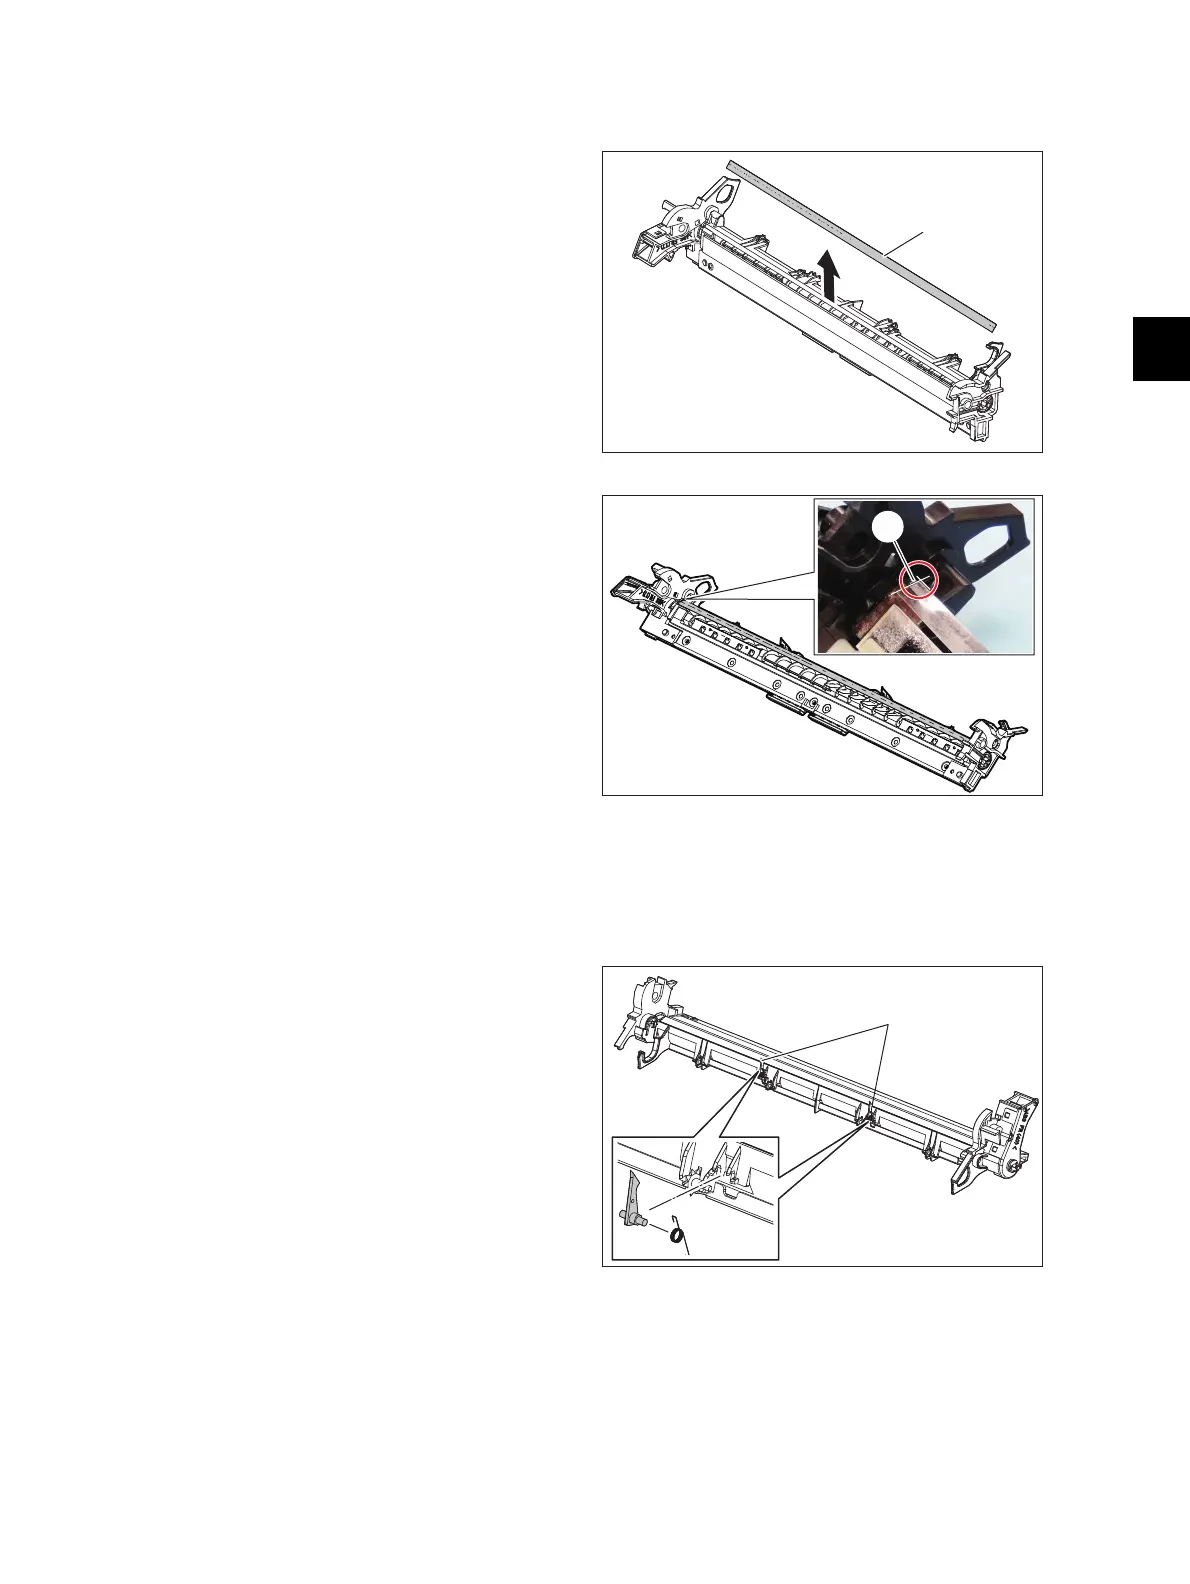
4.7.6 Recovery Blade
4.7.7 Drum separation finger
(1) Take off the drum cleaner unit.
P. 4-51 "4.7.3 Drum cleaner unit"
(2) Take off the Drum.
P. 4-52 "4.7.4 Drum"
(3) Peel off the recovery blade [1].
Fig. 4-136
Notes:
1. When attaching the recovery blade, clean
the surface of the frame first. Be careful
not to deform the blade.
2. When attaching the recovery blade, use
the stepped area [2] at the rear of the
cleaner unit as the reference for pasting
the recovery blade in the front/ rear
directions. Push the recovery blade
forward to this stepped area and paste it.
As for the left/ right directions, make sure
that the recovery blade does not project
out to the drum separation finger side.
3. Press the stuck part with your finger to
attach the blade securely.
Fig. 4-137
(1) Take off the drum.
P. 4-52 "4.7.4 Drum"
(2) Take off 2 drum separation fingers [1].
Notes:
1. When replacing the drum separation
fingers, make sure that the drum has
been taken off first since the fingers may
scratch the drum surface.
2. When the drum separation fingers have
been replaced, check if the pressure
movement is normal by moving them with
your hands.
Fig. 4-138
[2]
[1]

 Loading...


