4
© 2013-2017 TOSHIBA TEC CORPORATION All rights reserved
e-STUDIO2006/2306/2506/2007/2307/2507/2303A/2303AM/2803AM/2309A/2809A
DISASSEMBLY AND REPLACEMENT
4 - 57
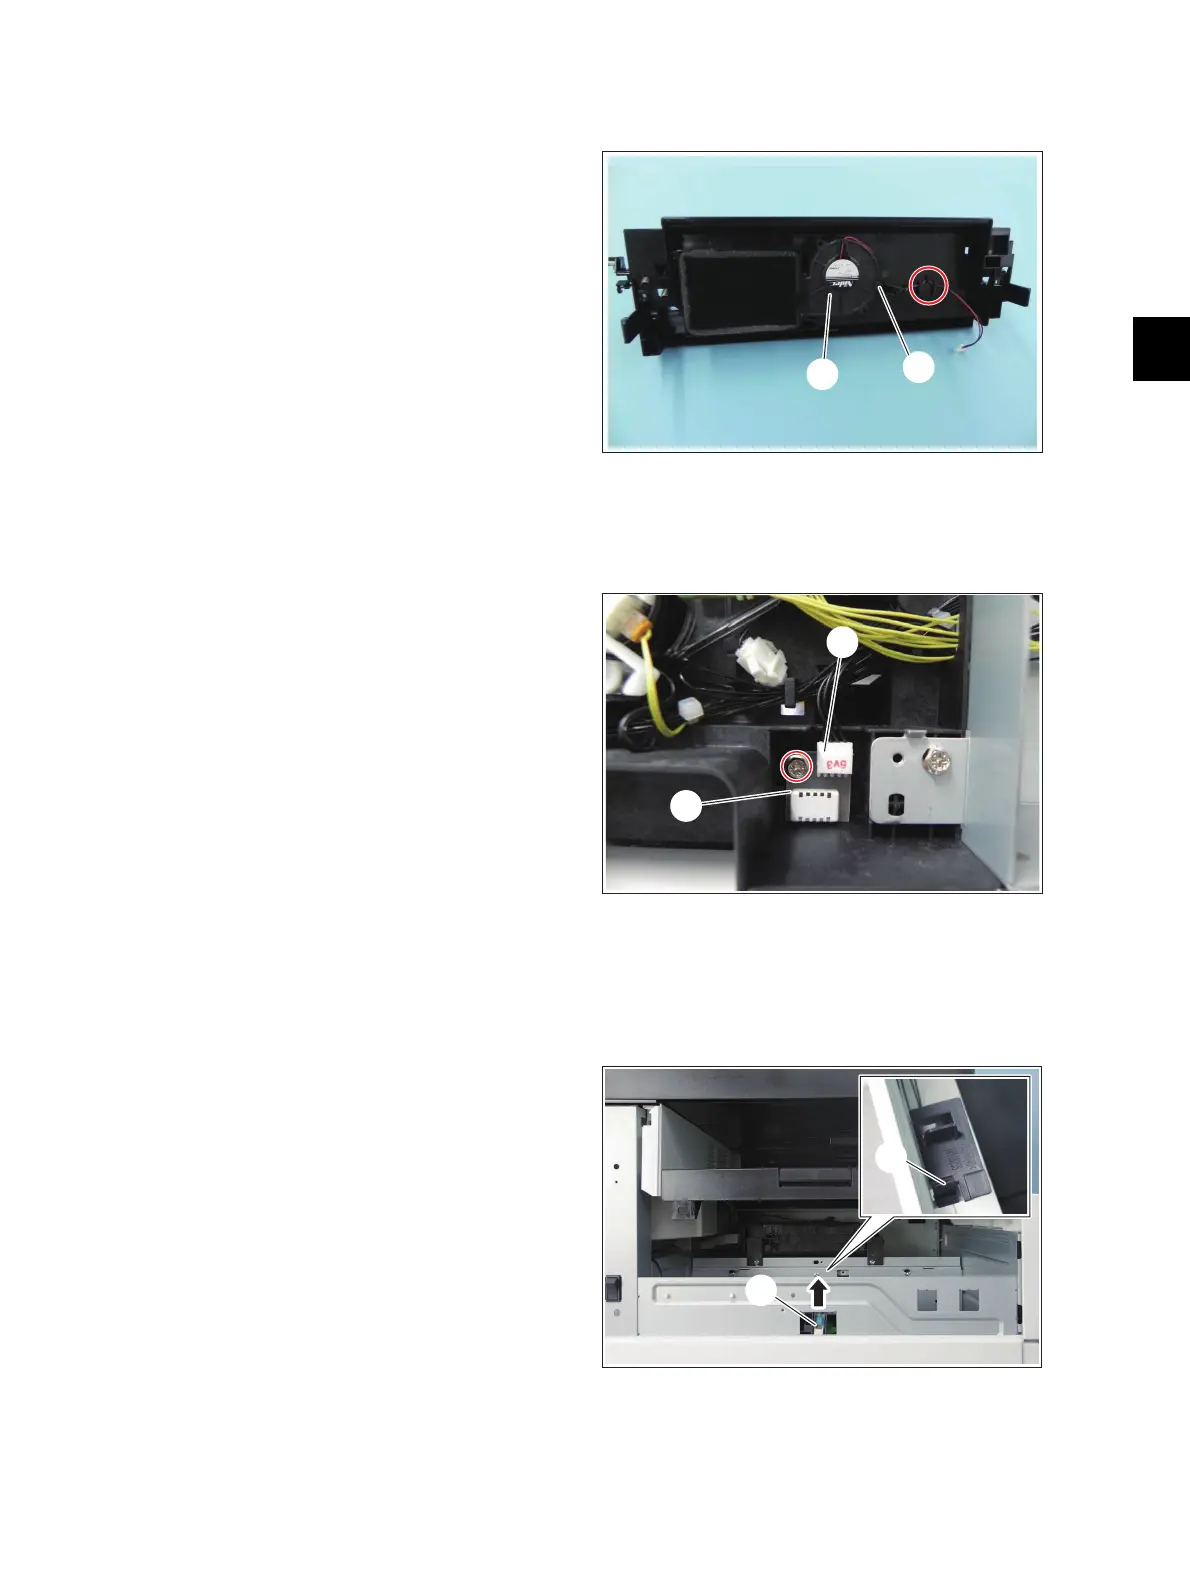
4.7.15 Suction fun (M5)
4.7.16 Temperature/humidity sensor (S1) <20L/23L/25L/20H/23H/25H>
4.7.17 Temperature/humidity sensor (S1) <23LA/23LM/28LM/23HA/
28HA>
(1) Open the right cover.
(2) Take off the duct unit.
P. 4-35 "4.6.3 Duct unit"
(3) Release the harness from the harness guide
[4].
(4) Release 1 latch [1] and then take off the
suction fun [2].
Fig. 4-148
(1) Take off the rear cover.
P. 4-5 "4.1.9 Rear cover <20L/23L/25L/
20H/23H/25H>"
(2) Disconnect 1 connector [1] and remove 1
screw. Take off the temperature/ humidity
sensor [2].
Fig. 4-149
(1) Take off the left cover.
P. 4-1 "4.1.2 Left cover <23LA/23LM/
28LM/23HA/28HA>"
(2) While pressing the lever [1], take off the
temperature/humidity sensor [2] with the
holder.
Fig. 4-150
[1]
[2]

 Loading...


