Routine Operation
36 RMWH-SVX001C-EN
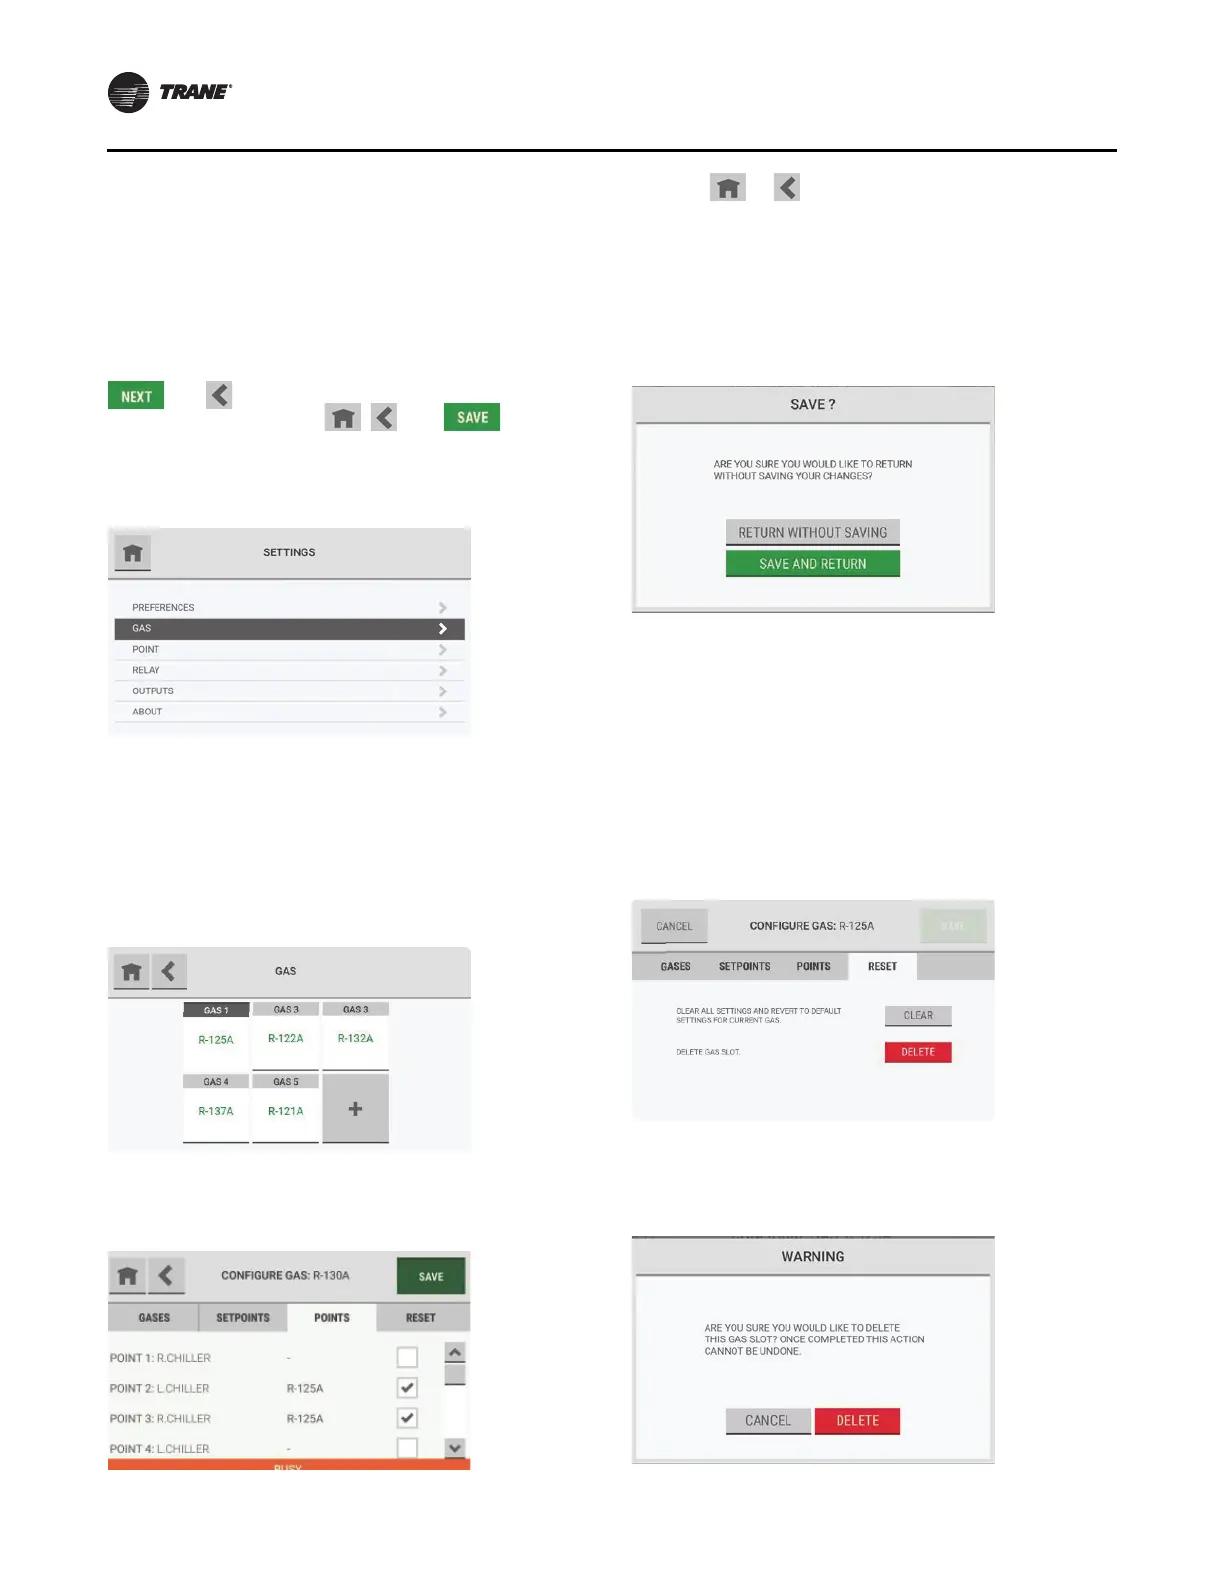
Gas Configuration
Use the Gas option to change the gas configuration
settings.
Note: Except for the buttons that show
in the screen
headers, the screens and steps used to change the
gas configuration settings are the same as those
used during the initial setup.
During the initial setup, the scree
n headers show the
and buttons. During routine operation, the
screen headers show the , , and buttons.
When a change is made to the configuration, the Save
button becomes active.
1.
On the Setti
ngs screen, select Gas.
2. On the Gas screen, select the applicable gas tile.
3. Do one of the following:
a. To change the gas configuration settings, go to
“Gas Configuration,” p. 19, and do Step 2 through
Step 13.
b. To clear or delete a configured gas, go to Step 1 in
“Reset Tab,” p. 36.
While the configuration is being updated, a Busy
message shows at the bottom of the Configure Gas
screen.
If the or button is selected while the Busy
message shows, a pop-up asks whether to abandon
the configuration changes.
• To return to the Gas screen without saving the
configuration changes,
se
lect Return without
Saving.
• To save the
configuration changes a
nd return to the
Configure Gas screen, select Save and Return.
When the configuration changes have been saved, the
Settings screen shows.
Reset Tab
Use the Reset tab to clear or delete a gas slot.
1. On the Configure Gas screen, select the Re
set tab.
2. Do one of the following:
a. To return to the default settings for
the currently
selected gas, select Clea
r.
b. To remove the gas slot completely,
select Delete.
3. On the warning pop-up, do one of the following:
a. To cancel the Delete function, select Cancel.
b. To
continue with the Delete function, select
Delete.