Initial Setup
RMWH-SVX001C-EN 19
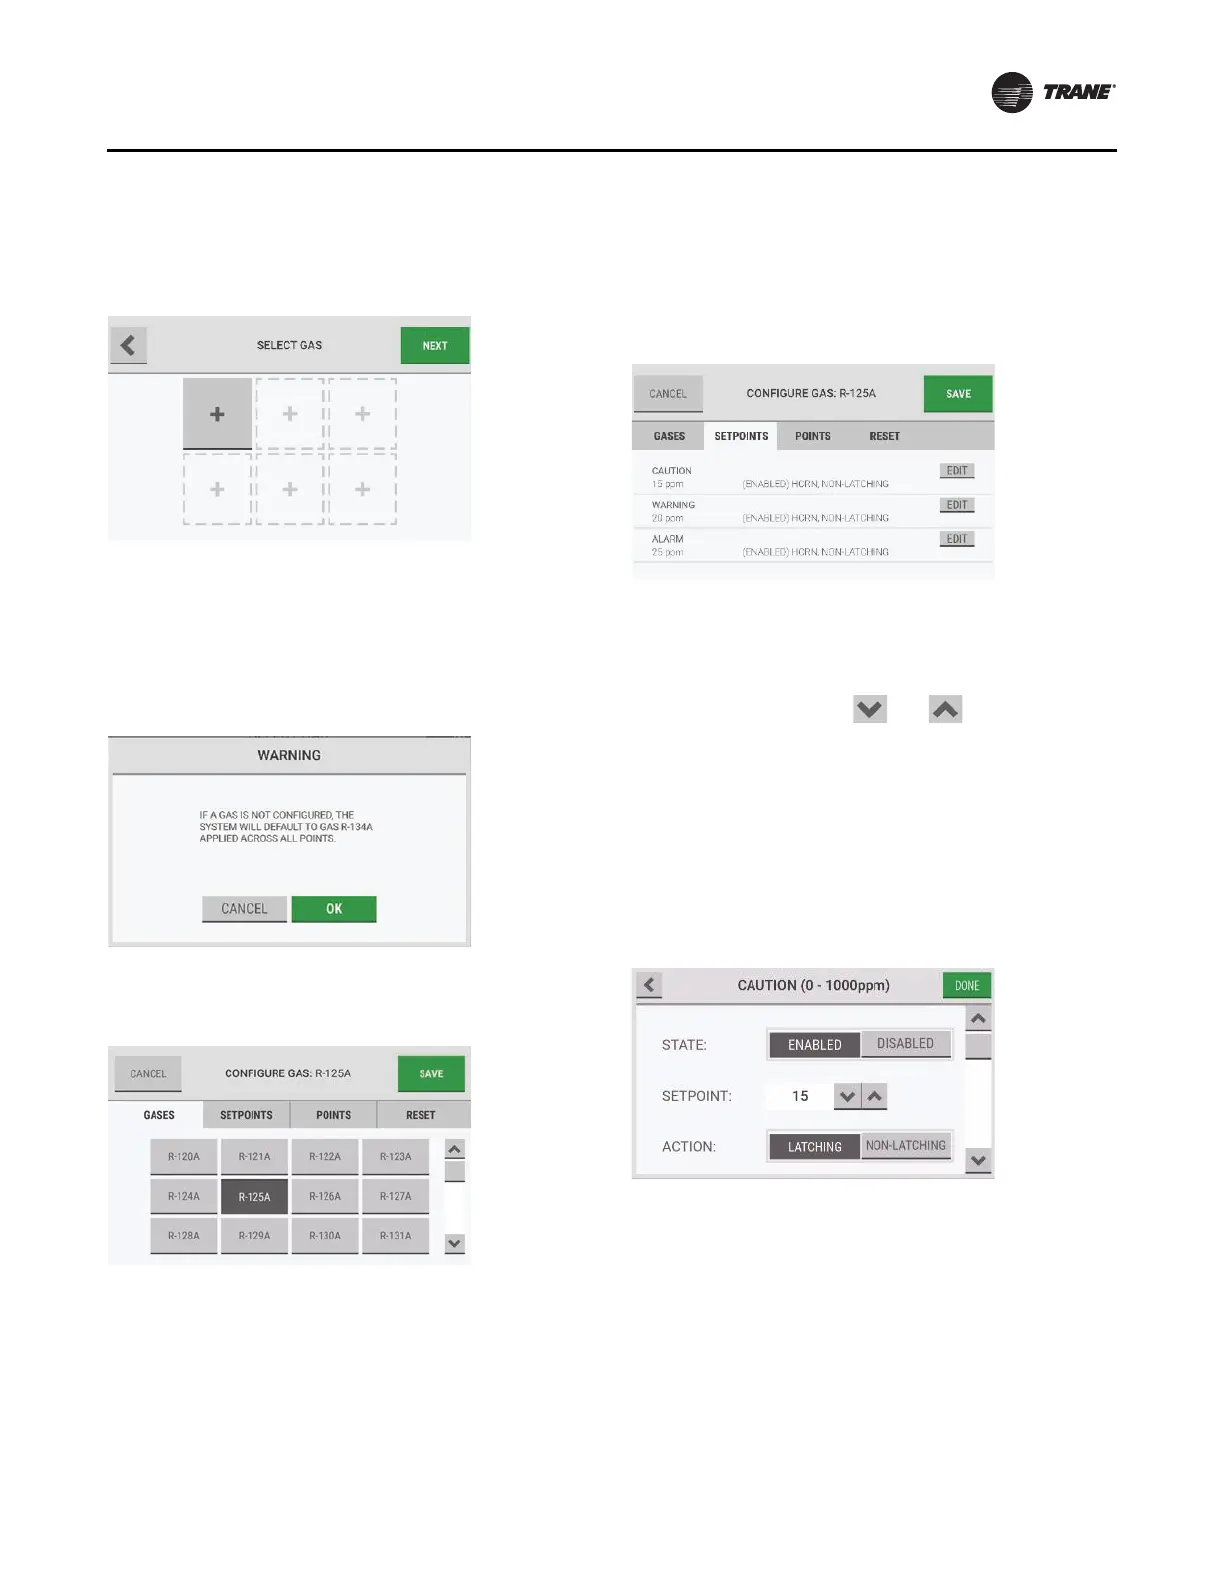
Gas Configuration
1. On the Select Gas screen, select an empty gas slot.
Note: A maximum of six slots or gases can be
configured.
Note: If Next is selected without configuring a gas, a
warning pop-up provides an alert that default
settings will be applied across all points.
To accept the default setti
ngs and b
ypass the gas
configuration step, select OK. Otherwise, select
Cancel to return to the Select Gas screen and select
a gas slot.
2. On the Gases tab of the Configure Gas screen, select
from the list of possible configurable gases. The screen
header changes to show the selected gas.
Note: When a gas is selected, the Save button becomes
active. The interface does not automatically move
to the Setpoints tab.
If Save
is selected without adjusting the
setpoints for
cautions, warnings, and alarms, the default setpoint
settings will be used for the selected gas.
3. Select the Setpoints tab.
4. Select the Edit button fo
r Caution, Warning, or Alarm,
as applicable.
Note: If t
he Setpoints tab is selected but a gas has
not been
selected, the options on the
Configure Gas screen will be inactive.
The options for the configuration settings for cautions,
warnings, and alarms
are identical.
5. In the configuration pop-up, for State, select Enabled
or Disabled.
If Disabled is selected, all other options ar
e inactive.
Go to Step 8.
6. For Setpoi
nt, use the
and buttons to adjust
the value.
7. For Action, select Latching or Non-Latching.
Note: Fo
r a definition of latching and non-latching
events, refer to “Cauti
ons, Warnings, and
Alarms,” p. 31.
For a list of default settings, refer to “Appendix C:
Default Settings,” p. 57.
Use the scroll bar to see all of the configuration
op
tions.
8. To associate an audible horn or a visual strobe with the
event, for Alarm Indication, select the Horn and/or
Strobe check boxes.