Maintenance
48 RMWH-SVX001C-EN
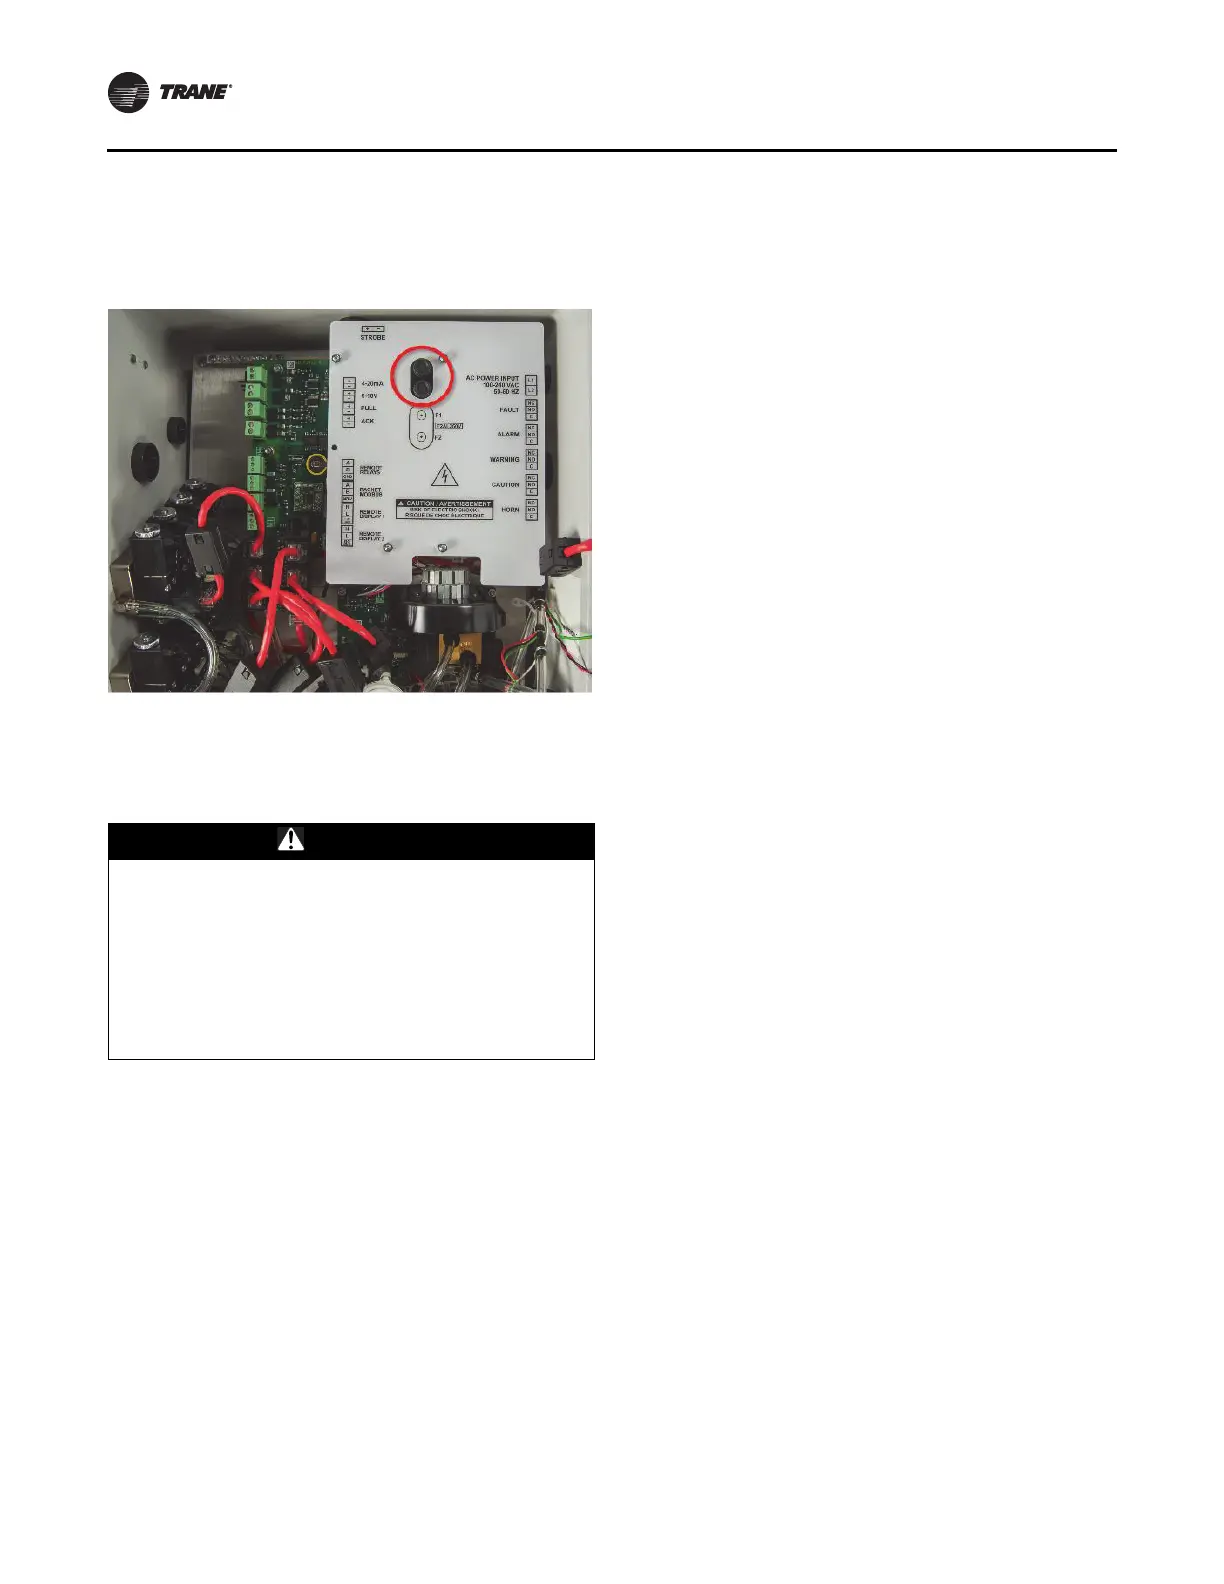
Replace Fuses
The device uses 2 amp, 240 V fuses (Trane P/N FUS02537
or an equivalent certified fuse).
Figure 14. Location of fuses
For a list of approved parts and how to order them, refer to
“Ordering Information,” p. 52.
When necessary, do the following pr
ocedure to replace
the fuses inside the devise enclosure:
WARNING
Hazardous Voltage!
Failure to disconnect power before servicing could
result in death or serious injury.
Disconnect all electric powe
r, including remote
disconne
cts before servicing. Follow proper lockout/
tagout procedures to ensure the power cannot be
inadvertently energized. Verify that no power is present
with a voltmeter. To prevent electrical shock, the circuit
board cover must be in place when power is on.
1. Disconnect electrical power to the device.
2. I
f applicable, remove the lockin
g mechanism.
3. Release the two latches on the left side of the device.
4. Open the enclosure
.
5. Attach the ESD wrist strap to the ESD connection point
i
nside th
e enclosure.
6. Turn the top of the fuse holder counterclockwise and
remove it.
7. Remove
the defective fuse.
8. Install a new fuse. Only use
Trane P/N FUS025
37 or an
equivalent certified fuse.
9. Install the fuse holder and turn the top clockw
ise to
secure it.
10. Disconnect the ES
D wrist strap from the ESD
connection
point inside the enclosure.
11. Close the enclosure.
12. Latch the two latches.
13. If applicable, attach
the locking mechanism.
14. S
upply electrical power to the device.