Maintenance
RMWH-SVX001C-EN 47
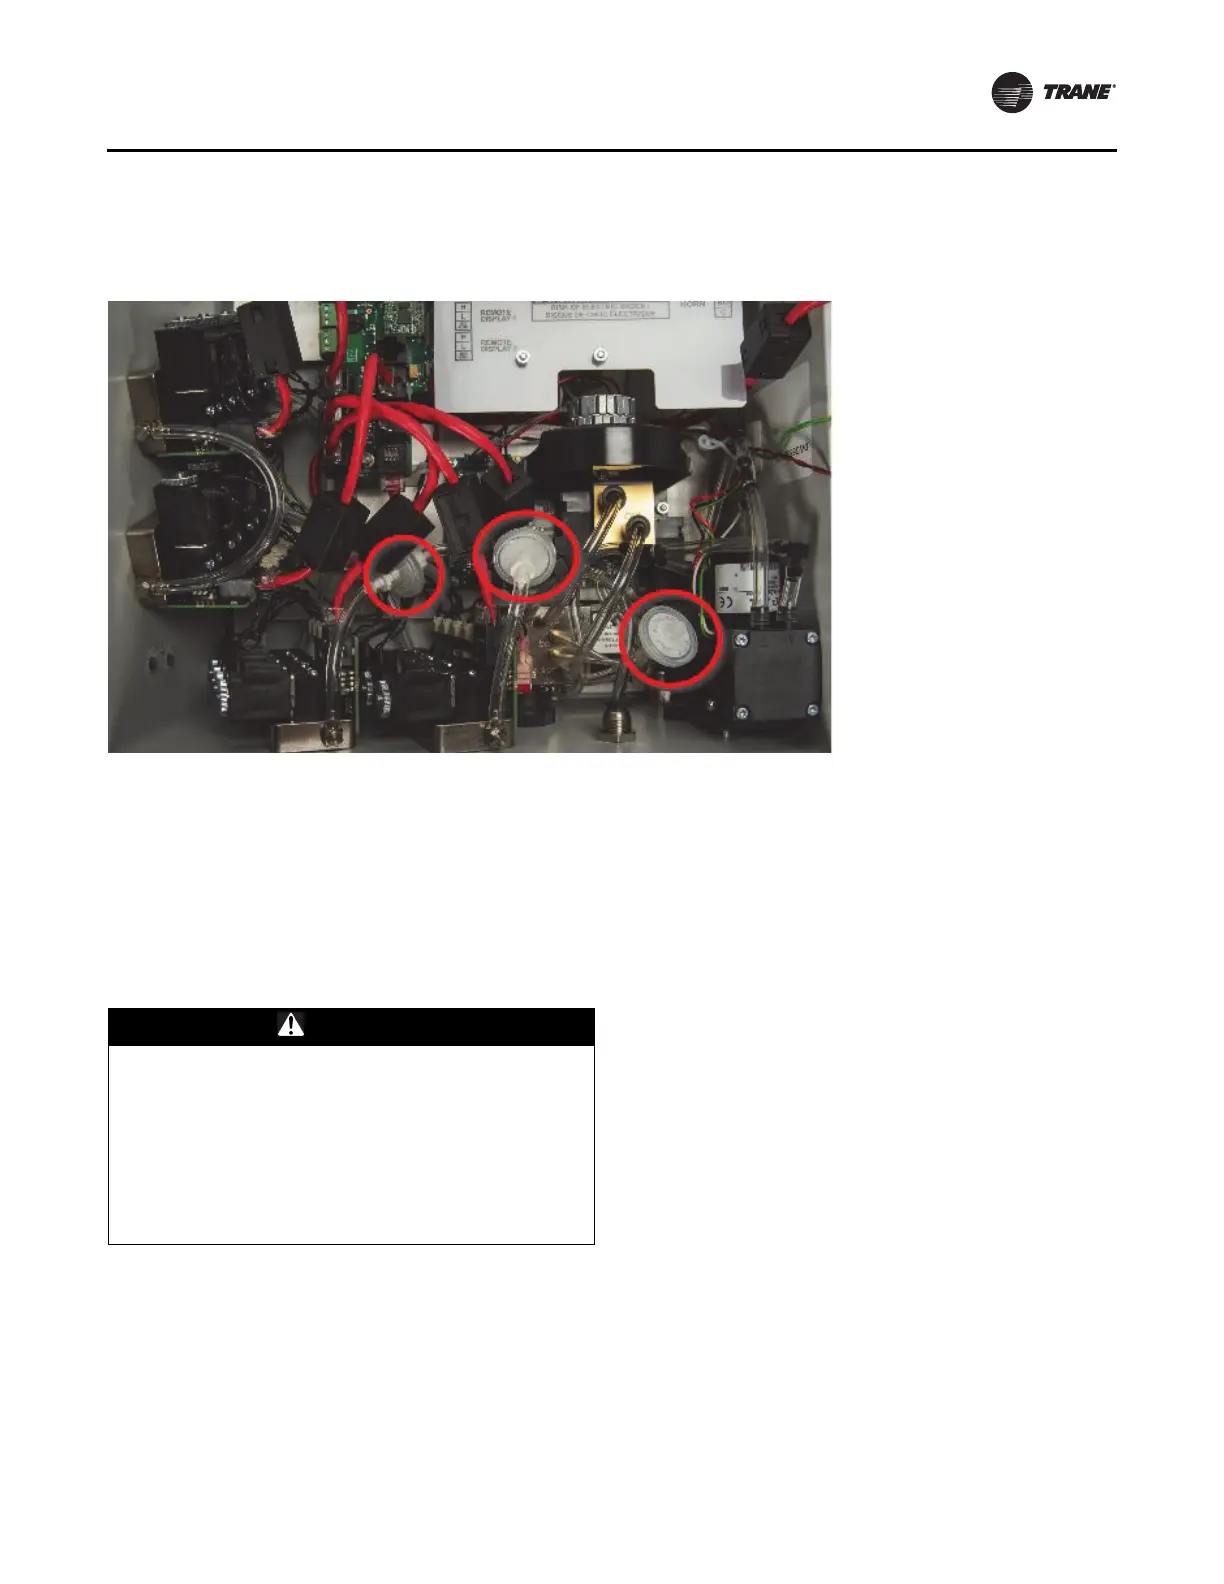
Examine and Replace Internal Inline Filters
Inline filters are installed inside the device enclosure (refer
to the following figure).
Figure 13. Location of inline filters
Periodically examine the inline filters inside the device
enclosure for dirt and particulate buildup.
If the inline filters become severely clogged with particles
or
moisture, the flow rate for the
device will decrease and
eventually cause a flow fault.
Replace dirty filters when necessary to prevent damage to
internal components. For a list of ap
proved parts and how
to order them, refer to “Ordering Information,” p. 52.
Do the following procedure to repl
ace the in
line filters:
WARNING
Hazardous Voltage!
Failure to disconnect power before servicing could
result in death or serious injury.
Disconnect all electric power, including remote
disconnects before servicing. Follow proper lockout/
tagout procedures to ensure the power cannot be
inadvertently energized. Verify that no power is present
with a voltmeter. To prevent electrical shock, the circuit
board cover must be in place when power is on.
1. Disconnect electrical power to
the device.
2. If applicable, remove the lockin
g mechanism.
3. Release the two latches on the left side of the device.
4. Open the enclosure
.
5. Attach the ESD wrist strap to the ESD connection point
i
nside th
e enclosure.
6. Twist the Luer locks on both ends of the inline filter to
release the filter from the tubing.
7.
Discard the dirty filter.
8. Remove the new inline filter from the bag.
9. Install one end of the new filter into the Luer lock and
twist
to lock the filter in position.
10. Twist the free end of tubing sl
ightly
so that it will be
straight when it’s connected to the filter.
11. Install the free end of the new filter into the Luer
lock on
the free end of tubing and twist to lock the filter in
position.
12. Make sure the new filter fits
snugly
into both ends of
the tubing.
13. Disconnect the ESD wrist strap from the ESD
connection
point inside the enclosure.
14. Close the enclosure.
15. Latch the two latches.
16. If applicable, attach the locking mechanism.
17. S
upply electrical power to the device.