EasyManuals Logo

Trotec Speedy 360 flexx Operation Manual

Trotec Speedy 360 flexx
90 pages
To Next Page IconTo Next Page
To Previous Page IconTo Previous Page
Page #61 background imageLoading...
Page #61 background image
Speedy 360
BA 8032_2.2_EN (05/2016) 61 / 90
www.troteclaser.com
8.5 Lens placement
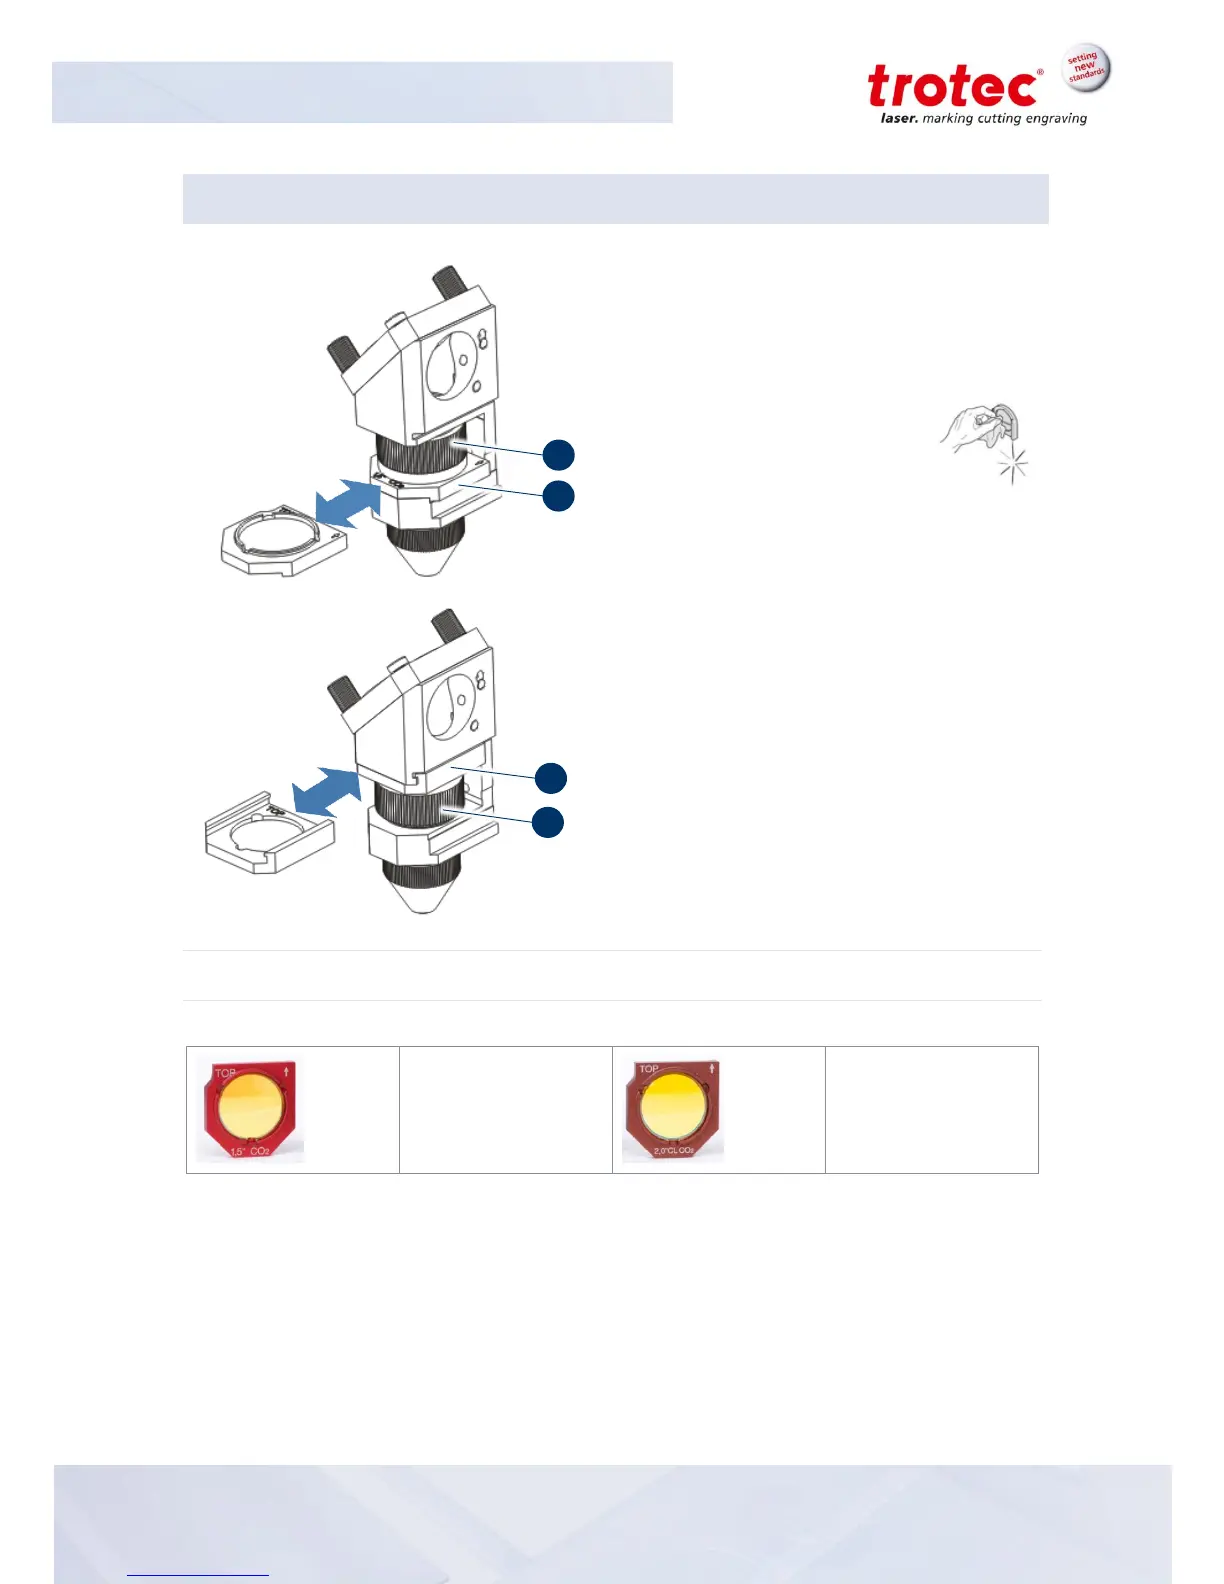
1. Loosen lens (1) by turning the clamping ring
inward (2)
2. Remove lens (1)
3. Check lens (1) for damage
4. If necessary, clean both sides of
the lens (1) with cleaning liquid
and cleaning tissue (see
chapter “Cleaning the lens”)
5. Check lens (1) once more for damage
6. Insert the lens (1) with the lettering facing up,
either above or below the clamping ring (2)
depending on the lens type
7. When inserting the lens (1) above the
clamping ring (2), turn the clamping ring
beforehand.
8. Fixate the lens with the clamping ring (2)
8.5.1 Lens position
The following lenses must be inserted below the clamping ring:
1,5” red
2,0" CL brown
All other available lenses must be inserted above the clamping ring.
2
1
2
1

Table of Contents

Other manuals for Trotec Speedy 360 flexx

Questions and Answers:

Question and Answer IconNeed help?

Do you have a question about the Trotec Speedy 360 flexx and is the answer not in the manual?

Trotec Speedy 360 flexx Specifications

General IconGeneral
BrandTrotec
ModelSpeedy 360 flexx
CategoryPrinter
LanguageEnglish

Related product manuals