14 INFO MODE
Load Menu ON/OFF:
Figure 7, page 13. The Load Menu screen allows
the operator to upload and/or download new menu
settings from a USB drive or smart card. Turning
“Load Menu” off will prevent access to the Load
Menu screen when the operator is viewing the Info 2
screen. See page 15 for more details.
Network Setup:
Figure 7, page 13. Using Oven Connect (page 4)
requires each oven to be networked. For help
determining the correct network setup information,
contact your network administrator.
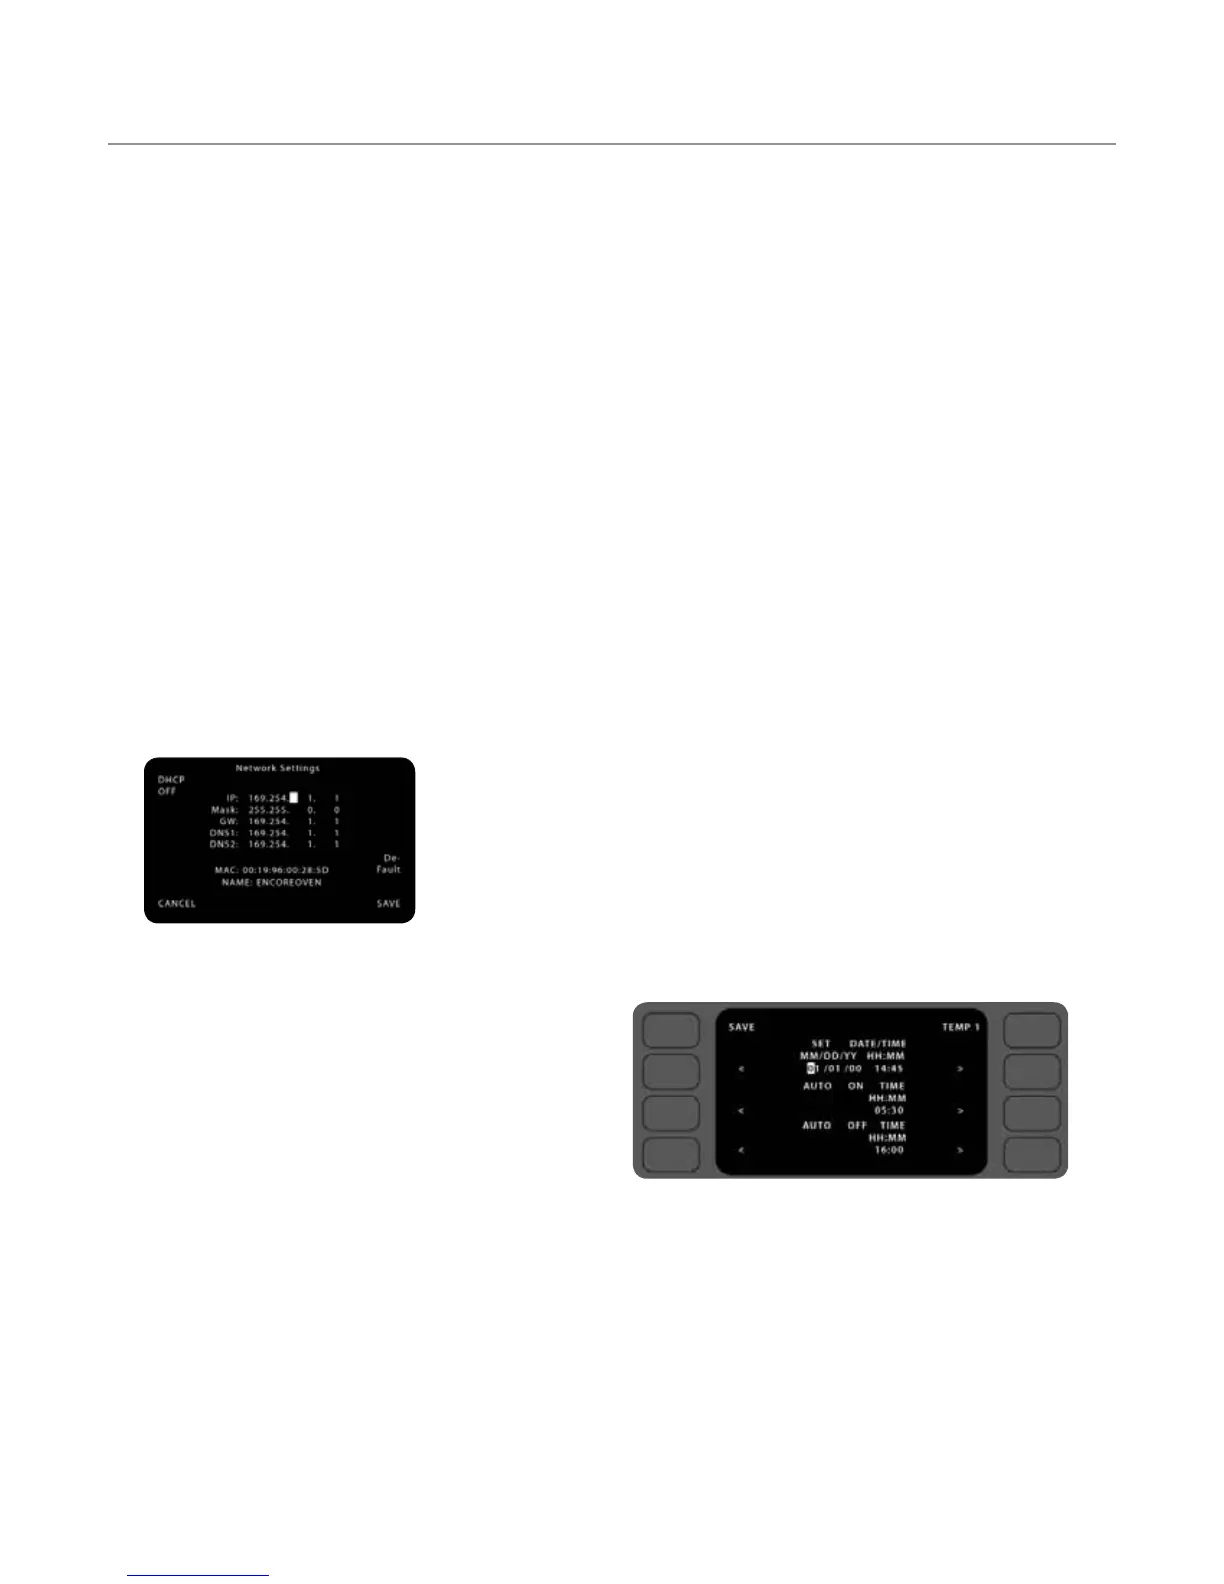
From the network setup screen (Figure 8), the
following information must be entered to configure
the oven for networking:
- IP Address
- Mask
- Gateway (GW)
- Domain Name Server (DNS 1)
- Alternate Domain Name Server (DNS 2)
Each number set can be edited in three-digit strings:
1. To edit the first string, press the Down key
and then type in the first three digits.
2. Press the Down key again and enter the next
three digits.
3. Repeat until all digits have been entered for
each field.
4. Press “Save.”
If DHCP is turned on (top-left corner of screen),
the oven will automatically be assigned an IP address
when connected to a local area network (if an IP
address is available). In most cases, TurboChef
recommends leaving DHCP off to ensure the IP
address on the oven does not change.
Auto Off - ON/OFF:
Figure 7, page 13. “Auto Off” is a feature that turns
the oven off automatically at a specific time of day.
To set the “Auto Off” time, see “Set Date/Time,”
adjacent.
Auto On - ON/OFF:
Figure 7, page 13. “Auto On” is a feature that turns
the oven on automatically at a specific time of day. To
set the “Auto On” time, see “Set Date/Time,” below.
Demo Mode ON/OFF:
Figure 7, page 13. Demo Mode is a feature used
to demonstrate the cooking features of the oven
without turning on the heaters or microwave system.
Demo Mode must remain off during regular operation.
Light Ring ON/OFF:
The light ring provides visual cues in regards to oven
operation and how much cook time is remaining. To
turn the light ring on or off, press the Down key from
the Options screen and set the light ring as needed.
Set Date/Time
From the Info 2 screen (Figure 6, page 13), select
“Set Date/Time” to set:
- Date and time of day
- Auto-on time
- Auto-off time
An accurate date and time of day are critical for using
“auto-on” and “auto-off” (see above for details). They
also help ensure the accuracy of diagnostics and fault
condition reporting.
NOTE: The clock will not automatically update for
Daylight Savings Time.
NOTE: The clock is 24-hour (8:30 p.m. = 20:30).
NOTE: The oven will not retain the date and time
if left unplugged for two or more weeks.
To set the date and time of day (Figure 9),
1. Use the keys to the left and right of the
“date/time of day” field to move the cursor
between digits.
2. Use the number keys to enter the month, day,
and year, followed by the hour and minute.
3. Select “Save” to save your changes or press the
Back/Stop key to cancel.
Figure 8: Network Settings Screen
Figure 9: Set Date, Time, and Auto-On/Auto-Off Time Screen