-
19
-
Please turn off the power switch and confirm that the motor has stopped before operation to
prevent personal injuries caused by unexpected start.
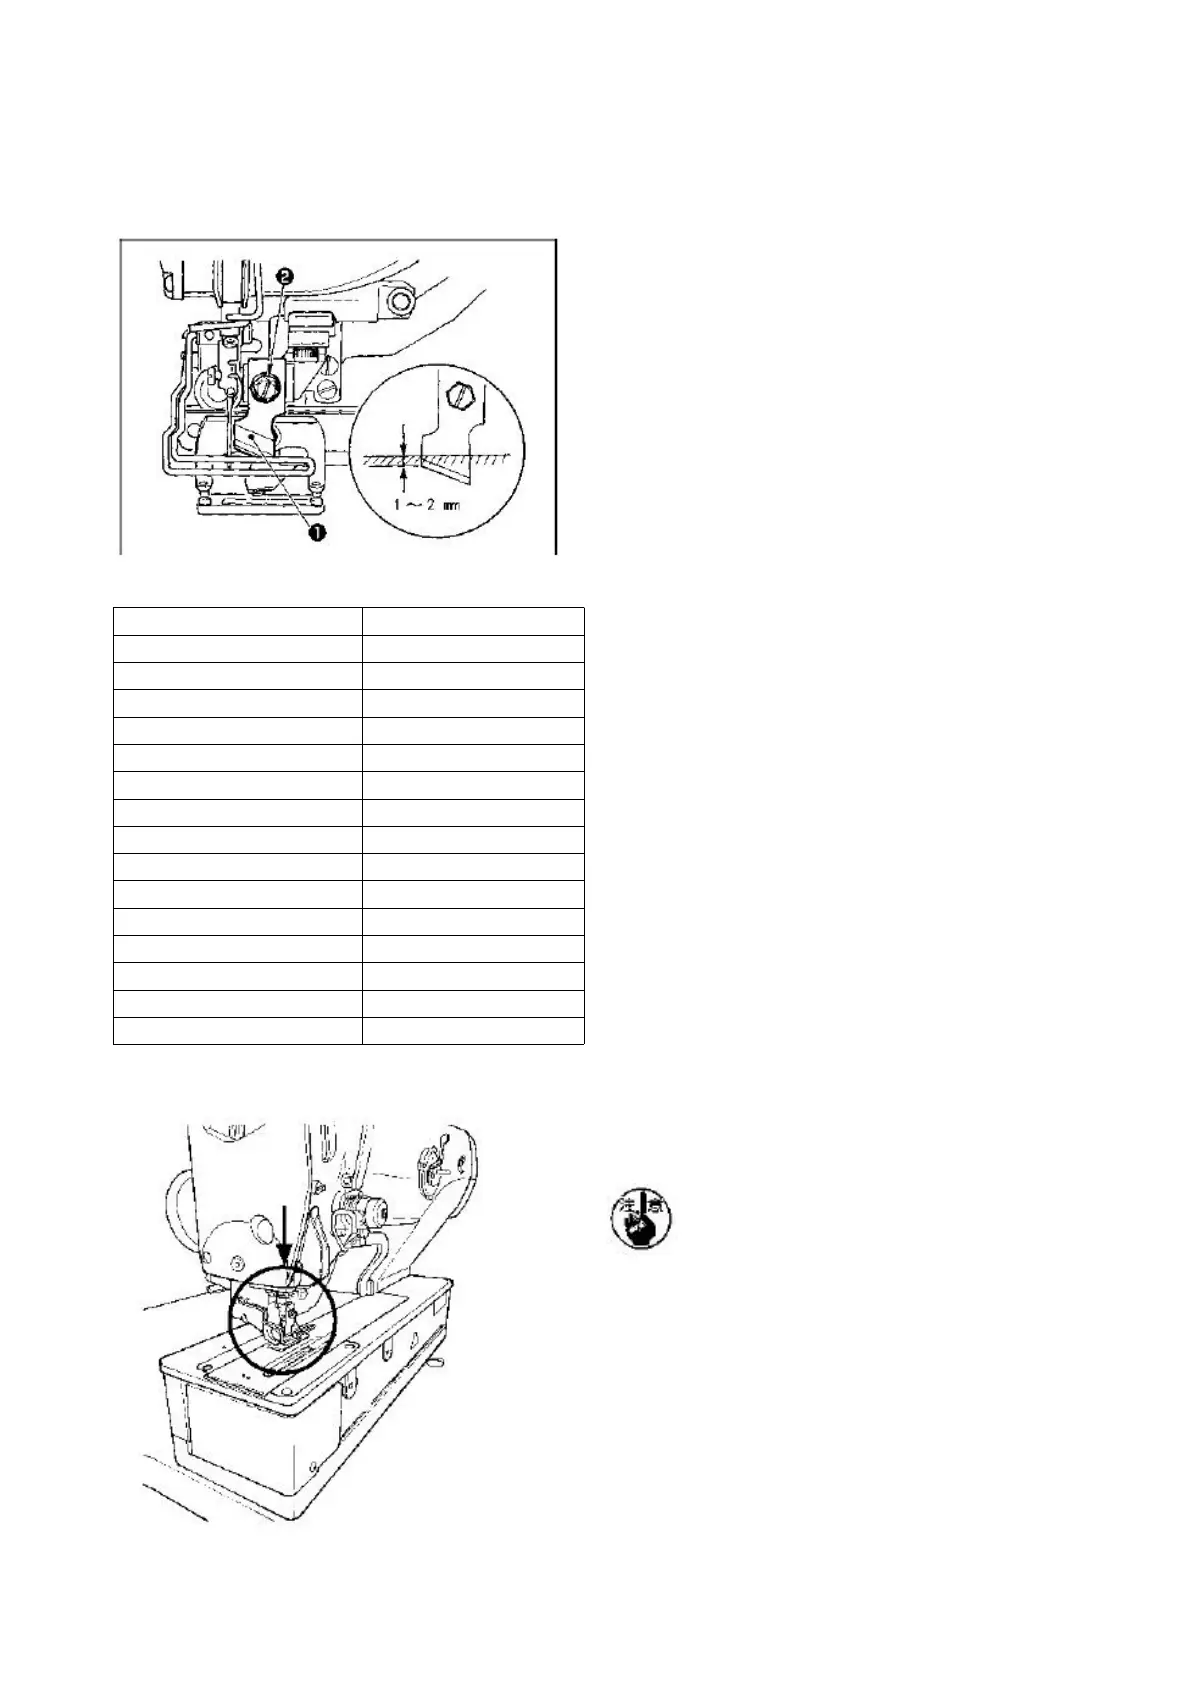
Please change new knife according to the following
steps.
1) After removing the knife setscrew, the knife
❶
and
washer can be removed easily.
2) After pressing the knife bar down, install the knife
to 1〜2mmabove the throat plate as shown in the
figure. Please make sure to install and tighten the
washer.
Inch -4 mm conversion table
If the knife in service is displayed as inch, please check
“Inch - mm conversion table” to set length of the knife
in mm (knife size). (Refer to “V-13 List of sewing data”
p.33)
8. Checking the delivery state
If the presser foot of the delivered machine is
lifted, please drop down the presser foot
before switching on sewing machine’s power.
Caution When dropping down the presser
foot, take care not to put your hands near the
knife.
When the presser foot is lifted and the power
is switched on, if the Ready key is pressed,
“E998 presser foot deviation” may occur.