Version 1
13
Overview
Pistol-grip housing
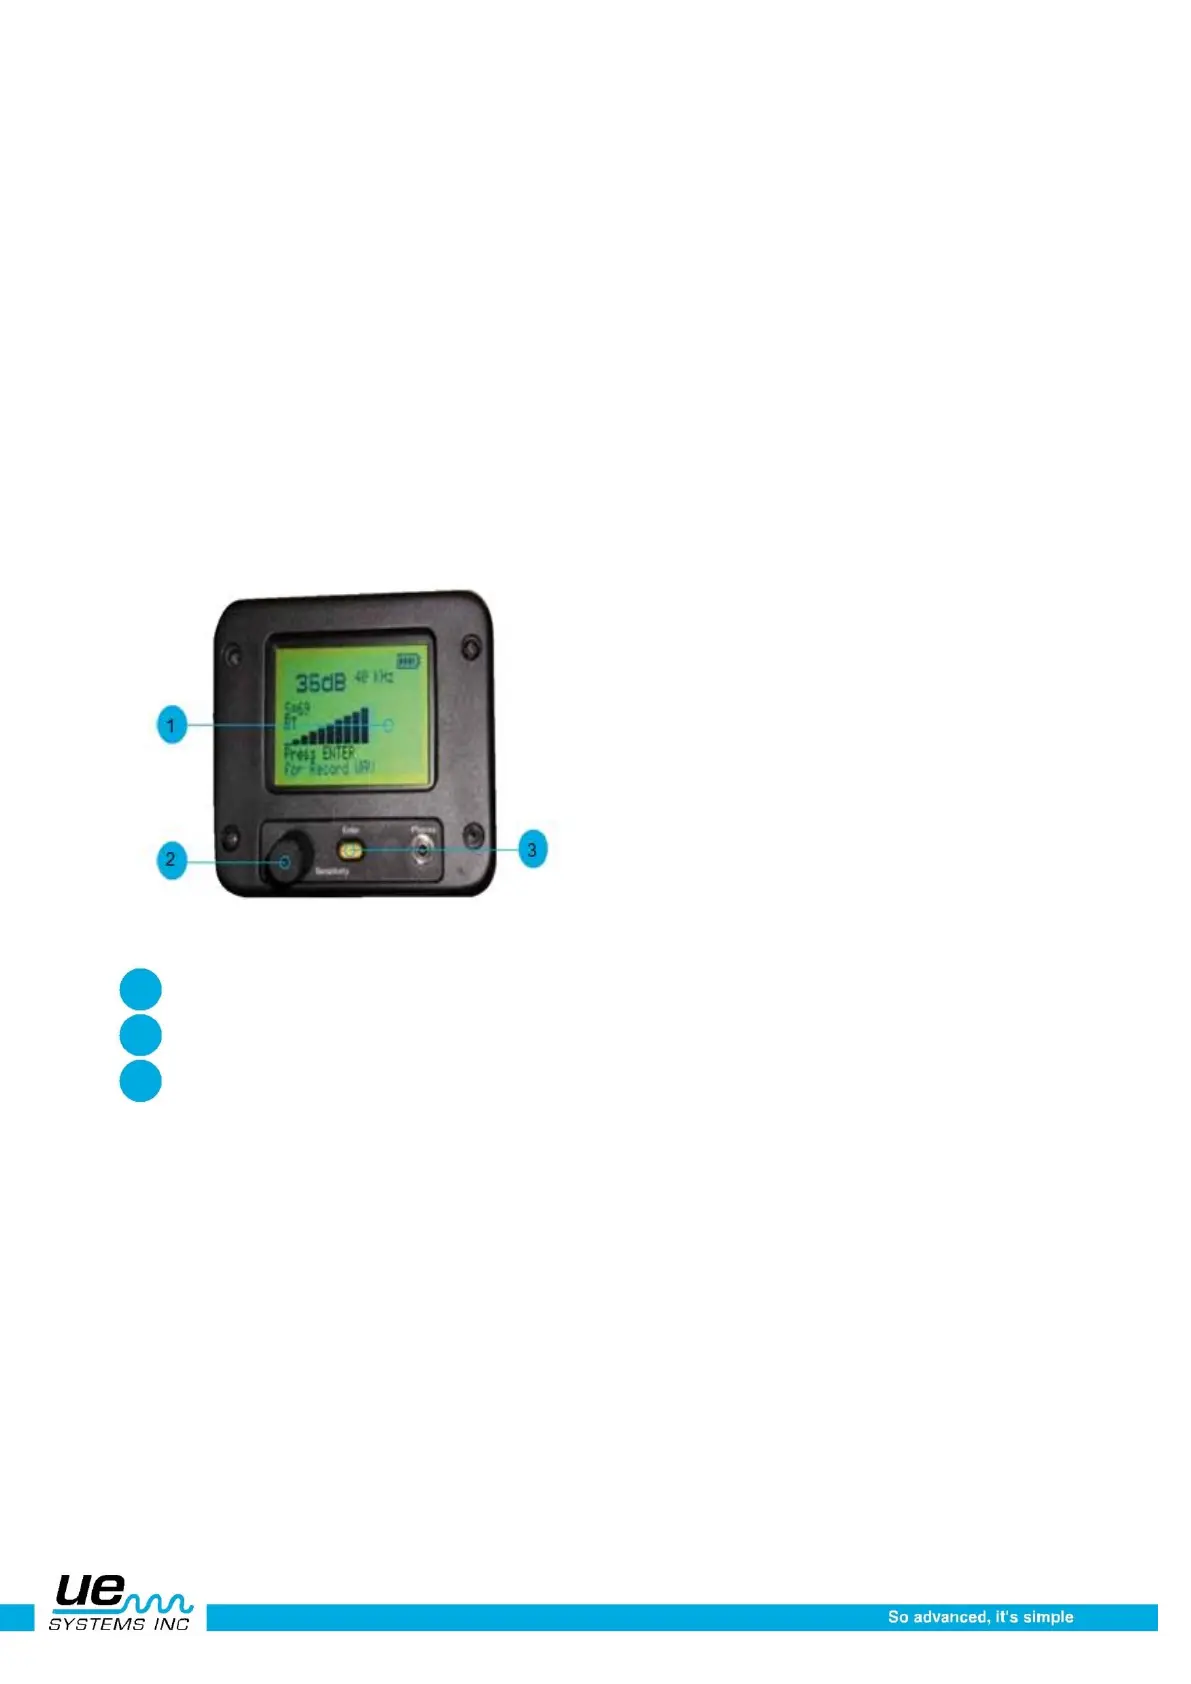
Display panel
In the Operation Mode the Display Panel will show inspection parameters such as intensity levels (as dB
and as a bar graph), Frequency, Battery Level, Sensitivity Level, Sensitivity Value, “Display Mode” and
Function Select Field. Intensity levels are shown simultaneously as a numeric dB value and on a sixteen
segmented bar graph (with each segment representing 3 dB). The Frequency is
adjustable from 20 kHz to 100 kHz. These represent the range of frequency selection capable with the
Ultraprobe. The most common frequency used for general leak detection or electrical inspection is 40
kHz. These frequencies may be “tuned in” when performing inspections with any of the Ultra-probe’s
plug-in modules. The Display Mode indicates the operation mode of the instrument. This is indicated on
the display panel as RT for Real Time, PH for Peak Hold, SS for Snap Shot, or RTO for Real Time “Off-
set”, PHO for Peak Hold “Offset” and SSO for Snap Shot “Offset”. (For additional in-formation about Off-
set see dB Scale Select in the Set Up Mode Section.
1 Display Panel
2 Sensitivity Control Dial
3 Yellow Enter Button
Trigger on/off trigger switch
The Ultraprobe is always “off’ until the trigger switch is pressed. To operate, press the trigger. To turn the
instrument off, release the trigger.
The time it takes for the instrument to turn off after release of the trigger can be set in the Set Turn Off
Time mode described later.
NOTE: To save the battery charge, if the instrument is set in the “Trigger Shut Off Mode (set
up 17), it will automatically turn off after approximately 5 minutes.
Line input
This Input is designed to receive signals from other instruments such as Temperature readings from
infrared thermometers. The Instrument will display the readings on the Display Panel.
 Loading...
