Version 1
38
Menu 35: BACK
This changes the Setup screen back to the 1st level (Menus 1-11). In order to Exit to Program, you must
be in the first level of the Setup Mode. Press (Click) the Yellow ENTER button and you will exit to Opera-
tions Mode.
HOW TO USE THE APPLICATION SELECT MODES
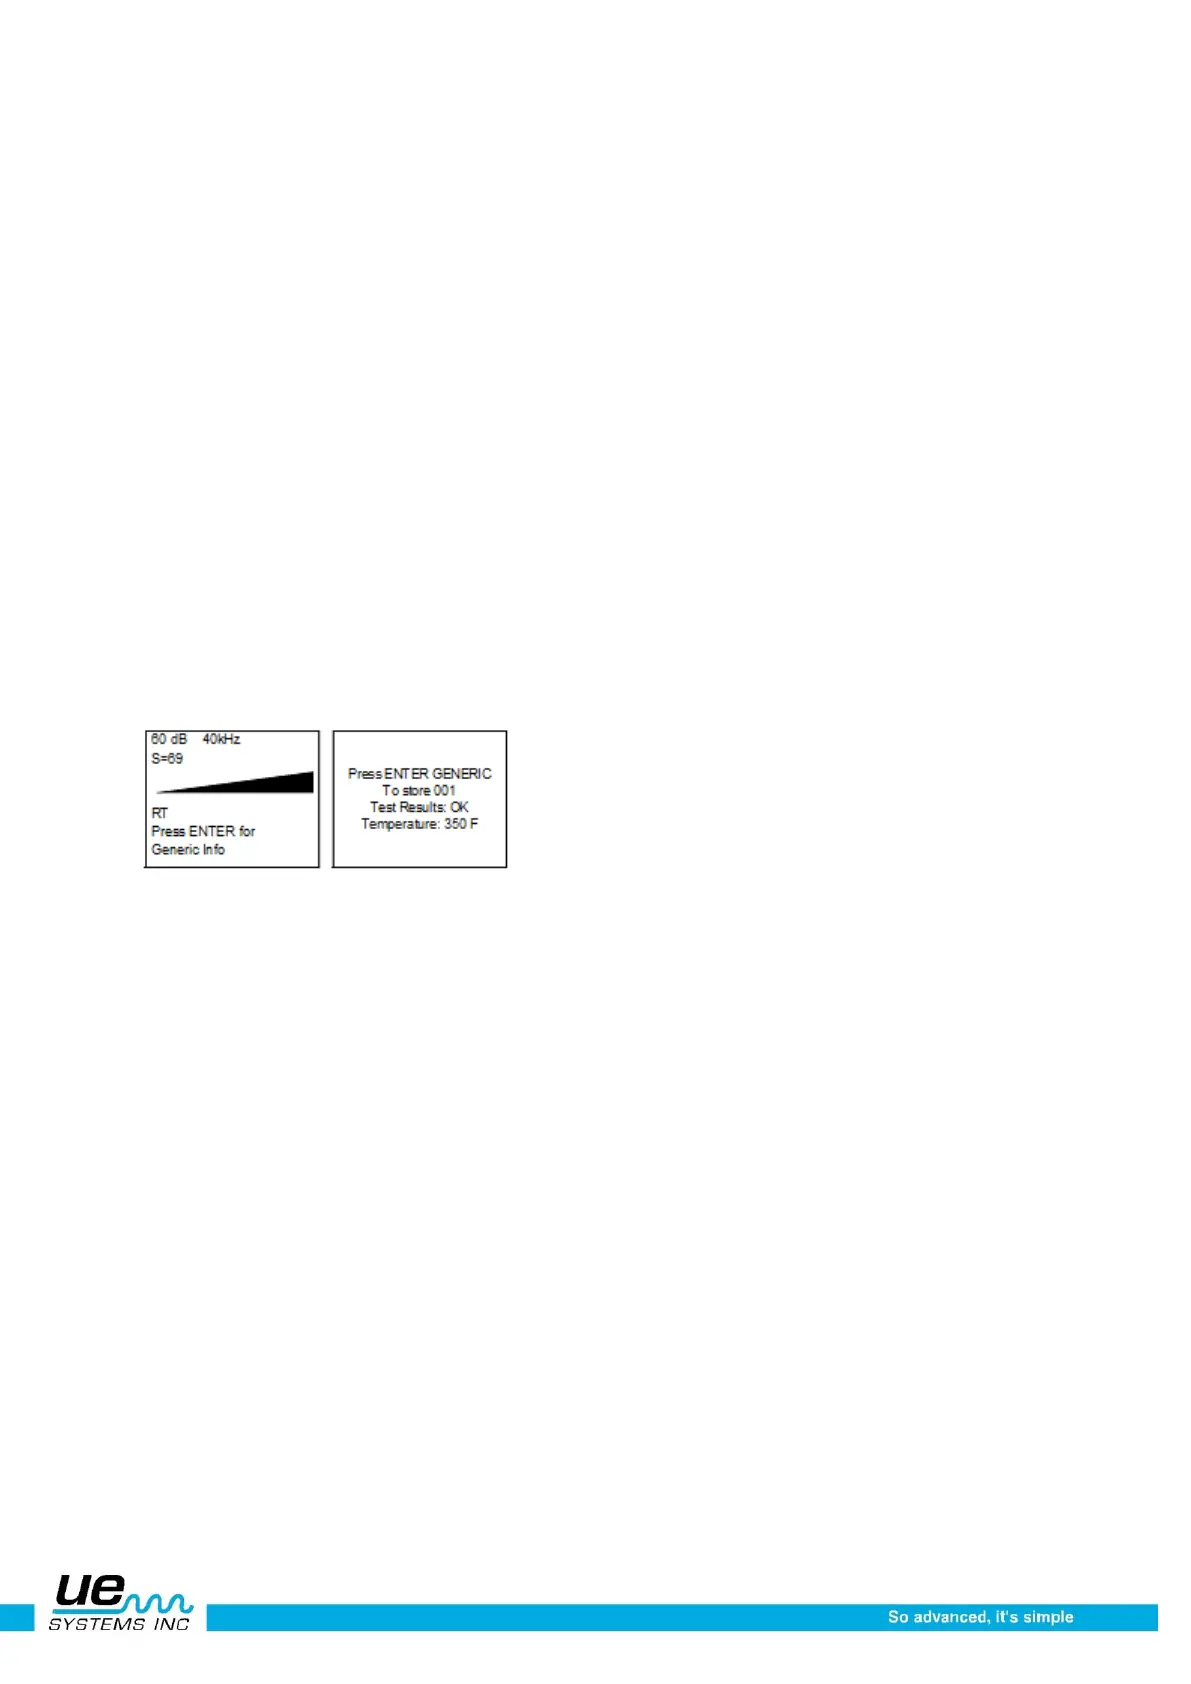
Generic
1. To view Generic Info, click the Sensitivity Dial to the bottom of the Display Panel until “Press EN-
TER For” is blinking. Spin to Generic Info and press Enter
2. To enter a test condition
3. Spin to Test: the condition default is OK and will blink slowly. If it is necessary to change:
4. Click with the Sensitivity Control Dial and the condition (OK) will blink rapidly
5. Spin to select a condition indication. The choices are; OK, CHK (for check) and a series of TR1-
TR9, which can be used as codes for other conditions
6. To Set, Click the Sensitivity Control Dial (the condition will blink slowly)
7. Spin to Temperature should a Temperature entry be desired
8. Click on the Temperature setting (it will blink rapidly) Spin to the left to select a “100” read-ing (ex
200, 300) and to the Right to select a “tens” reading (ex: 50)
9. Click to Set
10. Press Enter to store the information or
11. Spin and Click to Exit
If Parameter Info has been selected in the Storage Display function, the identical data and data en-try as
described above will be shown. Additional information such as date, time, module used and a command
for data storage will be shown in the MORE function.
Field entry list for generic:
Test Results: OK, CHK, TR2-TR9
Valves
NOTE: To use the ABCD Display Screen after Valves Application has been set, spin to Menu 02, Dis-
play Screens.
Click to enter and spin to ABCD. Click to select and press ENTER to Exit.
1. To view Valves Info, click the Sensitivity Dial until the cursor moves to the bottom of the Display
Panel and “Press ENTER For” is blinking. Spin to Valve Info and press Enter.
2. To enter a test condition:
3. Spin to the Test condition, default is OK and will blink slowly. If it is necessary to change:
4. Click with the Sensitivity Dial and the condition (OK) will blink rapidly.
5. Spin to select a condition indication. The choices are; OK, CHK(for check) and a series of TR1-
TR9 which can be use as codes for other conditions.
6. To Set, Click the Sensitivity Dial (the condition will blink slowly)
7. Spin to Temperature should a Temperature entry be desired
8. Click on the Temperature setting (it will blink rapidly) Spin to the left to select a “100” reading (ex
200, 300) and to the Right to select a “tens” reading (ex: 50)
9. Click to set
10. To enter PIPE Diameter, spin to PIPE DIA and click to enter
11. Spin to desired Pipe Diameter
 Loading...
