Version 1
42
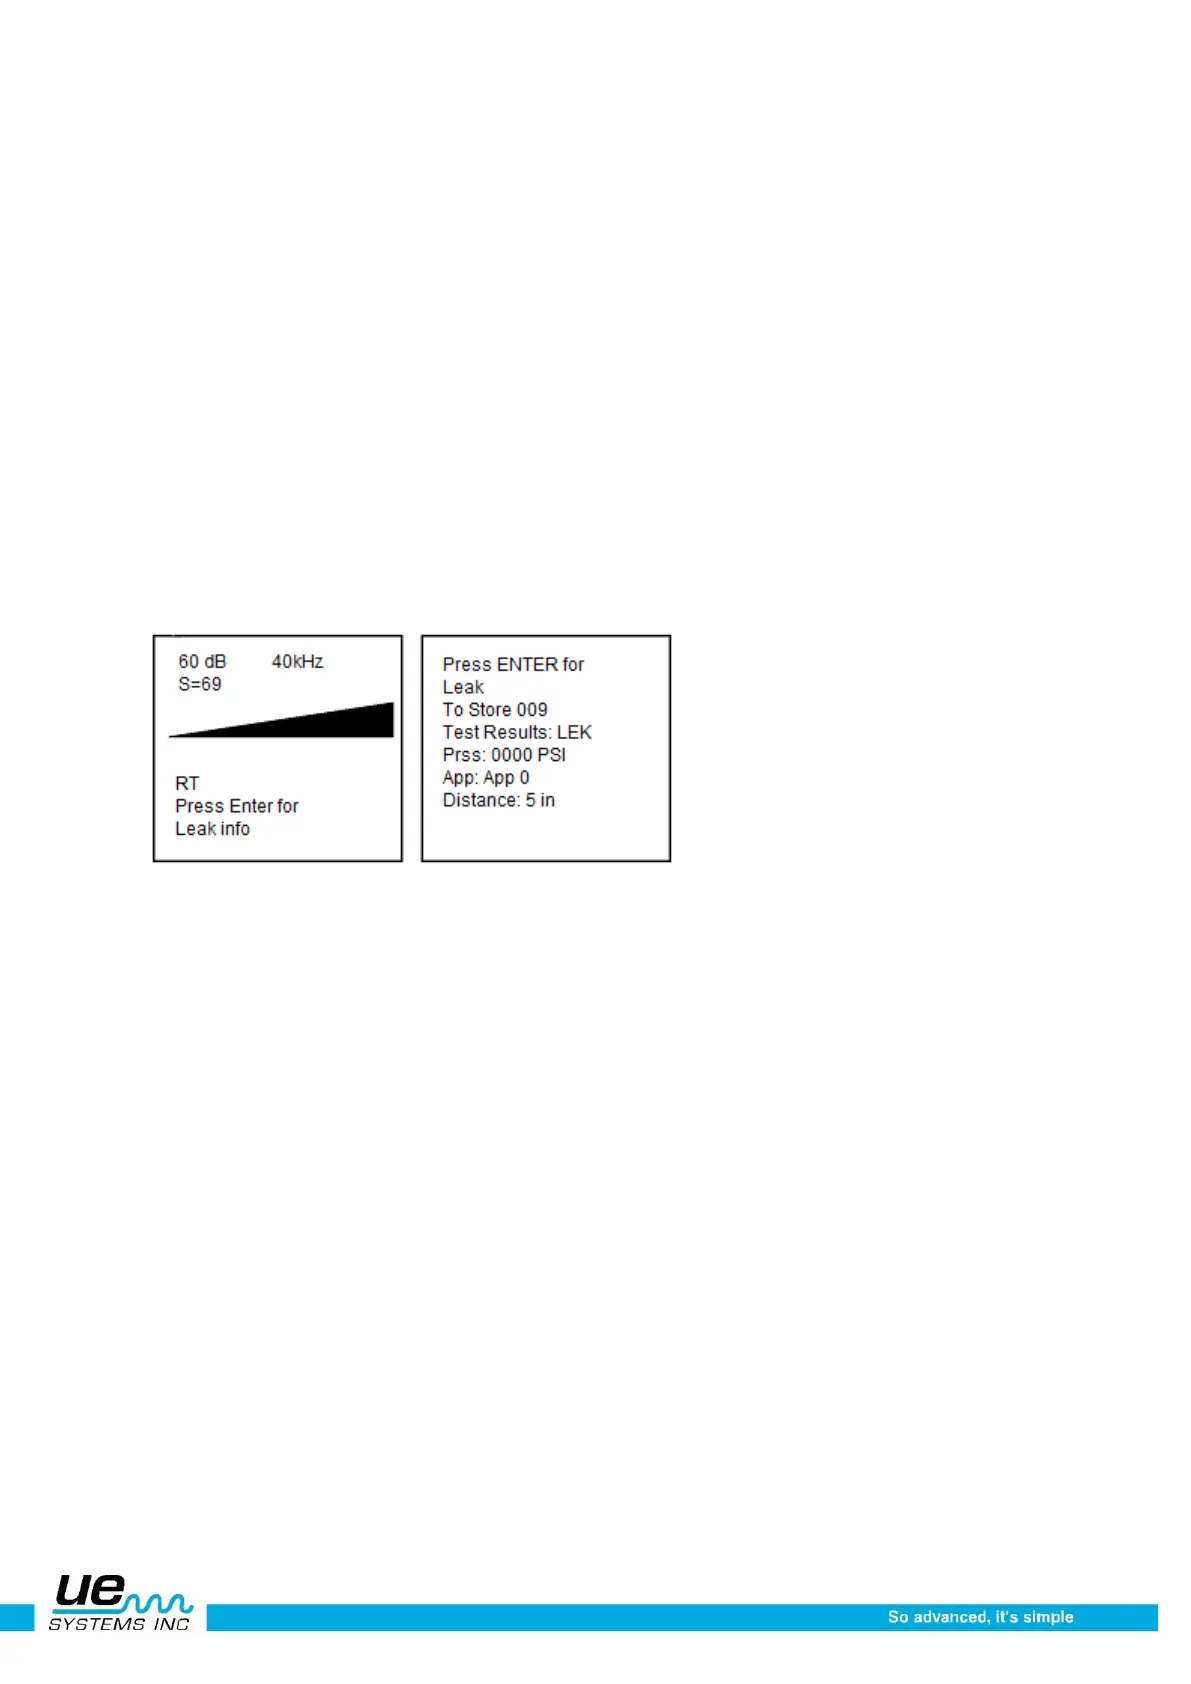
Leaks
1. To view Leak Info, click the Sensitivity Control Dial to move the cursor to the bottom of the Display
Panel until “Press ENTER For” is blinking. Spin to Leak Info and press Enter
2. Spin to Test Results: the condition default is LEK and will blink slowly. If it is necessary to change:
3. Click with the Sensitivity Control Dial and the condition (LEK) will blink rapidly.
4. Spin to select a condition indication. The choices are; LEK, CHK, OK
5. To Set, Click the Sensitivity Control Dial (the condition will blink slowly)
6. Spin to Pressure
7. Click on Pressure to enter and spin to desired pressure (PSI or BAR)
8. Click to Set
9. Spin to Application (codes as APP0-APP9)
10. Click to Enter and Spin to desired Application
11. Click to Set
13. Spin to Distance
14. Click to Enter
15. Spin to select Distance
16. Click to Set
17. Press Enter to store the information and Spin and Click to exit.
If Parameter Info has been selected in the Storage Display function, the identical data and data entry as
described above will be shown. Additional in-formation such as Date, Time, Module Used and a com-
mand for Data Storage will be shown in the MORE function.
Field entry list for leaks
Test Results: LEK/CHK/OK Press:0000 PSI (BAR) App: App0-9
Distance: 5 in,6 in, up to 15 in, then 2 ft to 30 ft (38 CM , 1M, 1.5M 2M, 2.5M up to 10M
NOTE: All Field Entry Lists shown above are the factory lists that can be changed/customized in the
Ultratrend Software. After the changes have been completed, they may be uploaded to the
Ultraprobe 10000.
 Loading...
