Version 1
17
Resetting the on board computer
For security purposes, there is no reset switch on the instrument. Should it be necessary to reset the
instrument:, disconnect the battery for one (1) minute and then reconnect the battery or enter SETUP
Mode and spin to DEFAULT SETTINGS(Menu 12) and choose the YES prompt to reset to factory de-
fault settings.
WARNING: Selecting Default Settings erases all records stored in the instrument.
Operational overview
The Ultraprobe 10000 is an ultrasonic inspection information, storage, sound event recording and re-
trieval system in a pistol housing. There are two modes that are important to understand:
Operation mode
The operation mode will be described in detail under the operation mode section. In this mode you will
perform all inspection actions such as scanning, probing, “Click and Spin” activities, sound recording and
data storage.
NOTE: “Click” operations require pressing a dial. “Spin” operations require turning a dial.
Setup mode
The setup mode will be described in detail under the Set Up Mode section,. There are 35 menu
options that will be described in that section. To use the set up mode, you must “click” to the bottom of
the display column, “spin” to “setup mode and press the yellow button labeled “enter”. For more details,
see the SETUP Mode section.
Operation mode
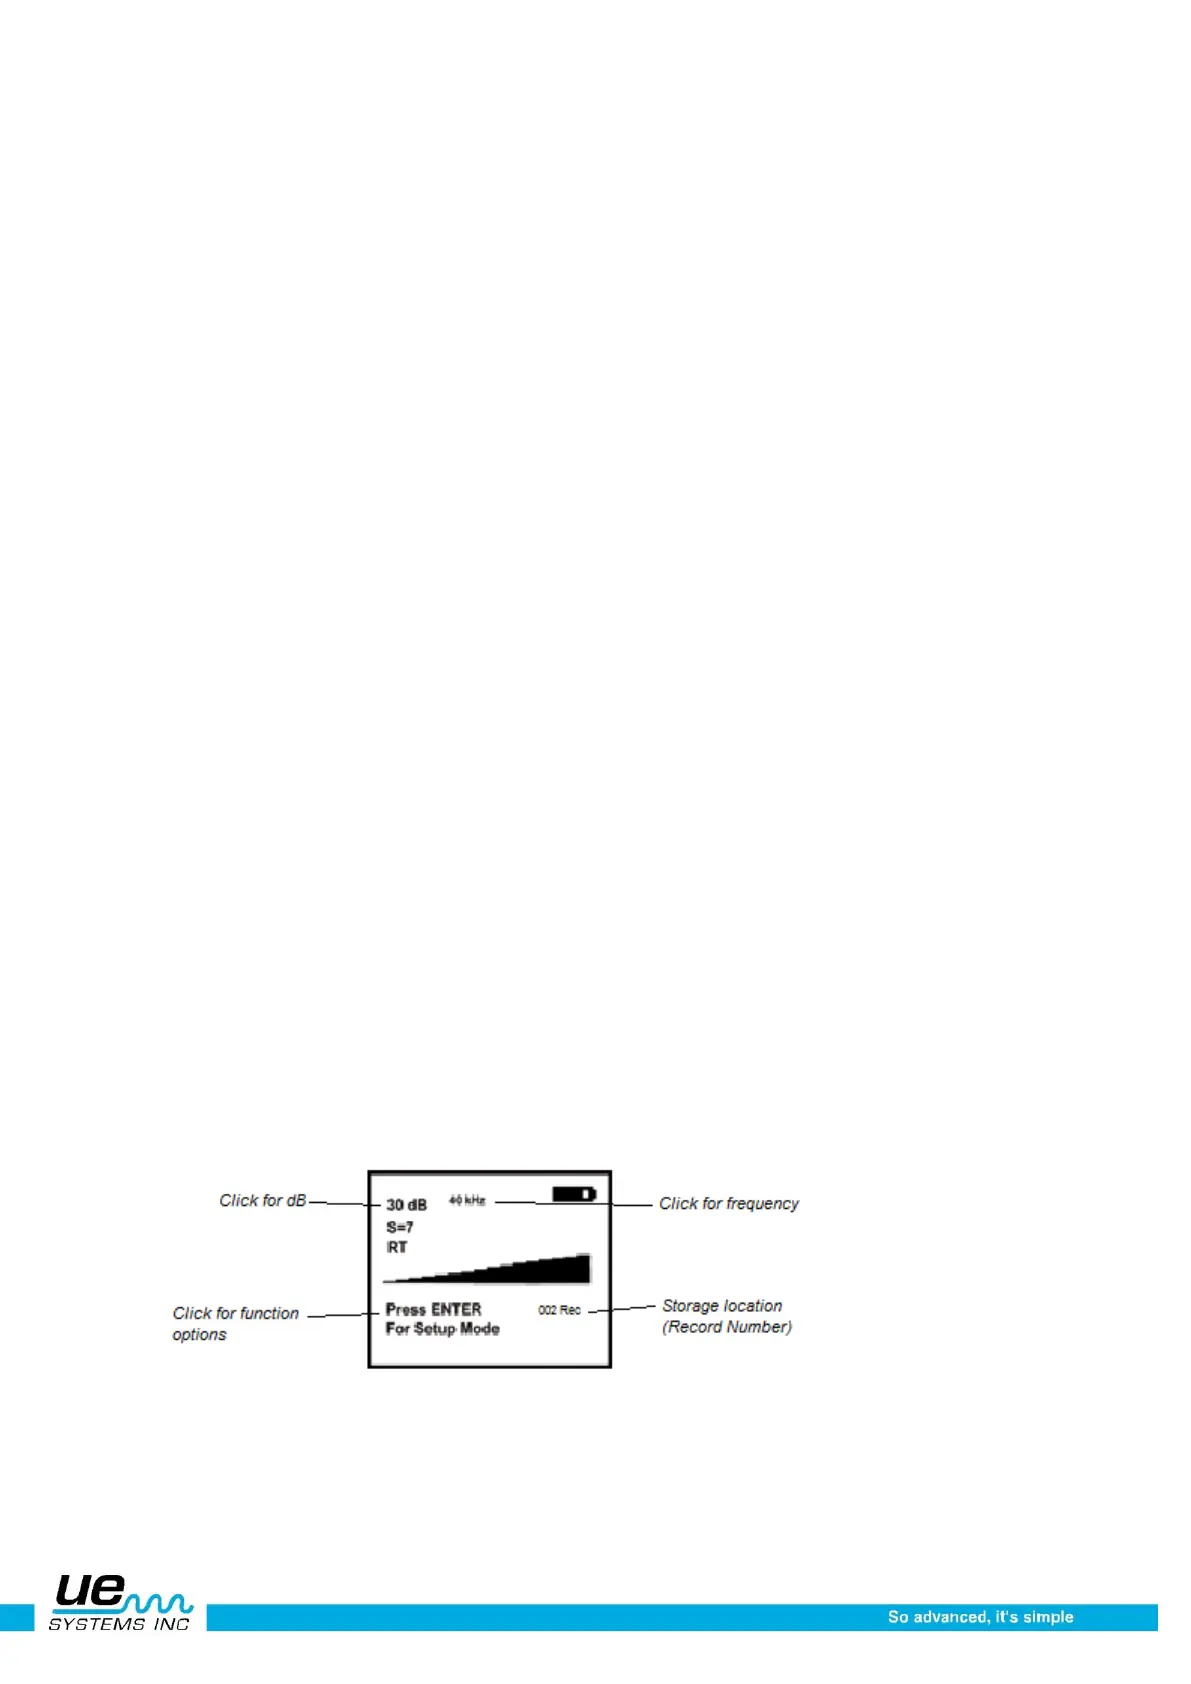
Main display navigation
Moving around the Display Panel is easy. Basically three clicks (presses) of the Sensitivity Dial will
move the cursor on the Display Panel to three key spots: the Decibel Indicator, the Frequency Indica-
tor and the Function Selection Indicator. When an indicator is selected, or “active”, it will blink. When
the cursor is moved to the Decibel Indicator and the Decibel Indicator is blinking, the Sensitivity Dial
may be spun (rotated) clockwise or counter clockwise to adjust the sensitivity/volume of the instrument.
When the cursor is moved to the Frequency Indicator and the Frequency Indicator is blinking, the
Sensitivity Dial may be spun to change the frequency. When blinking, the Function Selection, located
on the bottom of the screen can be changed by spinning the Sensitivity Dial up or down to select a spe-
cific feature which may be entered by pressing the yellow Enter Button.
Main Display Information:
When the trigger is pressed to turn the instrument on, the Display Panel will display intensity levels sim-
ultaneously on a bar graph and as a numerical decibel value. The current selected frequency will also be
shown. Remaining Battery Charge is shown in the upper right corner. Immediately under the dB reading
is the Sensitivity value which may be used as a reference for comparing readings or for specialized
 Loading...
