DISASSEMBLY
Urschel Laboratories recommends that
spindle assemblies be returned to the fac-
tory for repair, see page 53. For customers
choosing to rebuild this assembly, the follow-
ing repair instructions must be followed pre-
cisely for successful repair. See “Spindle As-
sembly”, pages 110 & 111, for part number
information.
The following tools are recommended:
1. Vise
2. Arbor Press
3. Dial indicator
4. Surface plate
5. Bore gauge capable of measuring to .0001"
6. Micrometers (0-1" & 1-2")
7. Special tools available from Urschel Labo-
ratories, see “Tools”, page 82.
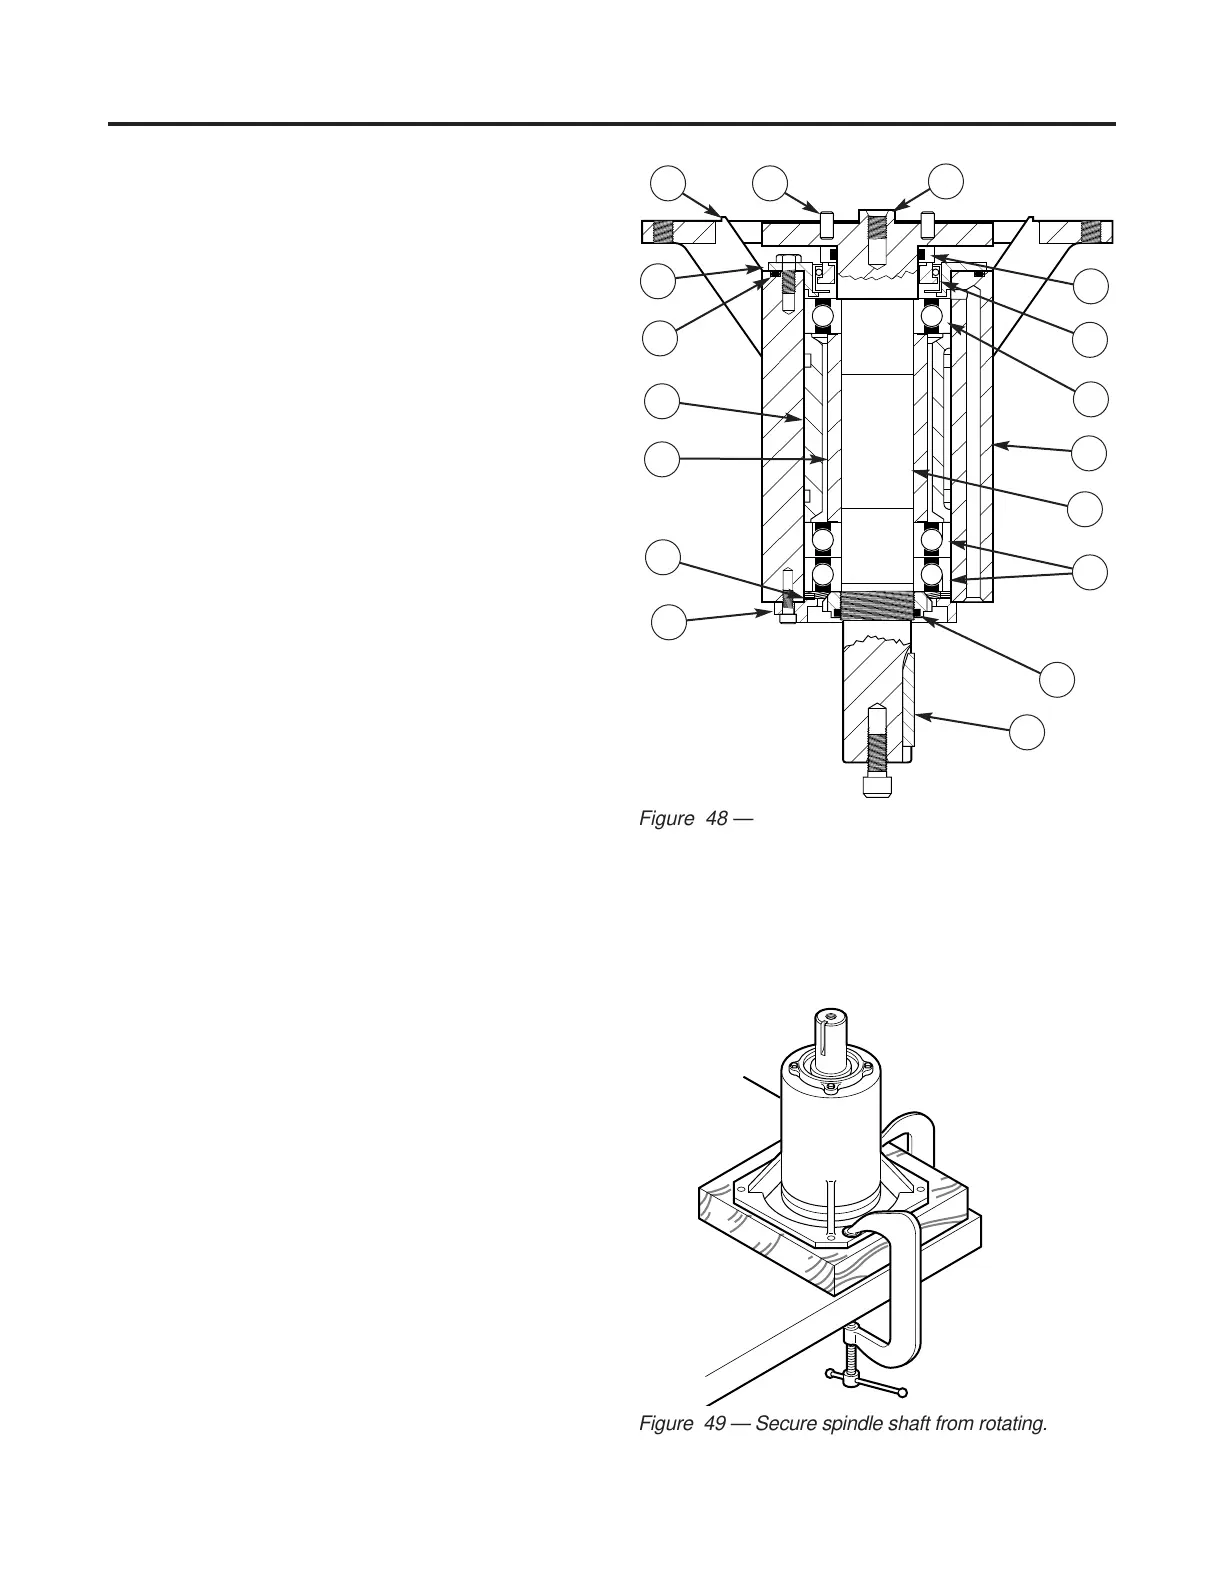
Refer to Figure 48 and proceed as follows:
1. Remove spindle from machine. See
page 54.
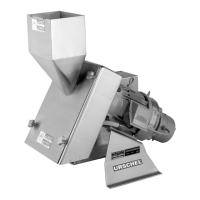
2. Secure shaft from rotating. Use a wood-
en block with drilled recesses for bearing
housing pilots, impeller shaft pilot and dow-
els (Figure 49). For impeller shafts without
dowels, place fasteners in impeller mount-
ing holes and drill recesses in wooden
block.
3. Remove lower bearing retainer and three
wavy spring washers.
MAINTENANCE
Spindle Assembly
56
Figure 49 — Secure spindle shaft from rotating.
Figure 48 — Spindle assembly. (1) Upper Bearing Re-
tainer, (2) “O” Ring, (3) Sleeve, (4) Bearing Spacer, (5)
Wavy Spring Washers, (6) Lower Bearing Retainer, (7)
Key, (8) Bearing Lock Nut, (9) Bearing - pair, (10) Im-
peller Shaft, (11) Bearing, (12) Seal, (13) Mating Ring,
(14) Bearing Housing, (15) Bearing Housing Pilot, (16)
Dowel, (17) Impeller Shaft Pilot
1
15 16
17
3
5
7
9
11
13
2
4
6
8
10
12
14