INSPECTION
Blades: Inspect for wear. Replace or turn
blades if necessary. Blades are of two differ-
ent types having different widths and either
squared or beveled ends, see “Microcut
Blades”, page 21. Blades with squared ends
can be turned to use all four cutting edges.
Blades with beveled edges can be turned once
to use two cutting edges. A program is avail-
able to extend the use of these blades. See
“Microcut Blades”, page 70.
Backing ring: Examine inner side of
backing ring for notches created by blade pres-
sure. Blades will normally indent backing ring
slightly because of blade angle. When this in-
dentation becomes a notch, it allows blades to
press too far back and, therefore, should be
replaced. See Figure 69.
Upper and lower blade holding
rings: Examine carefully for nicks, burrs or
damage to seats which locate and hold each
blade in place. Loss of even one seat means
ring must be replaced (Figure 69).
Lower ring: Examine eight columns which
locate the backing ring. If one or more of these
columns becomes loose, return ring to Urschel
Laboratories for repair.
NOTE:
DO NOT ATTEMPT TO REPAIR
THIS ITEM! Columns are a shrink fit and seri-
ous damage may result if removal or installa-
tion is attempted by use of a press.
Also examine dowel pins. If damaged, lower
blade holding ring cannot be properly located.
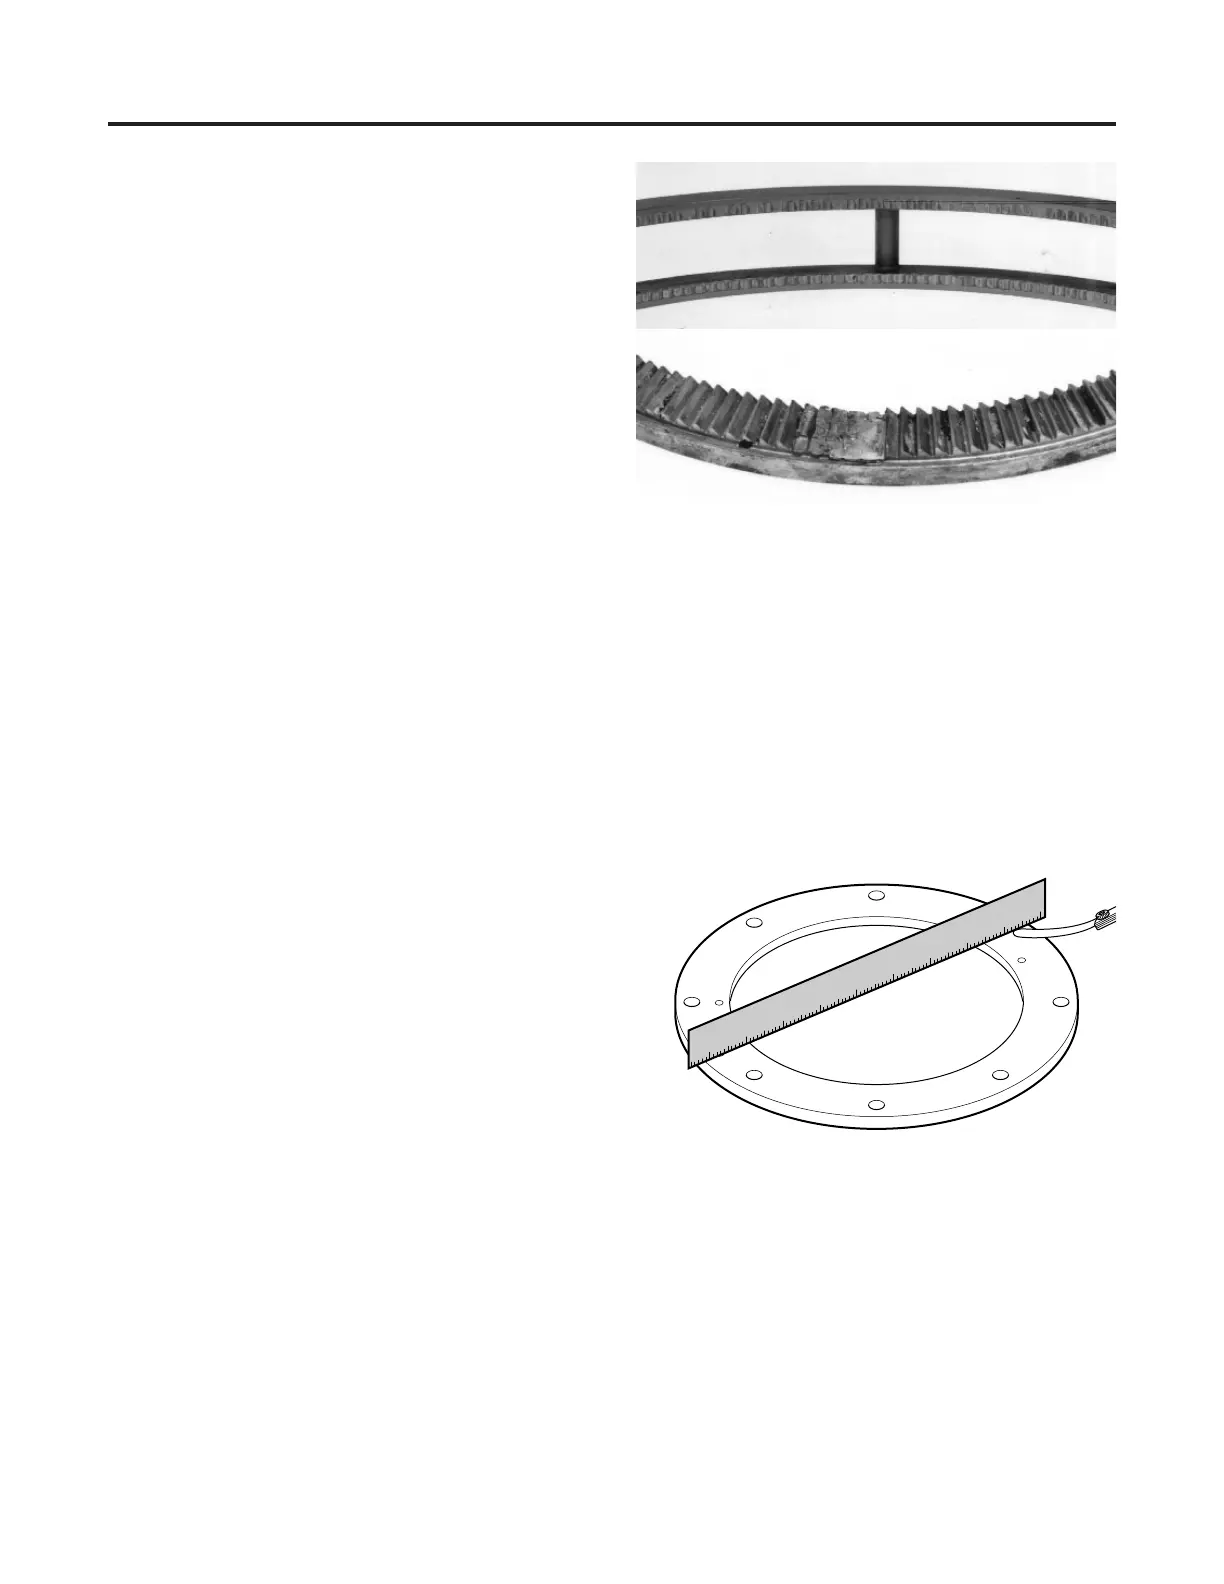
Upper ring: Check upper ring with a
straight edge and a .002" thickness gauge to
make sure ring is not bent or warped (Figure
70). Examine dowel pins. If damaged, upper
blade holding ring cannot be properly located.
MAINTENANCE
Microcut Head
67
Figure 69 — Backing ring (top) and blade holding ring
(bottom) in need of replacement
Figure 70 — Make sure upper ring is not bent or
warped.
 Loading...