The electrical system has prewired safety
switches on certain covers and guards to pre-
vent the machine from operating when these
covers or guards are removed.
w
WARNING:
Before operating the ma-
chine, a qualified trained person should
check the safety switches by the following
procedure. Be careful to avoid contact with
cutting parts and sharp edges exposed
during these tests!
AMPLIFIER
The amplifier, viewed through the starter en-
closure window, indicates the condition of the
safety switch circuits (see Figure 2, page 5).
When the green “relay condition” LEDs are il-
luminated, all circuits are closed and machine
is ready for operation.
When one or both of the red “relay condition”
LEDs are illuminated, one of the safety switch-
es is creating an open circuit.The illuminated
red “switch output” LEDs will indicate the prob-
lem source.
When the red “attention” LED is flashing and
all sensors and actuators are within specified
sensing distance, the power to the machine
must be turned off and then on again to reset
the amplifier. If the amplifier will not reset, call a
qualified electrician to locate and repair the
fault (see “Amplifier”, page 7).
SAFETY SWITCH TEST
w
WARNING:
There is a problem in the
safety switch circuit if the LEDs are not lit
as indicated or if, having removed a cover
or guard equipped with switch, the machine
can be started. DO NOT operate the ma-
chine in this condition! Call a qualified elec-
trician to locate and repair the fault imme-
diately. See “Inspection”, page 6.
1. With all covers and guards in place, turn
the power disconnect switch to “I” (ON).
Only the green “relay condition” LEDs on
the amplifier should be lit. Turn power dis-
connect switch to “O” (OFF).
2. Remove one cover or guard equipped
with switch. Turn power disconnect switch
to “I” (ON). Only the red “relay condition”
LEDs and the red “switch output”LEDs cor-
responding to the switch on the removed
cover should be lit on the amplifier. If LEDs
are lit correctly, push the “I”(START) button.
The safety switch circuit has been inter-
rupted and machine should NOT start. If
the machine does start, that safety circuit
has failed. Push the “O” (STOP) button,
then disconnect and lock out power
source. Call a qualified electrician to locate
and repair the fault immediately.
3. Turn the power disconnect switch to “O”
(OFF) and replace the cover or guard.
4. Individually remove each additional
cover or guard equipped with switch
and repeat steps 2 and 3. Make sure all
covers and guards are securely in place
after all switches have been tested.
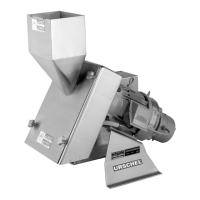
OPERATION
Safety Switches
A2
 Loading...