With the sliding glass fully up, undo the retaining screws and
remove the front and rear glass guide channel.
Slide the window down and slacken the window lifter tension
roller. Detach the cable from the sliding glass holder and remove
it from the rollers. Holding the cable taut, undo the retaining nuts
and withdraw the window regulator. Clamp the cable at the barrel
output with a wire clip. Withdraw the window glass through the
lower door aperture.
Undo the retaining screws to remove the swivel glass com-
plete with the sliding glass weatherstrips.
Undo door locking knob 6 (Fig.8-15), undo the screws that
retain inner door handle 1 bracket 4. Undo lock securing screws 3
(Fig.8-16) and remove the lock complete with the links, having first
detached lock release link 20 (Fig.8-15) from the lock driver.
Undo the two securing nuts and remove the external door
handle.
Undo the two retaining bolts and remove the check strap.
Reassembly is a straightforward reversal of dismantling.
When refitting the window lifter, watch there is no overlapping
of the cable on the drum. Adequately adjust the tension of cable
2 (Fig.8-17) and ensure smooth operation of the window lifter by
means of the tension roller, having slackened nut 3.
Before refitting the door trim, inspect the plastic clips.
Front door - alignment
Start the alignment by marking the contours of hinges on the
body pillar. Using impact screwdriver 2 (Fig.8-12), slacken hinge
retaining screws 1.
Align the door with the aperture in the body to the clearances
required, shifting the hinges within the contour marked. On com-
pletion, tighten the screws.
Front door lock - adjustment
To ensure a trouble-free operation of the lock, slacken the
securing bolts and align the position of door striker housing 14
(Fig.8-15).
178
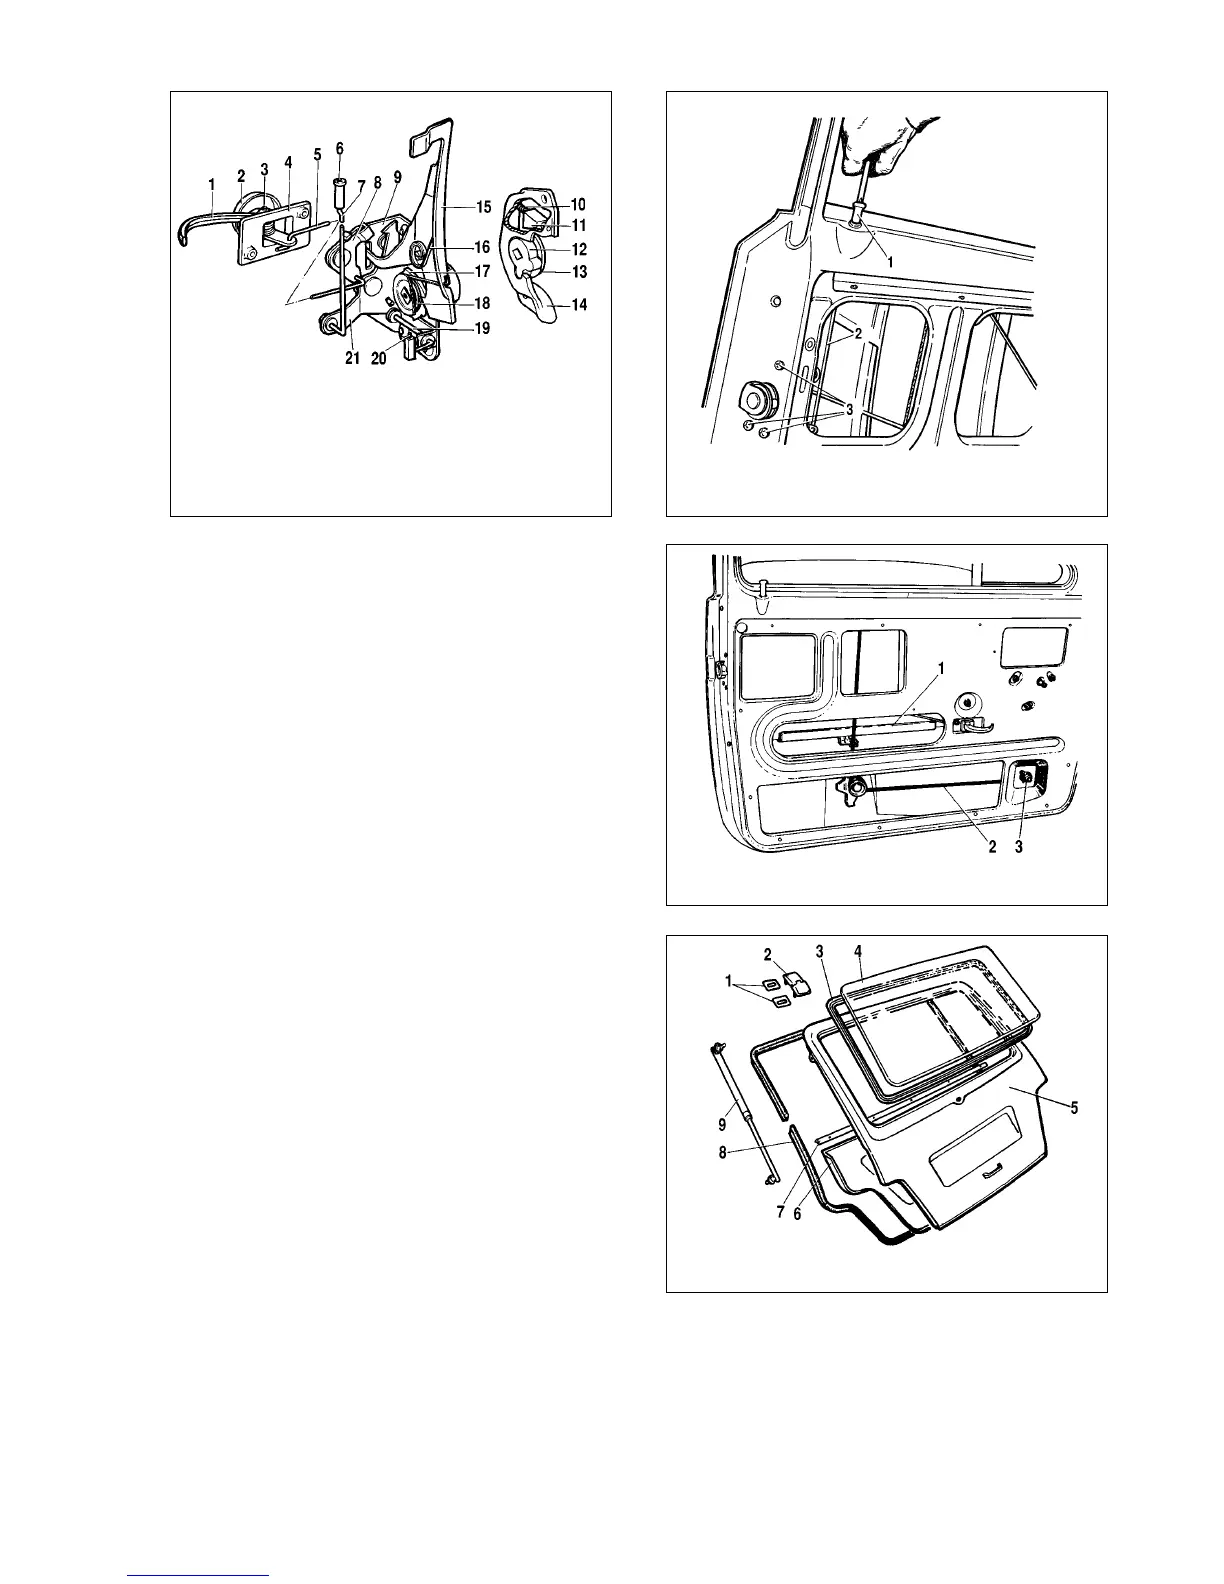
Fig.8-15. Front left door lock:
1 - inner door handle; 2 - escutcheon; 3 - pivot shaft; 4 - inner door bracket; 5 -
inner door operating link; 6 - door locking knob; 7 - locking knob rod; 8 - inner
control lever; 9 - lock body; 10 - spring; 11 - thrust block; 12 - rotor; 13 - central
shaft support; 14 - striker housing; 15 - exterior drive lever; 16 - exterior drive
lever spring; 17 - ratchet; 18 - ratchet spring; 19 - lock release shaft; 20 - lock
release link; 21 - lock operating lever
Fig.8-17. Adjusting the window lifter cable tension:
1 - sliding glass holder; 2 - cable; 3 - nut, tensioner bolt
Fig.8-18. Tailgate:
1 - gaskets; 2 - hinge; 3 - window seal; 4 - glass; 5 - tailgate; 6 - door trim; 7 -
cover; 8 - door aperture seal; 9 - gas-filled strut
Fig.8-16. Front door lock attachment:
1 - door locking knob; 2 - locking knob rod; 3 - lock securing screws