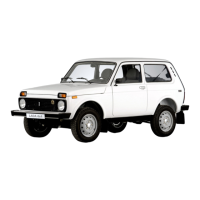
- use special wrench (of 10 mm square size) for 5 mm square
hole and turn the bracket clockwise to remove spring 6;
- tighten bolt 4;
- remove the cambelt.
Refitting is the reversal of the removal procedure:
- make sure the camshaft and fuel pump pulleys are in the
position required and secured, idler pulley 7 (Fig.9-22) and ten-
sioner 3 rotate freely, while plunger 1 and spring 6 are free with-
in the tensioner housing;
- refit the belt providing it is taut;
- refit the timing belt over the pulleys in the following order:
crankshaft pulley, idler pulley 7, fuel pump pulley, camshaft pul-
ley, tensioner pulley, water pump;
- slacken bolt 4 to release the tensioner;
- remove the retaining bolts and flywheel retainer;
- tighten bolt 4 and nut 2;
- rotate the crankshaft two turns clockwise.
Tension - checking:
- tighten the retaining bolts and refit the flywheel retainer;
- loosen bolt 4 and nut 2 to spread tension over the belt;
- tighten bolt 4 and nut 2 to 18 N•m;
- refit the crankshaft pulley;
- coat bolt 20 with Loctite 243;
- fix the flywheel with tool OUT0000049;
- refit the pulley retaining bolt, torque to 40 N•m, turn to fur-
ther 60°;
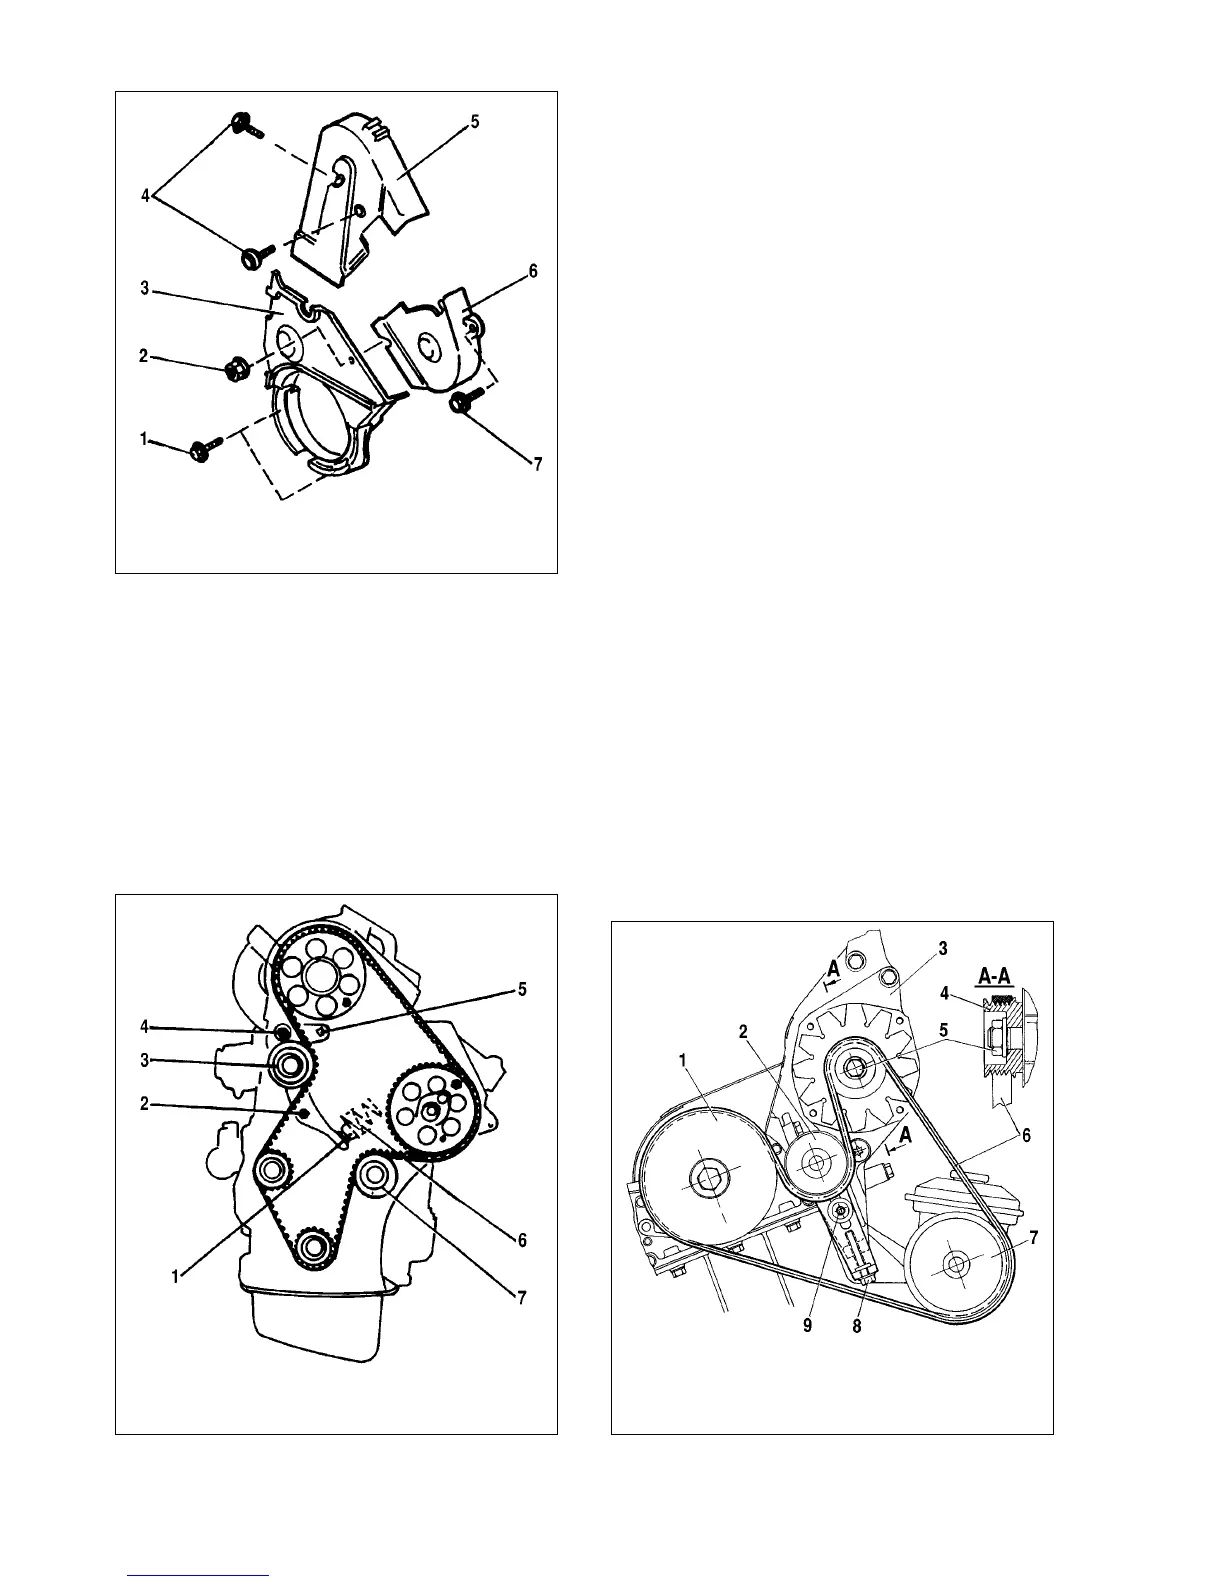
- refit bottom cover 3 (Fig.9-21), tighten bolts 1 to 15 N•m;
- refit cover 5, tighten bolts 4 to 15 N•m;
- tighten right-hand cover 6 bolt 7 to 10 N•m.
Note. When you fail to refit any securing bolt or a retainer,
repeat the complete procedure for the cambelt refitting.
Alternator - removal and refitting
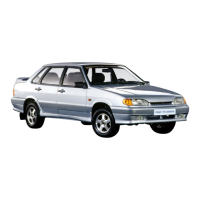
Removal. Loosen tensioner 2 bolt and bolt 9 (Fig.9-23).
Tighten bolt 8 until it comes against the limiter. Remove the belt.
CHECK to see pulley 4 rotates easily without seizures.
201
Fig.9-21. Removing and refitting the timing covers:
1 - securing bolts, bottom cover; 2 - nut; 3 - bottom cover; 4 - securing bolts,
left-hand cover; 5 - left-hand cover; 6 - right-hand cover; 7 - bolt
Fig.9-22. Removing and refitting the cambelt:
1 - plunger; 2 - nut; 3 - tensioner roller; 4 - bolt; 5 - square-type hole; 6 - spring;
7 - idler pulley
Fig.9-23. Removing and refitting the alternator drive belt:
1 - crankshaft pulley; 2 - tensioner pulley; 3 - alternator; 4 - alternator pulley; 5 -
nut; 6 - alternator drivebelt; 7 - vacuum pump pulley; 8 - tensioner bolt; 9 - ten-
sioner fixing bolt