Clutch assembly - removal and refitting
Removal. First remove the gearbox (see "Gearbox"). Undo the
bolts and remove the clutch cover in assembly with the pressure
plate. Do not lift this unit by holding the pressure plate thrust flange.
Refitting is a reversal of removal, providing the following:
- inspect the bearing on the crankshaft end face, if necessary
replace the bearing;
- inspect the splines on the clutch disc hub and the gearbox
input shaft, clean the splines and grease with a thin layer of
greasing ãëñ-15 or îàéã-1, îàéã-2;
- refit the clutch disc with the hub protruding part facing the gear-
box and centralise the plate against the bearing using tool A.70081,
simulating the gearbox input shaft splined end (fig. 3-4).
60
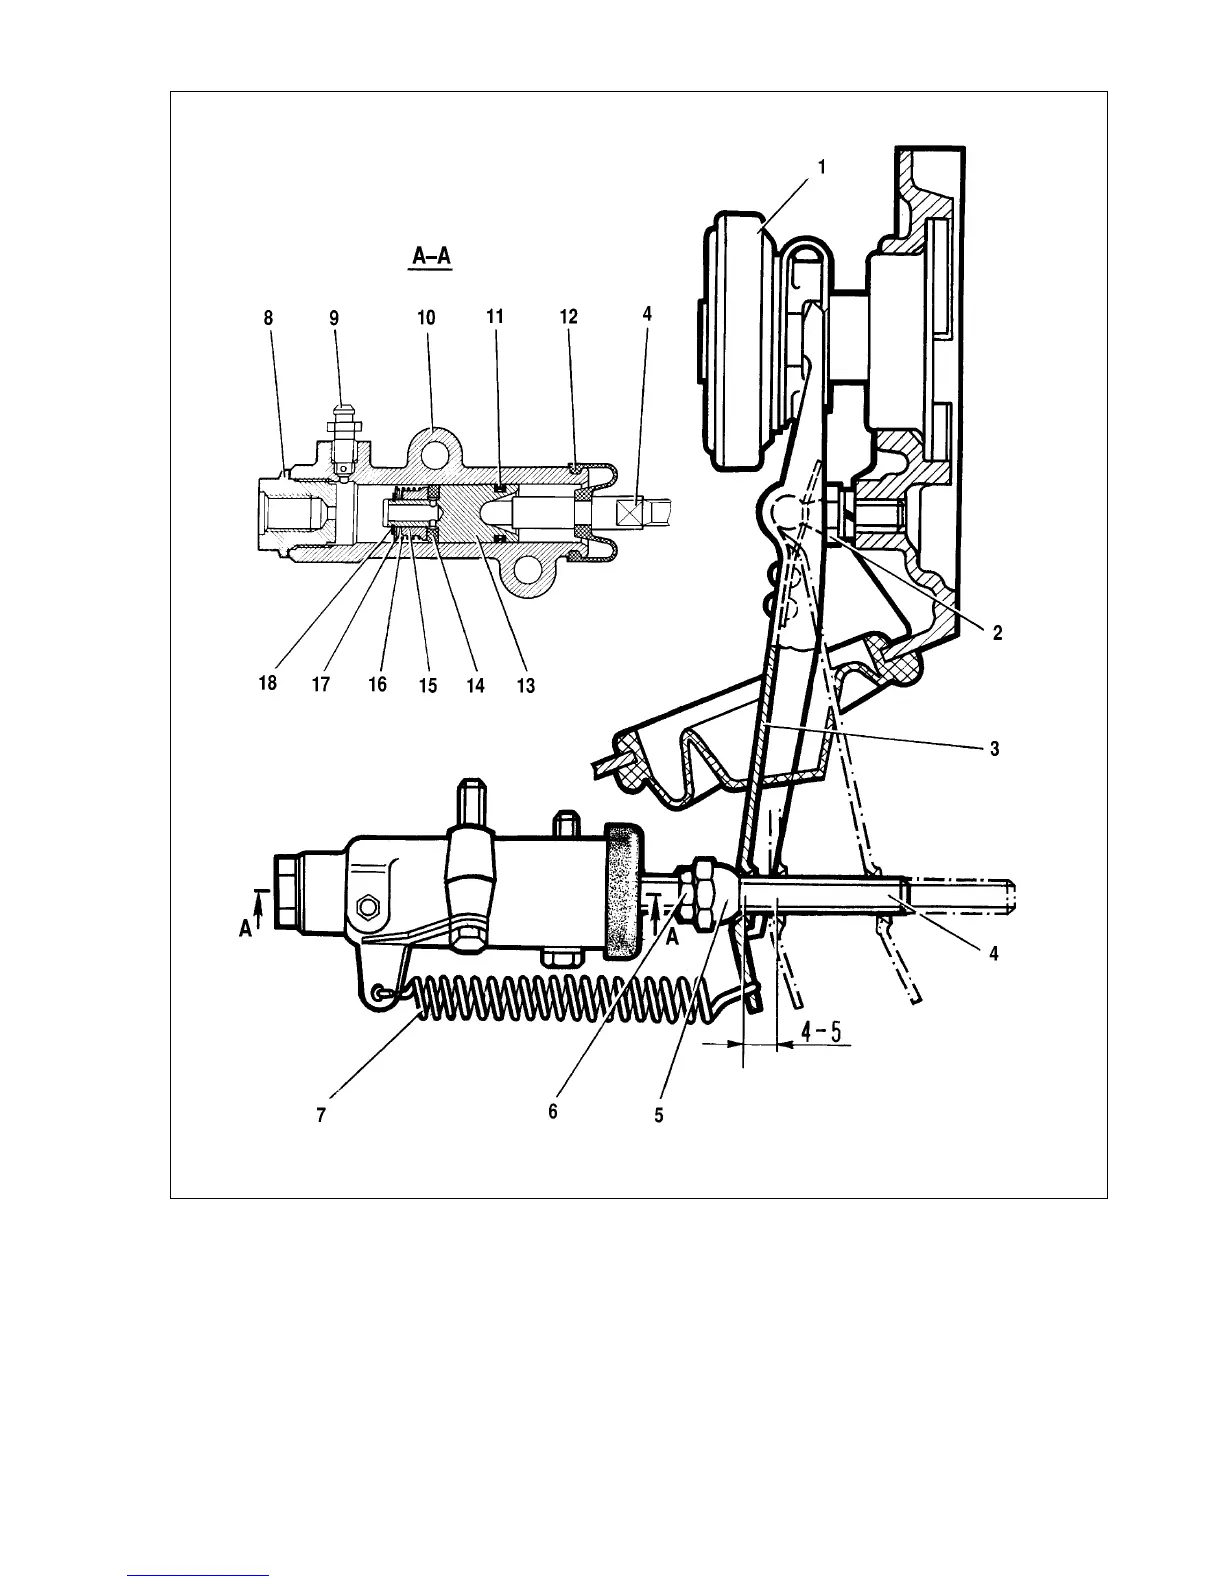
Fig. 3-3. Slave cylinder and clutch release fork:
1 - release bearing; 2 - ball pivot; 3 - clutch release fork; 4 - pushrod; 5 - adjusting bolt; 6 - locknut; 7 - return spring; 8 - plug; 9 - bleeder; 10 - cylinder body; 11 - sealing
ring; 12 - protective cap; 13 - piston; 14 - sealing; 15 - sleeve; 16 - spring; 17 - spring disc; 18 -lock ring