VTK‐VS‐BA‐004e‐B|UserManualMDS3200A | Maintenance
60
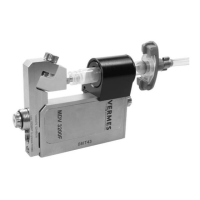
9.3 MaintenanceoftheTappet
Asthetappetbelongstothewearingpartsofthesystem,ithastobegreasedandex‐
changedinregularintervalsorinthecaseofproblems(assoonasitstartstomoveina
sluggishway).Theexchangeproceduredependsontheparticulartappetmodel;ceramics
(two
versions,CTandCTF)andtungstencarbide(TTF)itemsareavailable.
CAUTION!(properlytrainedpersonnel)
Toavoidmajordamages,theseprocedureshavetobecarriedoutbypersonnelwithproper
training.
CAUTION!(usetoolMDT310)
Fordismantlingandinstallation,thetappetchangingtoolMDT310isrequired(seepage
9).
9.3.1 TheCT‐tappet(ceramicstappet)
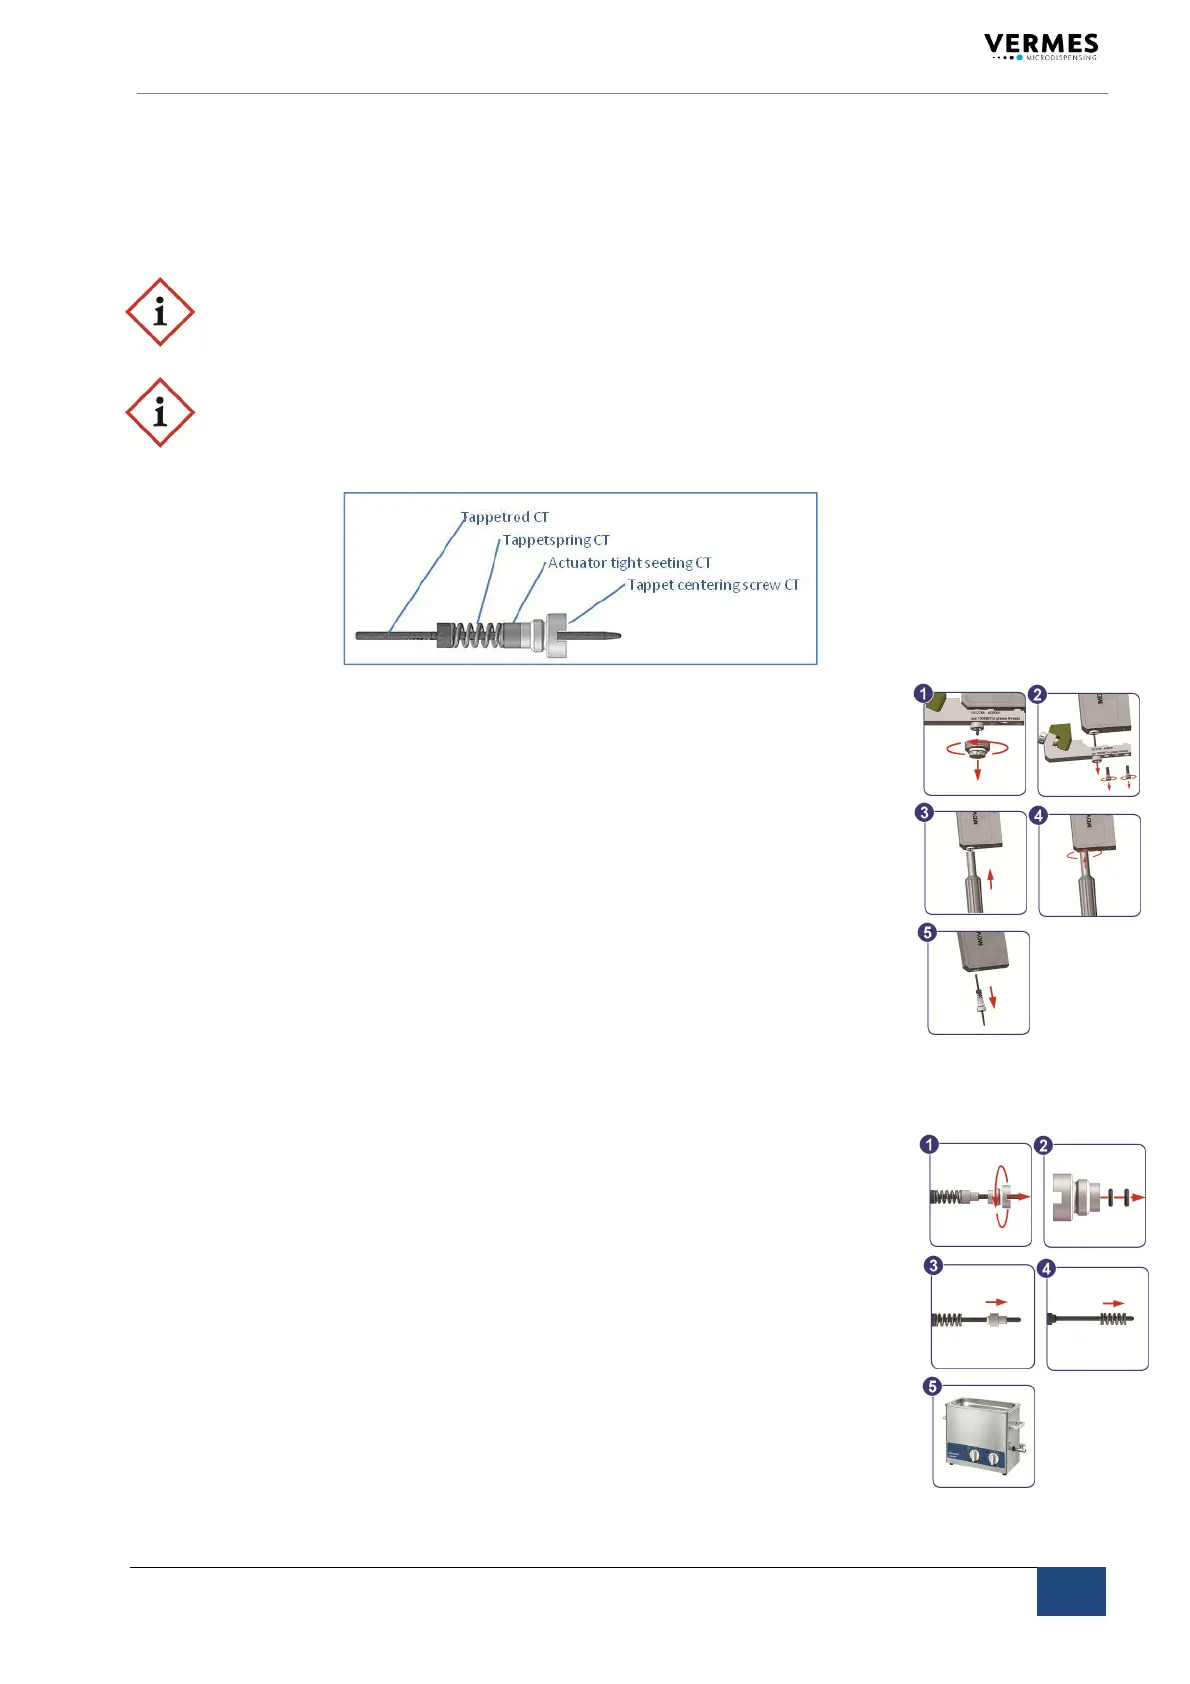
9.3.1.1 Demounting
Step1: Carefullyremovethenozzleunitfromthefluidbox.(1)
Step2: BothM2.5hexagonscrewsofthefluidboxmustbeloosenedandun‐
screwed.Slowlyslideawaythefluidboxfromthetappet.Thefluidbox
mustnotbejammed;otherwisethetappetmaybreakoff!(2)
Step3: Tounscrewthetappetitself,proceedasfollows:
Tool
MDT310featuresareceptacleboringforthetappet.Thisboringhasto
bepushedcarefullyoverthetappet,untilthestudsofthetoollatchinthecor‐
respondingrecessofthetappetcenteringscrew(3).
Inordertodisengagethetappet,rotatethetoolcounterclockwise,witha
slightconstantpressure(4).
Separatethetoolfromthetappet.Thetappetcannowberemovedthrough
thecaseboringofthevalve(5).
9.3.1.2 Installation
Tore‐installatappet,performthesequencedescribedaboveinreversedorder.
Aftercompletion,donotforgettoexecutetheadjust.
9.3.1.3 Disassembly
andCleaning
Step1: Inordertotakeapartthetappet,firstdisengage,slightlyrotating,the
centeringscrewfromtherod.Refertotheillustrationofthepartsabove.
Step2: TheinnerO‐ringsofthecenteringscrewhavetobedrawnoffbymeans
oftweezers.
Step3:
Theactuatorseathastobeseparatedfromthetappetrod(bothitems
illustratedabove).
Step4: Pulloffthespringfromtherod.
Step5: Allofthecomponentsmayhavetobecleanedinanultrasonicbath(not
theO‐rings!).TocleantheO‐rings,carefullywipe
themwithacloth.Po‐
rousringshavetobereplaced(order.no:1012275).
 Loading...