VTK‐VS‐BA‐004e‐B|UserManualMDS3200A | Cleaning
57
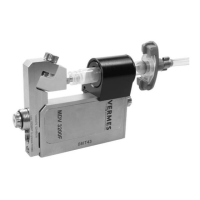
8.3.3 Dismantlingthe ValveandFinePurification
Step1: Thedispensingprocessmustbecompleted.Thevalveisinclosedposition.Switch
OFFthecontrolunitanddisconnectitfromthemains.
Step2: Deactivatethecompressed‐airconnectoranddisengageit.
Step3: Removeactuatorandsensorcablefromthevalve.
Step4: Disassemblethevalveas
follows:
Unscrewandremovethecartridge.
Loosenthetwoscrewsforthecartridgeholder.Removetheholder.
DetachtheLuerLockconnectorfromthecartridgebase.Ifnecessary,useawrench
no.8.
DisconnectthesealingnutwithtoolMDT302.Removeittogetherwiththe
cartridge
base.
Disconnectthenozzleunit,rotatingcounterclockwise.
Disassemblethisunit.
Unscrewthetappetguidance,togetherwiththenozzleinsert,fromthenozzleadjusting
nut.UsethenozzlechangingtoolMDT303.AfterwardspullofftheO‐ringfromthetap‐
petguidance.
Removethetwoconnectingscrews
inordertoseparatethefluidboxfromthevalve.
CAUTION!(bewareoftappetwhiledisconnecting)
Becarefulwhendisconnectingthefluidbox.Thetappetcanbreak,ifthefluidboxis
jammed.
Disengagethetappetcenteringpieceandtappetsealingfromthefluidbox.Usethe
thicker
sideoftoolMDT304forthispurpose.
Step5: Prewashallofthecomponentsbyhand.Theproperuseofthepartscontainedin
cleaningtoolsetCTKisillustratedonthefollowingpage(seepage58).Eachof
themisdedicatedtoparticularcomponents.Forthenozzleinsert
useaspecial
cleaningwire.ThesearenotpartoftheCTKset,butcanbeorderedseparately.
Theyareavailableindifferentsizes.
Step6: Theactualcleaningprocesstakesplaceinsideanultrasonicbath.
Placeabowlwithsufficientcapacityintothebath.
Setthefluid
box,tappetsealing,tappetcenteringpiece,cartridgebase,sealingnut,Luer
Lockconnector,nozzleadjustingnut,tappetguidance(withoutO‐Ring)andnozzleinsert
intothebowl.
Fillupthebowlwithanappropriatesolvent(e.g.Isopropanol),untilallofthepartsare
covered.
Leavethecomponentsca.
15mininside.
Step7: Drytheparts.Simplyuseexposuretoairorcompressedair.
Step8: Forre‐assembly,performthesequencedescribedinstep4inreversedorder.
 Loading...