Appendix B: Installation Checklist
You can print and refer to the following checklist to assist you with installing the appliance and managed targets.
ITEM INSTALLATION STEP
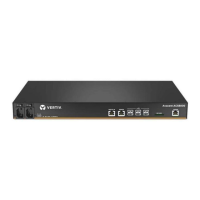
1 Rack mount or wall mount the appliance. See Rack and Wall Mounting on page 5.
2 Connect the redundant power cables to P1 and P2 (100-240 volts).See Connecting the Hardware on page 6.
3
Connect at least GB1 to the management network. Connect GB2 to the same management network if you intend to configure the two ports
for failover. GB2 can be connected to different networks if the appliance configured in normal mode. See Setting Up Your Network on page
16.
4
Connect the tan-colored serial adaptor (DB9-RJ45)to a straight CAT5/6 cable. Connect a laptop/PC using this cable assembly to the Setup
port on the front of the appliance. Using a terminal emulation program, such as PuTTY, at 9600 baud access the appliance CLIto configure
IPand user settings.
Turn off DHCP:set /system/administration/networkManagement/networkInterfaces/eth0/ dhcp=false
Assign IP:set /system/administration/networkManagement/networkInterfaces/eth0/ addr=<192.168.0.5>
Assign mask:set /system/administration/networkManagement/networkInterfaces/eth0/ mask=255.255.255.0
Assign gateway:set /system/administration/networkManagement/networkInterfaces/eth0/ gateway=<192.168.0.1>
-or-
Connect a crash cart/LCDtray to the VGAand USBports on the front of the appliance to access the VGAconsole and configure IPand
user settings.
Assign IP/mask/gateway:From the sidebar of the web manager, click
Administration-Network Settings - eth0
Default credentials:username = admin; password = admin. See Web User Interface on page 19.
5 Select a networking mode (normal, failover, bridge group). See Bridge Group Configuration on page 25.
6 Assign an IP address or addresses to the Eth/Bond0/Bridge group named interface. See Bridge Group Configuration on page 25.
7 Verify network connectivity by browsing to https://<appliance IP>
8
Consult the Network Settings-Routes page to ensure the IPnetwork assigned to the priv interface is unique within your organization. If it
isn't, access the Targets-Port Configuration-Network Settings page and change the IPaddresses assigned to the virtual private interfaces
to organizationally unique ones. Be sure to create new DHCP dynamic ranges to match the virtual private interface IPs you changed.
SeeNetwork Settings on page 24.
9 Physically connect KVM, serial or PDUtargets to the appliance. See Connecting targets on page 8.
10
To connect SPs to the appliance,
First, consult the appliance release notes for a list of supported SP types and firmware versions.
Second, access the SPdirectly to ensure the SPis a DHCPclient or has a static IPappropriate for the public network it is connected to or
appropriate for the private ports on the appliance.
Third, ensure that IPMIis enabled on the SP.
Fourth, ensure that you know or change the SPlog-in credential to one that is or will be configured within the appliance.
Fifth, access the Targets-SPManagement-Default Users page and add a credential to the list matching the one configured in the SP.
Sixth, physically connect the SPto a private appliance port if it is not already connected to another network.
Seventh, if necessary, create a discovery range for the network that contains the SP. See Connecting targets on page 8.
11
Rename target devices aliases to user/human meaningful names. For example, hostname, DNSname, physical location name or other.
See Port configuration on page 36.
12
Change the default account credentials, create additional user accounts or add AD/LDAP or DSView™ software as an authentication
service. Create user groups and assign target permissions. See Power User group on page 33.
13
Test launching a KVM, vKVM, vMedia, serial, SOL, SSH, browser session to each new target device. Verify power on/off/cycle
functionality for non-production systems. See Sessions on page 69.
14 Create a system backup to preserve the appliance configuration in case of emergency. See Firmware on page 60.
Table B.1 Appliance Connections Checklist
Vertiv | Avocent® Universal Management Gateway Appliance Installer/User Guide | 96