Commissioning
Installing the Light Fixtures—Metal Halide (1100W) or LED (300W or 240W) 6.12
47
[en-US] | 02/2023 | 5100065071 | LTV 4L/6L | Operator’s Manual
1
2
4
5
6
7
8
9
11
12
3 10 13
14
15
16 1718
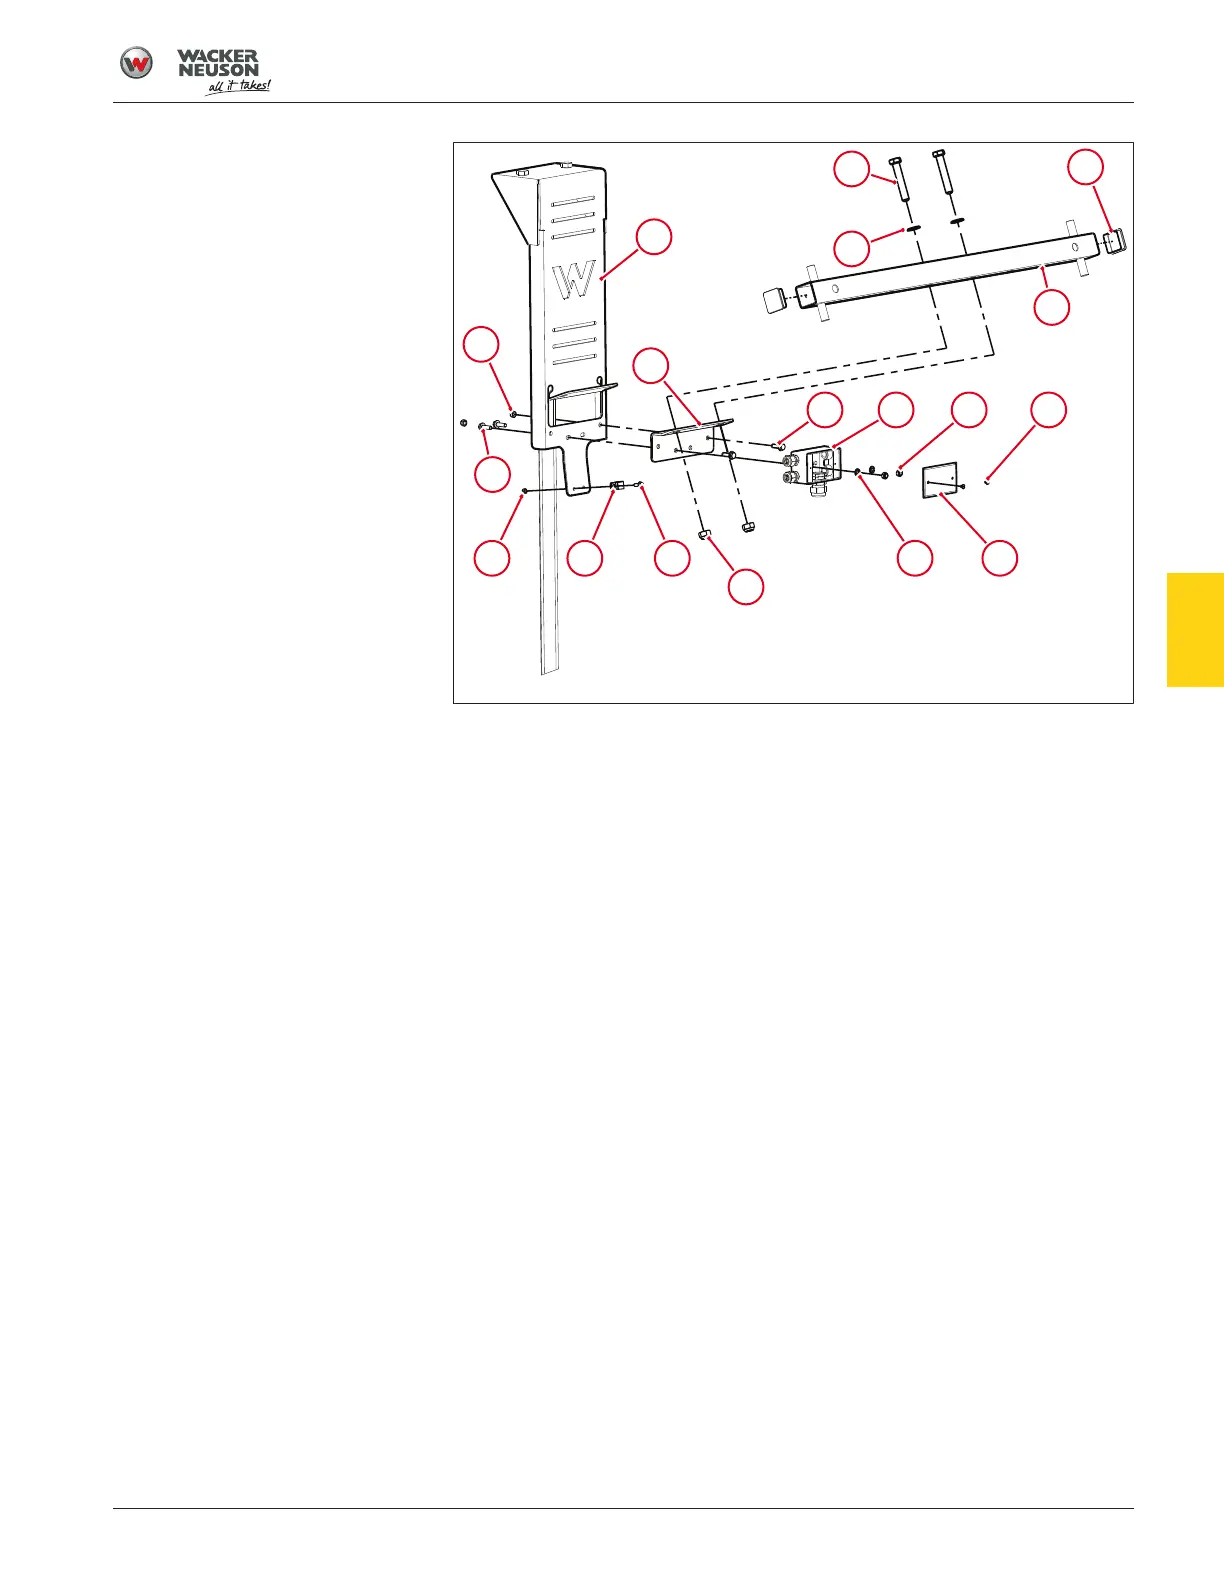
Fig.22: Installing the light support bracket and light bar
2. Press the two light bar plugs (5) into each end of the light bar (6).
3. Attach the light bar to the light support bracket with two M16x90
screws (7), two B17 flat washers (8), and two M16-10.9 serrated flange
nuts (9). Tighten the M16x90 screws to a torque of
58Nm(42.8ft.lbs.).
4. Fasten the wiring junction box (10) to the light support bracket with two
M8x25 serrated screws (11), two B8.4 flat washers (12), and two M8
lock nuts (13). Tighten the M8x25 serrated screws to a torque of
24Nm(18ft.lbs.).
5. Attach the wiring junction box cover (14) to the wiring junction box with
two screws (15).
6. Fasten a P-clamp (16) to the bottom of the light mount bracket, as
shown, with an M6x16 serrated flange screw (17) and an M6 lock
nut(18).
6.12 Installing the Light Fixtures—Metal Halide (1100W) or LED (300W or
240W)
Materials needed
• Four light fixtures—metal halide or LED
Note: Use four light fixtures of the same kind. Do not combine metal
halide light fixtures and LED light fixtures on the light bar. Similarly, do
not combine 240W and 300W LED light fixtures.
• Hardware bag 5
6