on the back of the cart. Finally, connect the power strip’s cable to a wall outlet operating on
its own circuit.
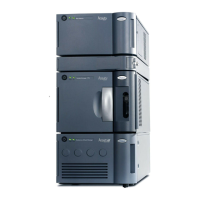
2.3 Connecting the probe
To avoid puncture injuries from the sharp probe capillary, use care when inserting it into the
source enclosure.
Warning: To avoid puncture injuries from the sharp probe capillary, use care when
inserting it into the source enclosure.
Notice: To avoid damaging the fragile probe capillary, where the instrument is situated
above eye level, disconnect the instrument’s external connections and place it on a
bench top or other surface so that you can exercise caution when inserting the probe
(see Removing the source enclosure from the instrument).
Before starting the instrument, connect the LC flow to the probe.
To connect the probe:
1. Connect the LC flow or syringe pump to the probe assembly's input and secure the PEEK
fitting.
Warning: To avoid puncture injuries from the sharp probe capillary, use care
when inserting it into the source enclosure.
Note: To avoid damaging the fragile probe capillary, use care when inserting it into the
source enclosure.
2. Carefully insert the probe capillary into the inlet atop the source enclosure and tighten the
probe fitting until it clicks.
June 15, 2017, 715003956 Rev. F
Page 21