3.10.4 Fitting the ion guide assembly to the instrument
Required materials
• Chemical-resistant, powder-free gloves
• 2.5-mm hex wrench
Warning: To avoid personal contamination with biohazardous or toxic compounds, wear clean,
chemical-resistant, powder-free gloves when performing this procedure.
To fit the ion guide assembly to the instrument:
1. Fit the differential aperture O-ring to the differential aperture support (see the figure
"Removing the pumping block and ion guide" in the topic Removing the ion guide assembly
from the source assembly).
2. Fit the differential aperture to the differential aperture support using the 3 slotted screws,
and then secure the screws using a flat-blade screwdriver.
3. Carefully slide the ion guide’s PCBs into the differential aperture support.
4. Secure the ion guide to the differential aperture support using the four ion guide securing
screws.
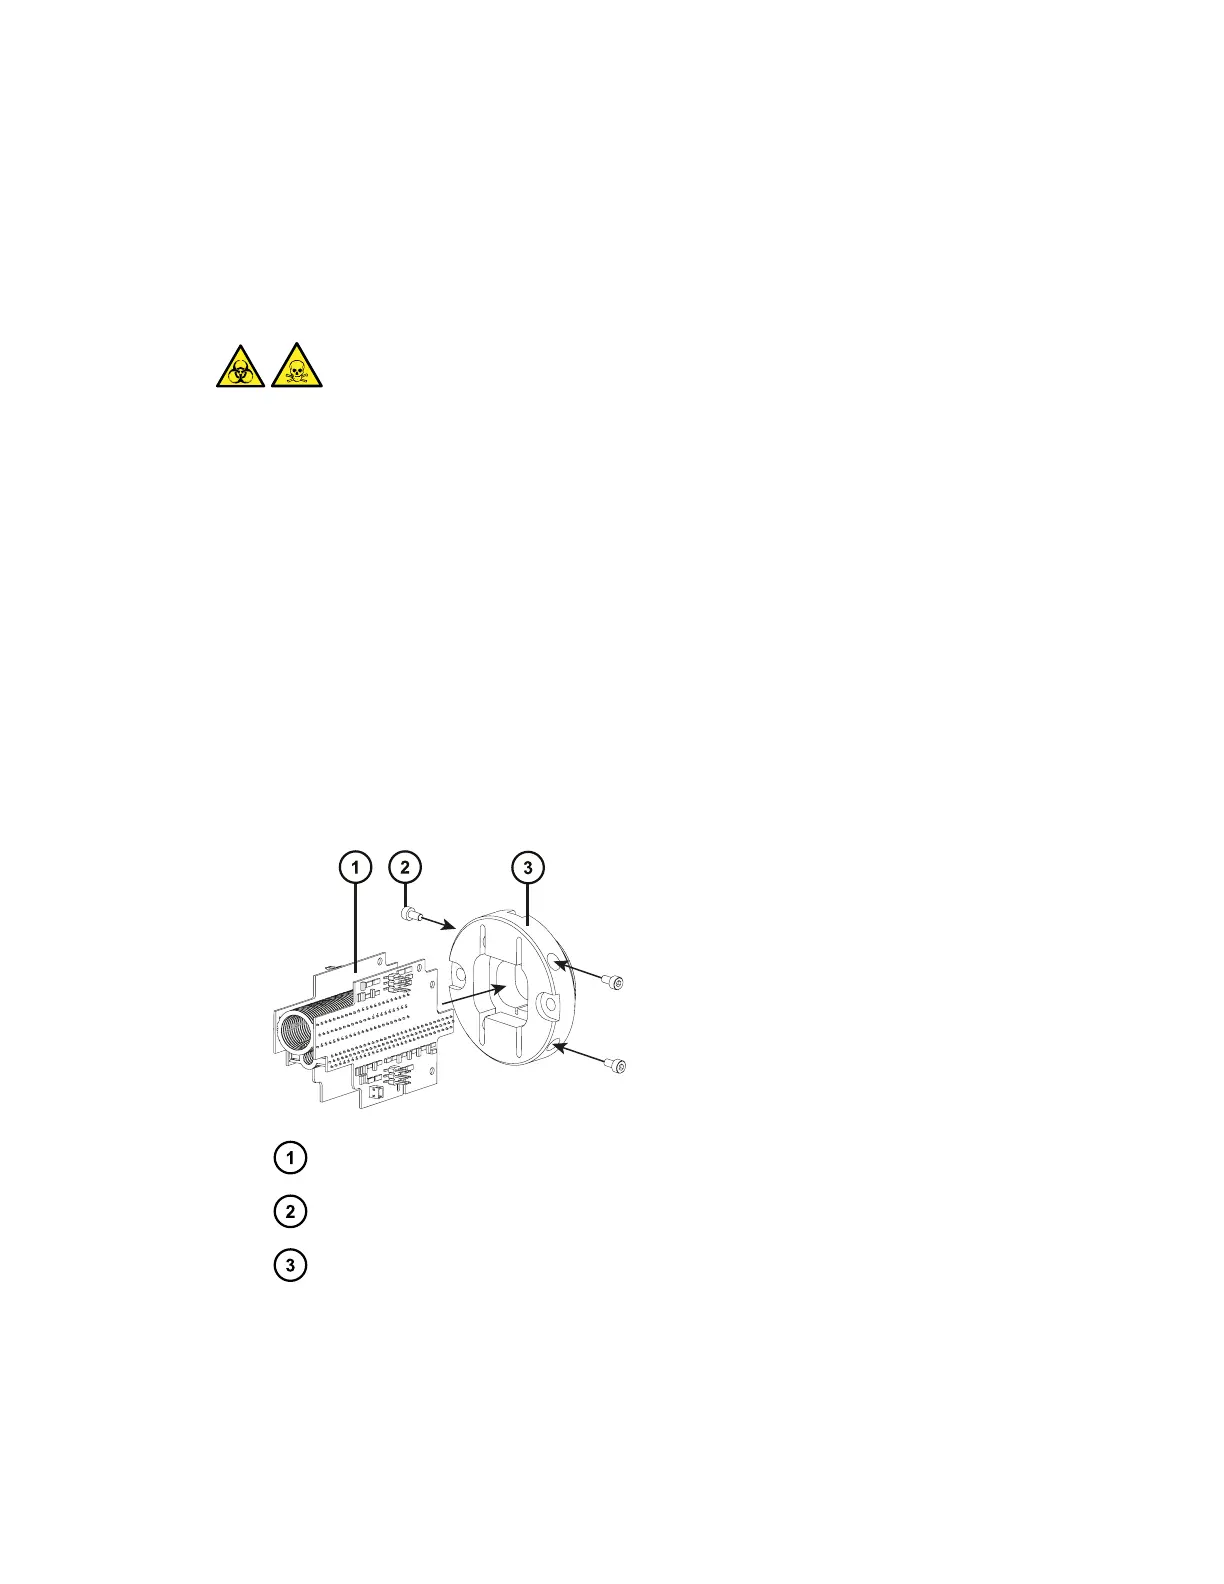
Figure 3–13: Assembling the ion guide housing
Ion guide
Ion guide securing screws (fourth screw is obscured)
Differential aperture support
5. Secure the ion guide and differential aperture support assembly to the pumping block’s ion
guide support rods using the 2 differential aperture support screws, and tighten them using
the 2.5-mm hex wrench.
June 15, 2017, 715003956 Rev. F
Page 47