Warning: To avoid personal contamination with biohazardous or toxic compounds, wear clean,
chemical-resistant, powder-free gloves when performing this procedure.
Warning: To avoid puncture injuries from the sharp calibration pin, use care when
removing it from and replacing it in the ion block.
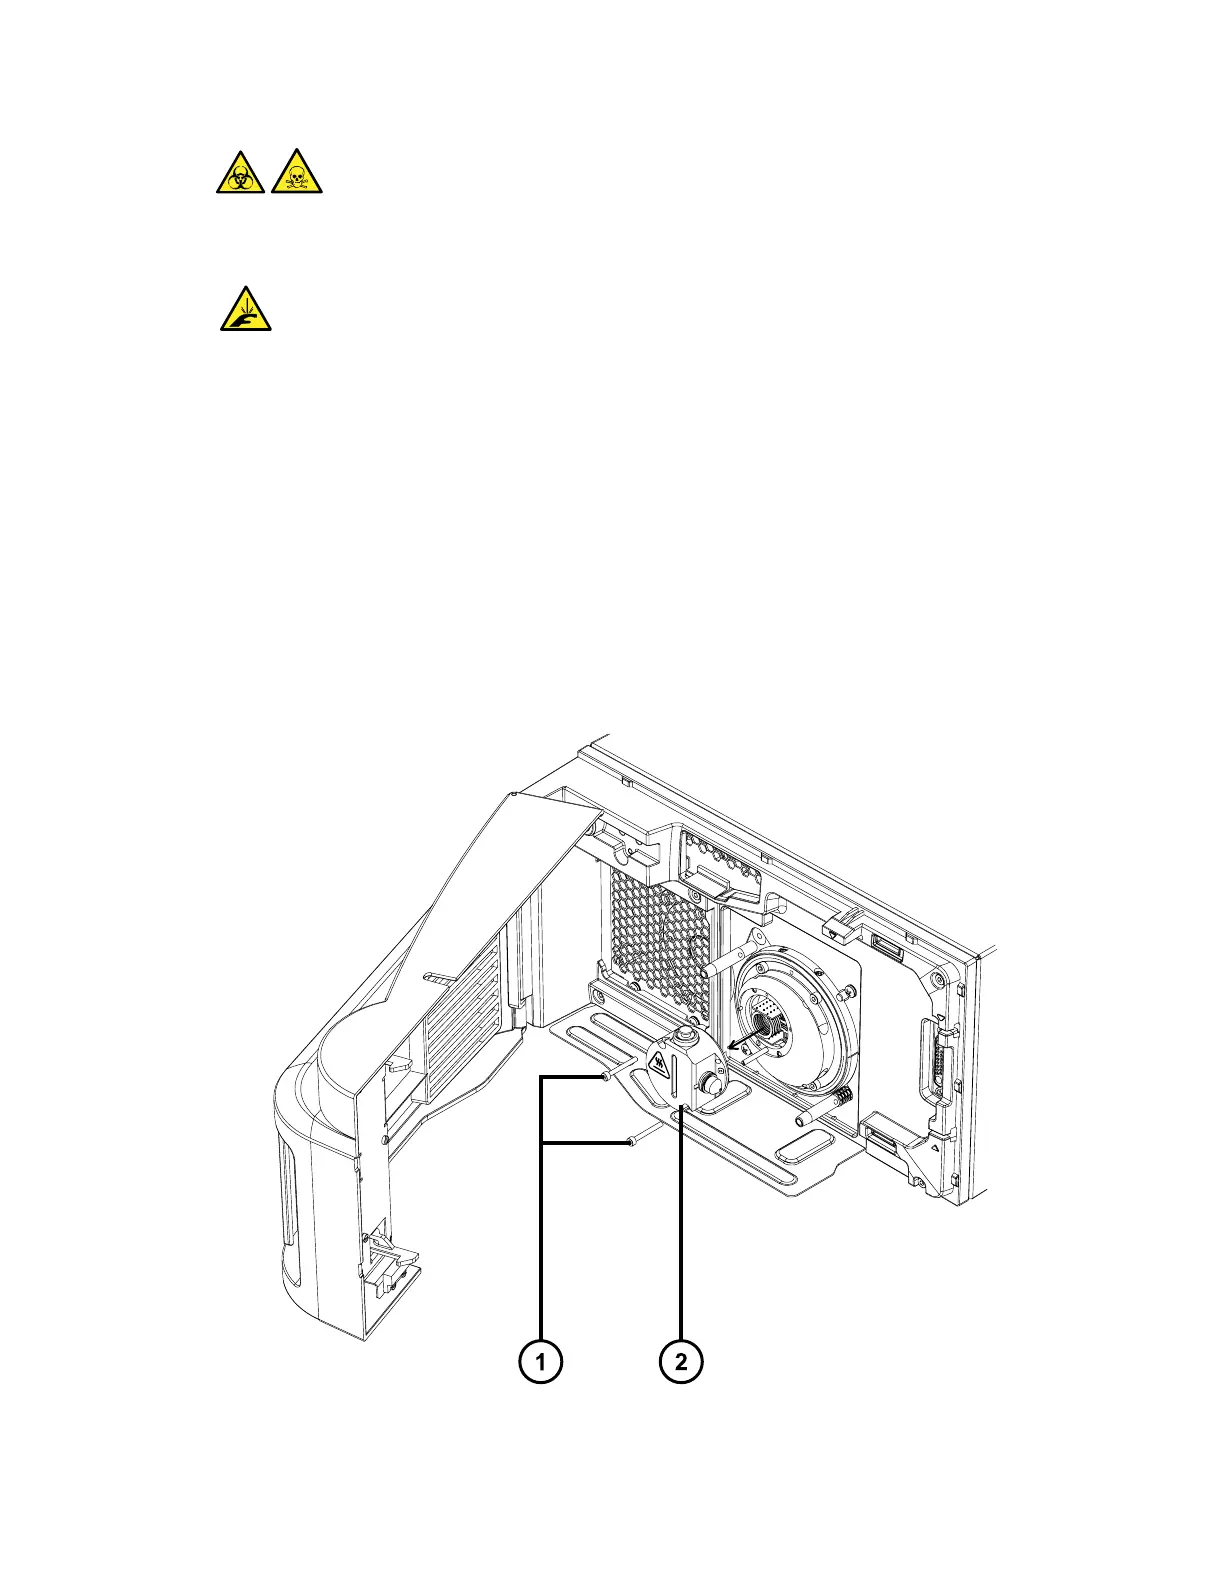
To remove the ion block:
1. Insert a flat-blade screwdriver beneath the top of the calibration pin, and then lever the pin
away from the ion block.
Tip: To locate the calibration pin, see the image "Removing the sample cone assembly" in
Removing the sample cone assembly from the ion block.
2. Remove the sample cone assembly from the right-hand side of the ion block (see
Removing the sample cone assembly from the ion block).
3. Remove the 2 screws securing the ion block to the instrument using the 2.5-mm hex
wrench.
Figure 3–5: Removing the ion block
June 15, 2017, 715003956 Rev. F
Page 35