1726 North Ballard Road - Appleton, WI 54911 - 920.991.9082
Technical Support 800.238.8739 - TechSupport@WaupacaElevator.com
PTM30112-G
12/07/2012
W
E
CRUSH
HAZARD
CUTTING
HAZ ARD
CRUSH
HAZARD
CRUSH
HAZARD
FALLING
HAZ ARD
CRUSH
HAZARD
PINCH
HAZ ARD
PUNCTURE
HAZ ARD
FRAMELESS CAR
ASSEMBLY
SERIES : 015 - 016 - 018 - 115 - 116 - 118
C
A
B
D
C
A
B
E
D
C
A
B
E
D
F
8
10
14
12
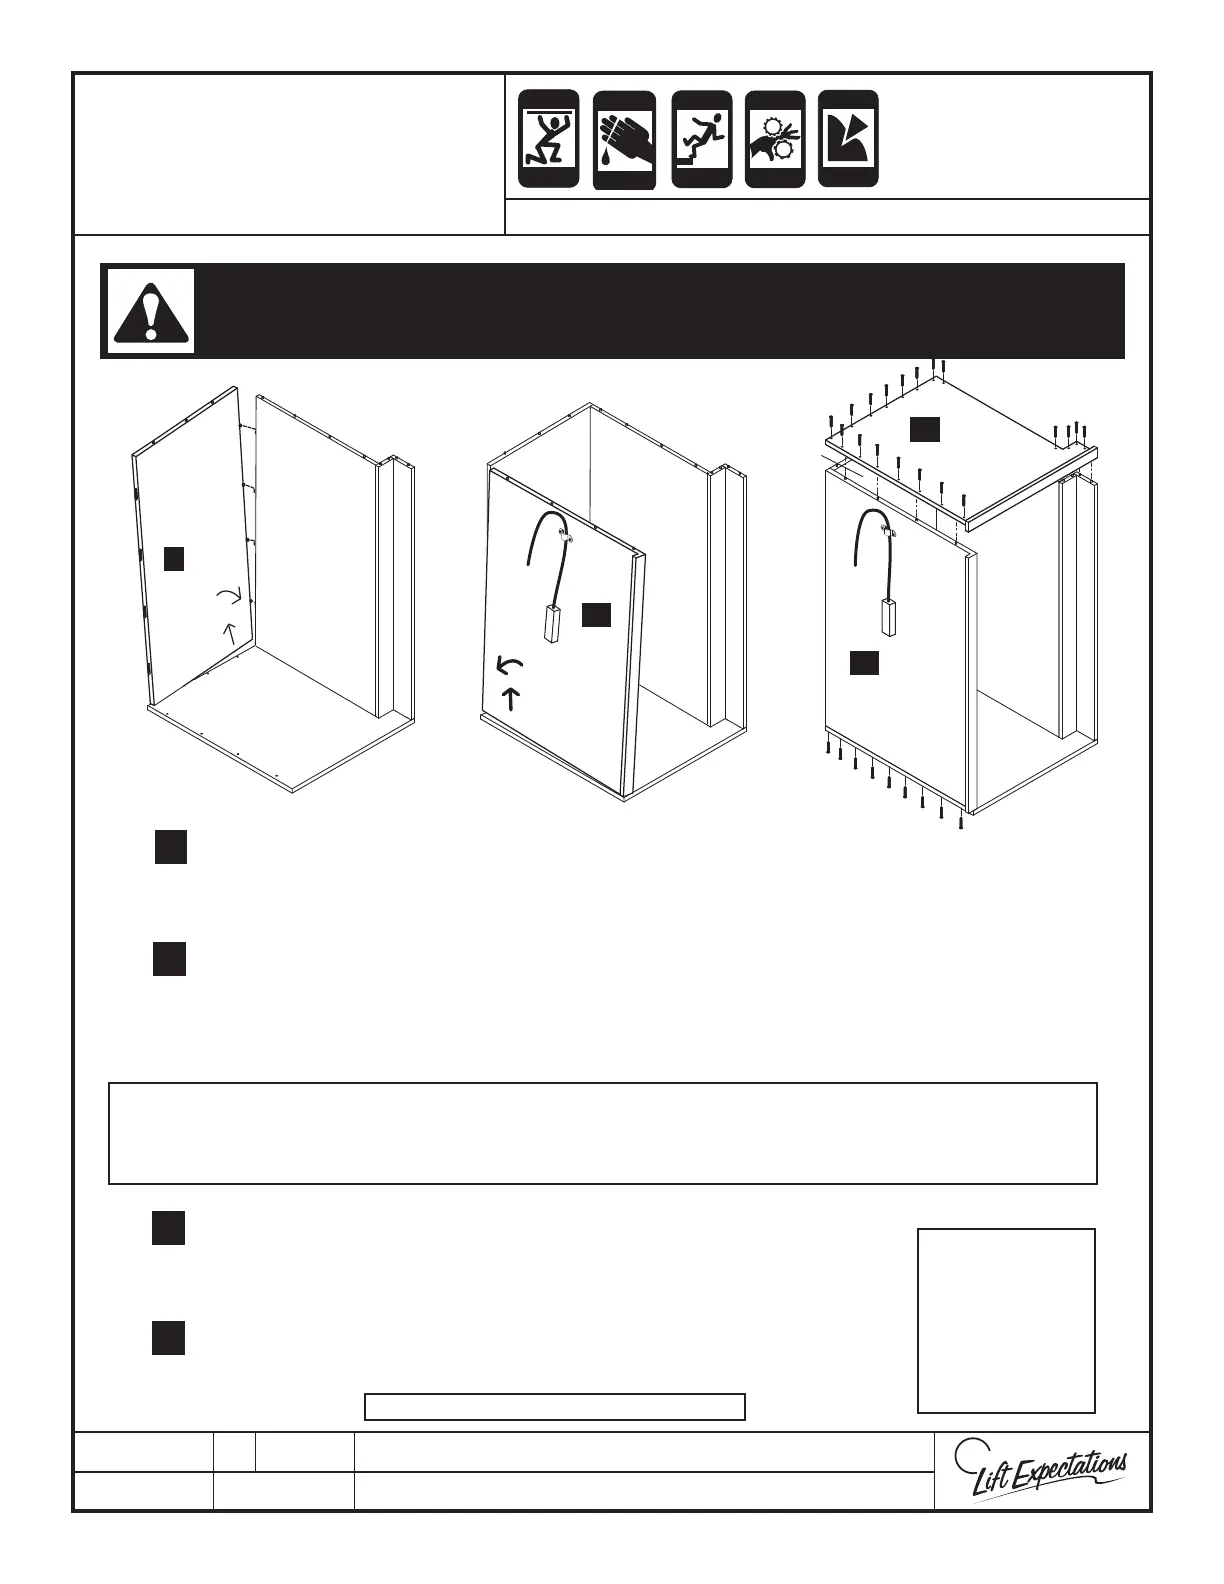
Step 8 Carefully lift at the connecting corner and connect the pins in wall D into the fasteners in wall B.
Step
9 Drive dowels from oor A into wall D with a rubber mallet to prevent walls from moving or sliding.
Step 10 Set wall E into place. Carefully lift wall E at the connecting corner and connect the pins in wall E
into the fasteners in wall D.
Step
11 Drive dowels from oor A into wall E with a rubber mallet to prevent walls from moving or sliding.
Step 12 Set ceiling F onto walls B, C, D and E with dowels.
Step
13 Use rubber mallet to drive dowels through the ceiling and into walls.
Step 14 Fasten ceiling rst then oor panel to walls with provided hardware in
pre-drilled locations.
Verify ush alignment across top of walls and gate pocket. Use a rubber mallet to bring the walls into
alignment. Do not rely on ceiling screws to close gaps. Check to make certain all fasteners are seated
completely and all walls are level.
8
10
14
12
Note:
U
se a small
amount of wax
or liquid soap
f
or lubricating
har
dwar
e
.
VERIFY ALL FASTENERS ARE SECURE!
Support walls during assembly. Tilting forwards or backwards on dowels could result in damage to the
walls and/or fasteners and prevent proper assembly of car. Do not allow walls to slide o the oor this
may cause harm to yourself and the walls.
 Loading...