Component Access and Removal
WWaallll OOvveennss
4-5
COMPONENTS BEHIND CONTROL PANEL:
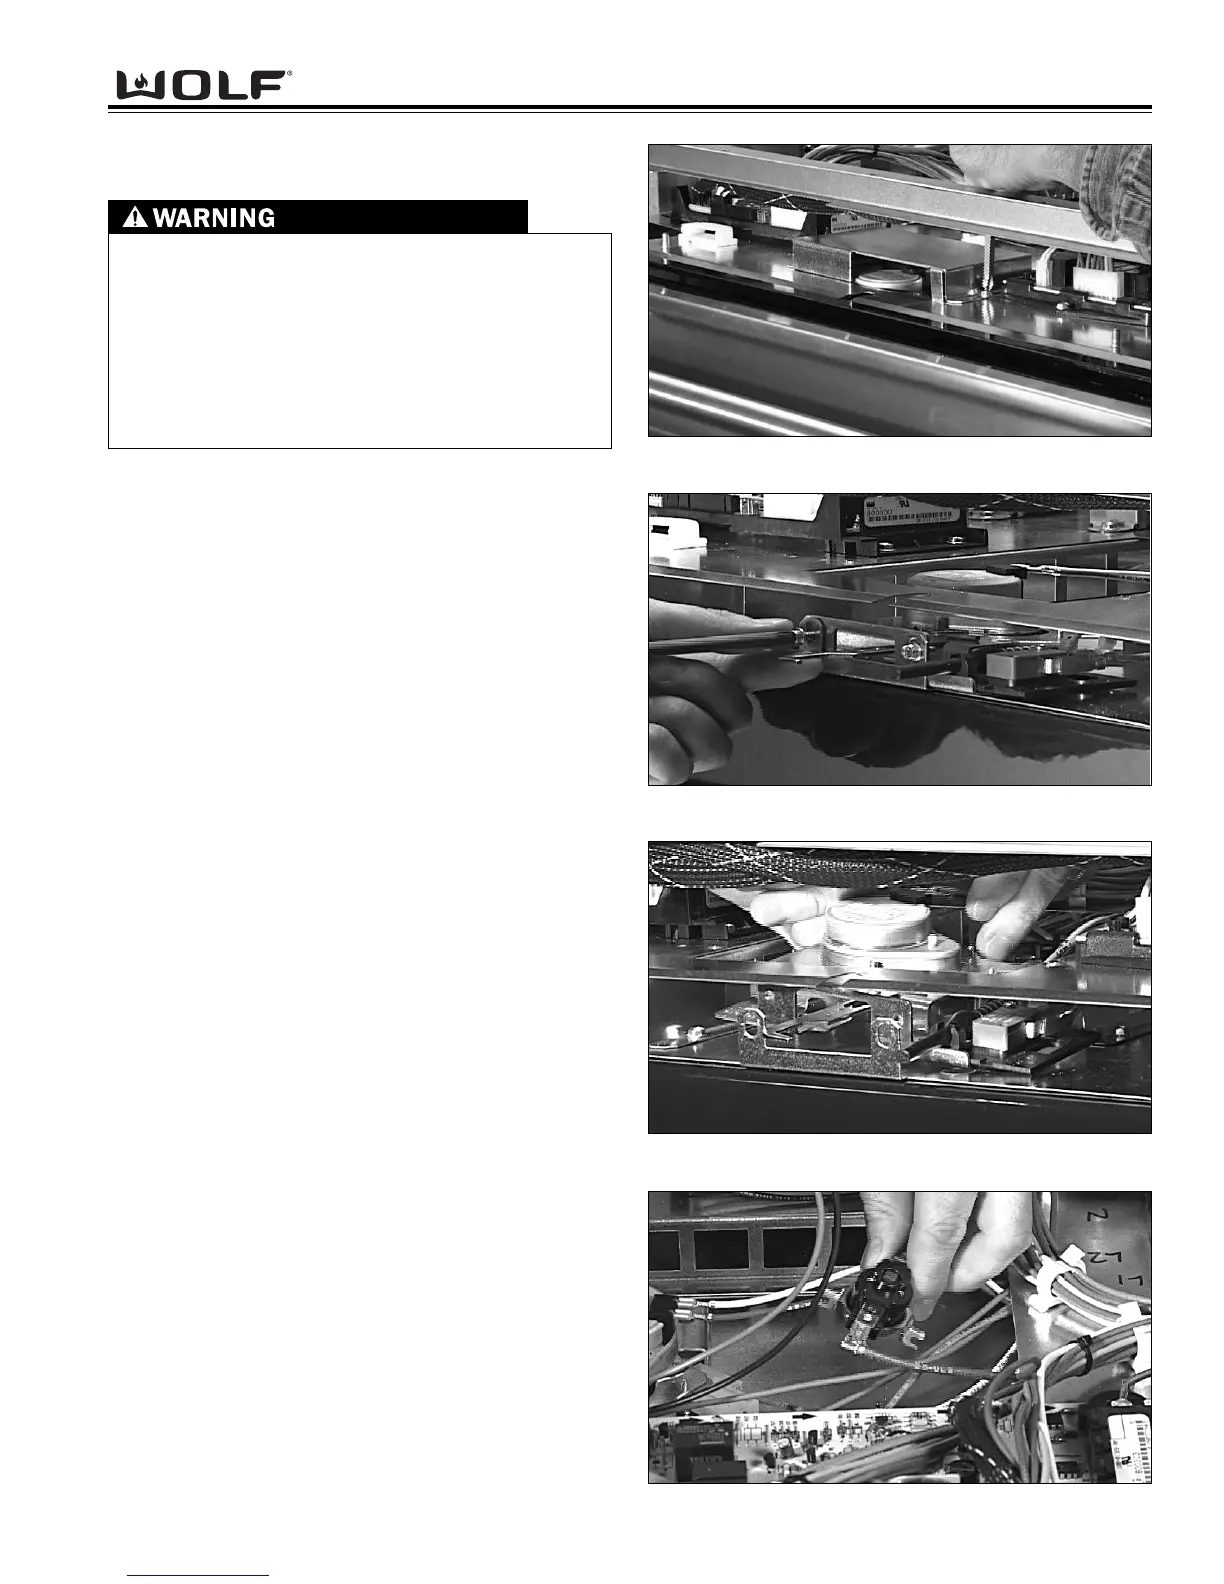
Latch Cover Removal
Extract the two screws that mount the latch cover to the
mounting plate. (See Figure 4-9). Now, lift latch cover
from unit.
Motorized Door Latch Assembly Removal
Begin by opening the oven door. Extract the screws
and remove the face plate. Now, extract the two
screws that secure the latch assembly to the mounting
bracket (located just below the control panel). (See
Figure 4-10). Now, lift the rear of the latch assembly up
from the mounting slots. Then, slide the latch assembly
out so you can unplug the wires from the micro switch-
es and lock motor. (See Figure 4-11).
Limit Switch Removal
To remove the limit switch you need to remove the latch
cover. Now, extract the two screws that secure the limit
switch to the mounting plate. Lift the limit switch out
and disconnect the wires. (See Figure 4-12).
TURN OFF THE ELECTRICAL POWER GOING TO
THE OVEN BEFORE SERVICING.
IN ORDER TO REMOVE THE CONTROL PANEL
AND COMPONENTS BEHIND IT, THE OVEN WILL
HAVE TO BE PULLED OUT APPROXIMATELY 12
INCHES FROM ITS INSTALLATION AND THE
FRONT OVEN TOP PANEL WILL NEED TO BE
REMOVED.
Figure 4-9. Latch Cover Removal.
Figure 4-12. Limit Switch Removal.
Figure 4-11. Motorized Door Latch Removal.
Figure 4-10. Motorized Door Latch Removal.