89
XAG AUSTRALIA
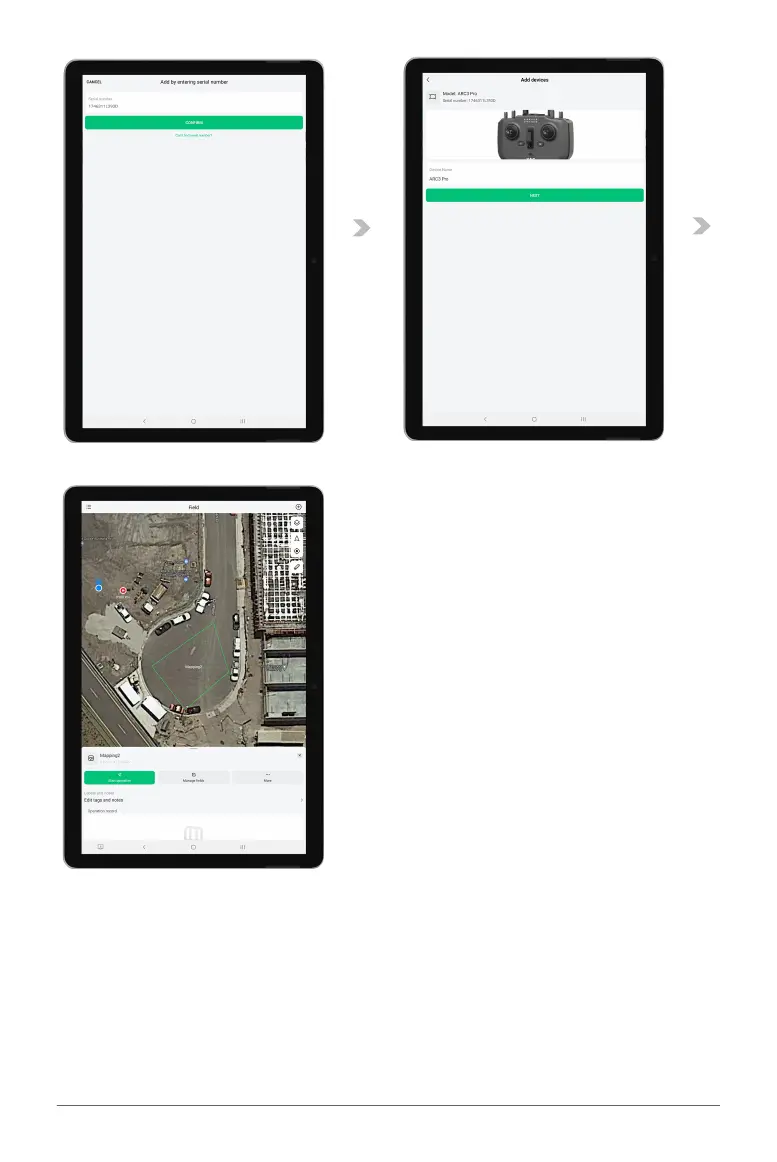
05. At this point, you'll be prompted to either scan or manually enter the Product’s QR code. This
code is located at the back of your ARC3 Pro controller (do not mistake it for the QR code on the
ARC3 Pro RTK module). Please note that this process is case sensitive.
06. Upon successful scanning or typing of the QR code, a new window will open allowing you to
assign a unique name to your ARC3 Pro controller. Once you've entered the desired name, press
"next" to proceed.
07. A confirmation message reading "setup success" will appear on the screen, indicating that the
setup process is complete. You can now see the newly named ARC3 Pro controller listed on your
Device page in the XAG One app.