26
Installation and Connection
Installing the transceiver
Installing the front panel
Install the front panel using the supplied bracket.
Caution
The bracket can be formed by hand to match the location where the front panel is installed.
Be careful not to cause an injury when bending the bracket.
1 Select the installation location.
Caution Select a stable, flat location with as few dents and protrusions as possible.
Tip See “Installation location when used in a mobile unit” on page 22.
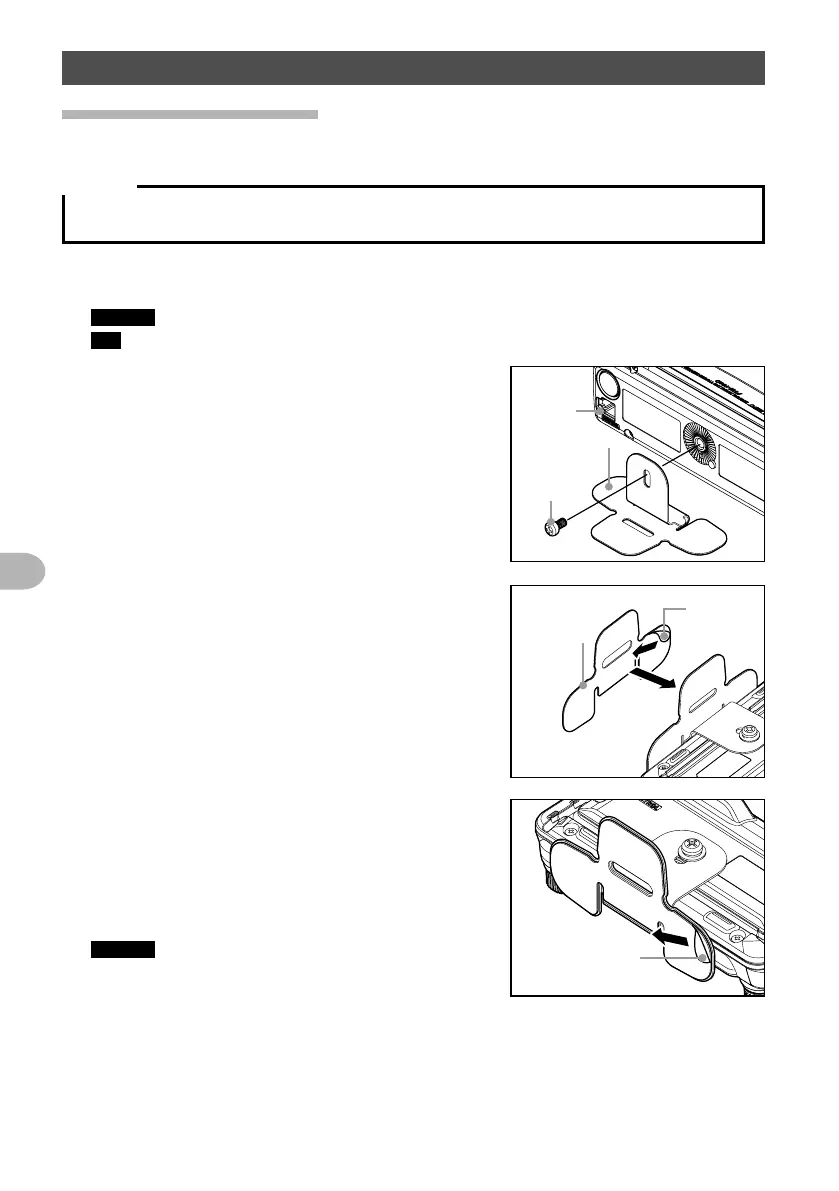
2 Attach the bracket to the front panel.
Attach the bracket to the front panel using the
supplied screws as shown in the illustration.
Controller
Bracket
Screw
3 Adhere double-sided adhesive sheet to the
bracket.
Peel off the protection tape from one side of the
supplied double-sided adhesive sheet, and paste
it onto the bottom side of the bracket.
Protection
tape
Double-sided
adhesive
sheet
4 Install the bracket where you want to place the
front panel.
After the adhesive sheet is adhered to the bottom
side of the bracket, Peel off the other side of the
protection tape, and then stick the bracket to the
installation location.
Caution Remove all dirt and dust from the installation
location before affixing the bracket.
Protection tape
 Loading...