CAUTION
:~~~
~~~~~~~
Place
a
wooden
piece
on
the
case
to
protect
it
against
scratching.
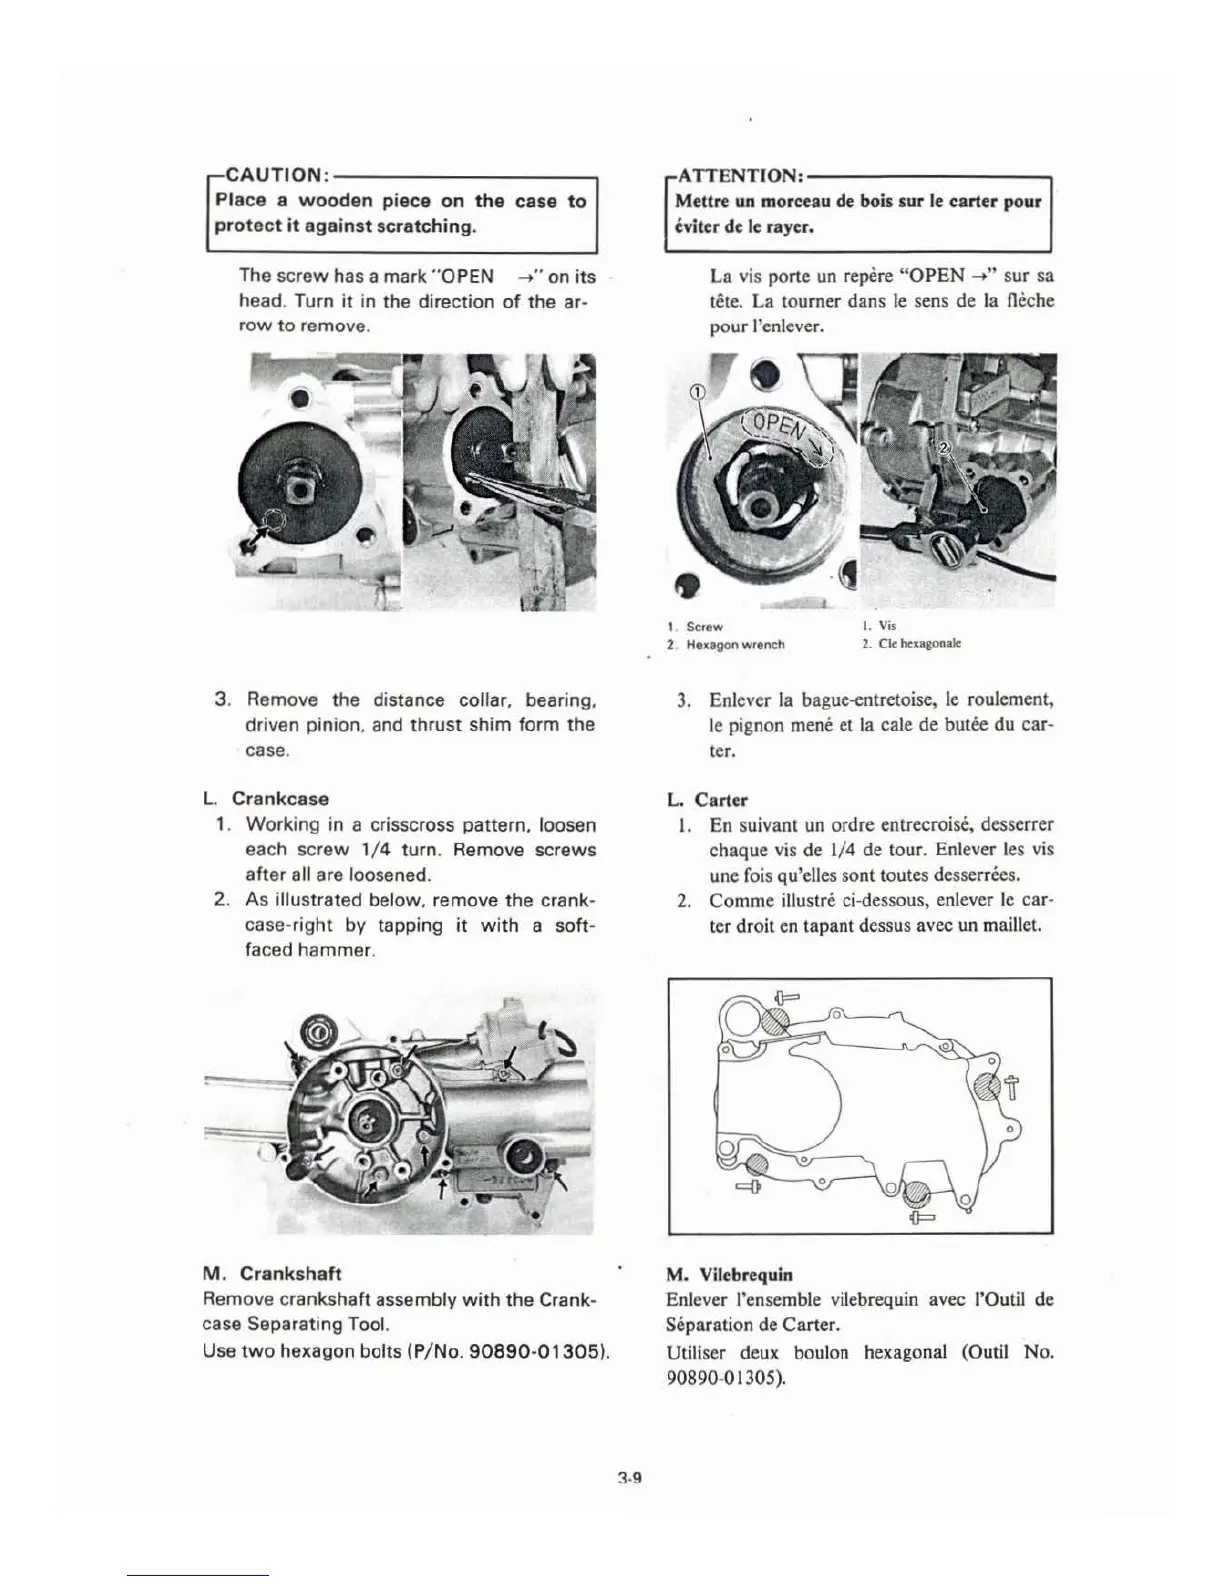
The screw has a mark
"O
PEN
~
.. on
its
head. Turn
it
in the direction
of
the
ar-
row
to
remove
.
3. Remove the distance collar, bearing,
driven pinion. and
thrust
shim form
the
case.
L.
Cr
a
nkcase
1. Working in a
cr
isscross pattern. loosen
each screw 1/ 4 turn. Remove screws
after
all are loosened.
2. As illustrated below, remove the crank-
case-right by tapping it
with
a soft-
faced hammer.
M .
Crankshaft
Remove crankshaft assembly
with
the
Crank-
case Separating Tool.
Use
two
hexagon bolts (P/No.
90890-01305
).
3.9
ATTENTION:~~~~~~~~~
Mettre un morceau
de
bois
sur
le carter pour
eviter de
le
rayer.
La
vis porte un repere "
OPEN
~"
sur
sa
tete.
La
tourner
dans
le sens
de
la Oeche
pour
l'enlever.
1. Screw
I.
Vis
2.
Huag
on
wren
ch
2. Cle hcxagonale
3. Enlever
la
bague-entretoise, le roulement,
le pignon
mene et
la
cale
de
butee
du
car-
ter.
L.
Carter
I.
En
su
ivant un
ordre
entrecroise, desserrer
ch
aque
vis
de
1/4
de
tour. Enlever les vis
une
fois qu'elles sont toutes desserrees.
2.
Comme
illustre ci-dessous, enlever le
ca
r-
ter
droit en
tap
ant dessus avec
un
maillet.
M. Vilebrequin
En
lever l'ensemble vilebrequin avec l'Outil
de
Separation de
Carter.
Utiliser
deux
boulon hexagonal (Outil
No.
90890-01305).
 Loading...