FRONT BRAKE
4-22
4. Check:
• Brake fluid level
Refer to “CHECKING THE BRAKE FLUID
LEVEL” on page 3-24.
5. Check:
• Brake lever operation
A softy or spongy feeling Bleed the brake
system.
Refer to “BLEEDING THE HYDRAULIC
BRAKE SYSTEM” on page 3-25.
EAM30030
REMOVING THE FRONT BRAKE CALIPER
Before disassembling the brake caliper, drain
the brake fluid from the entire brake system.
1. Remove:
• Union bolt
• Copper washer
• Brake hose
Put the end of the brake hose into a container
and pump out the brake fluid.
EAM30031
DISASSEMBLING THE FRONT BRAKE
CALIPER
1. Remove:
• Brake caliper piston “1”
• Brake caliper piston dust seal “2”
• Brake caliper piston seal “3”
a. Blow compressed air into the brake hose
joint opening to force out the piston from
the brake caliper.
EWA13550
• Cover the brake caliper piston with a rag.
Be careful not to get injured when the pis-
ton is expelled from the brake caliper.
• Never try to pry out the brake caliper pis-
ton.
b. Remove the brake caliper piston dust seal
and the brake caliper piston seal.
EAM30032
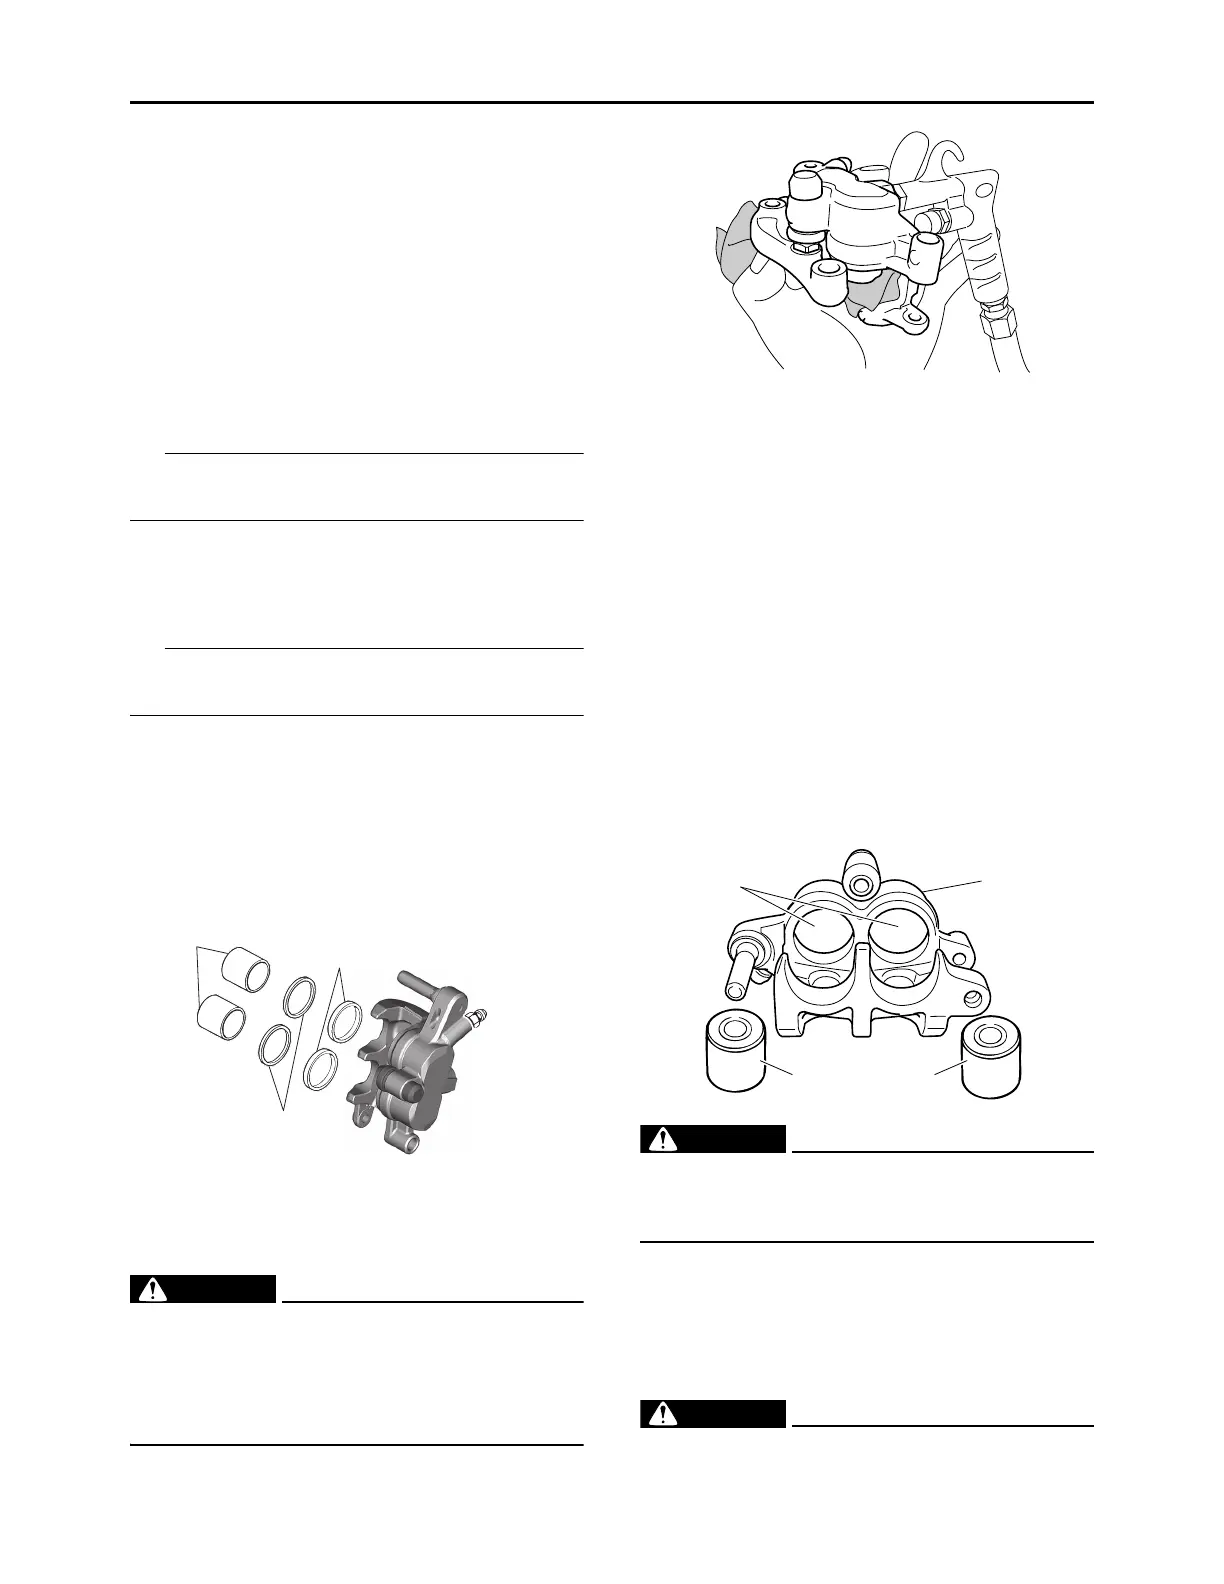
CHECKING THE FRONT BRAKE CALIPER
1. Check:
• Brake caliper piston “1”
Rust/scratches/wear Replace the brake
caliper piston.
• Brake caliper cylinder “2”
Scratches/wear Replace the brake caliper
assembly.
• Brake caliper body “3”
Cracks/damage Replace the brake caliper
assembly.
• Brake fluid delivery passages
(brake caliper body)
Obstruction Blow out with compressed air.
EWA19220
When the brake caliper is disassembled, re-
place the brake caliper piston seal and the
brake caliper piston dust seal with new ones.
2. Check:
• Brake caliper bracket
Crack/damage Replace.
EAM30033
ASSEMBLING THE FRONT BRAKE CALIPER
EWA19230
• Before installation, clean and lubricate the
internal parts. Use new brake fluid for
3
1
2