GENERATOR
5-39
EAM30487
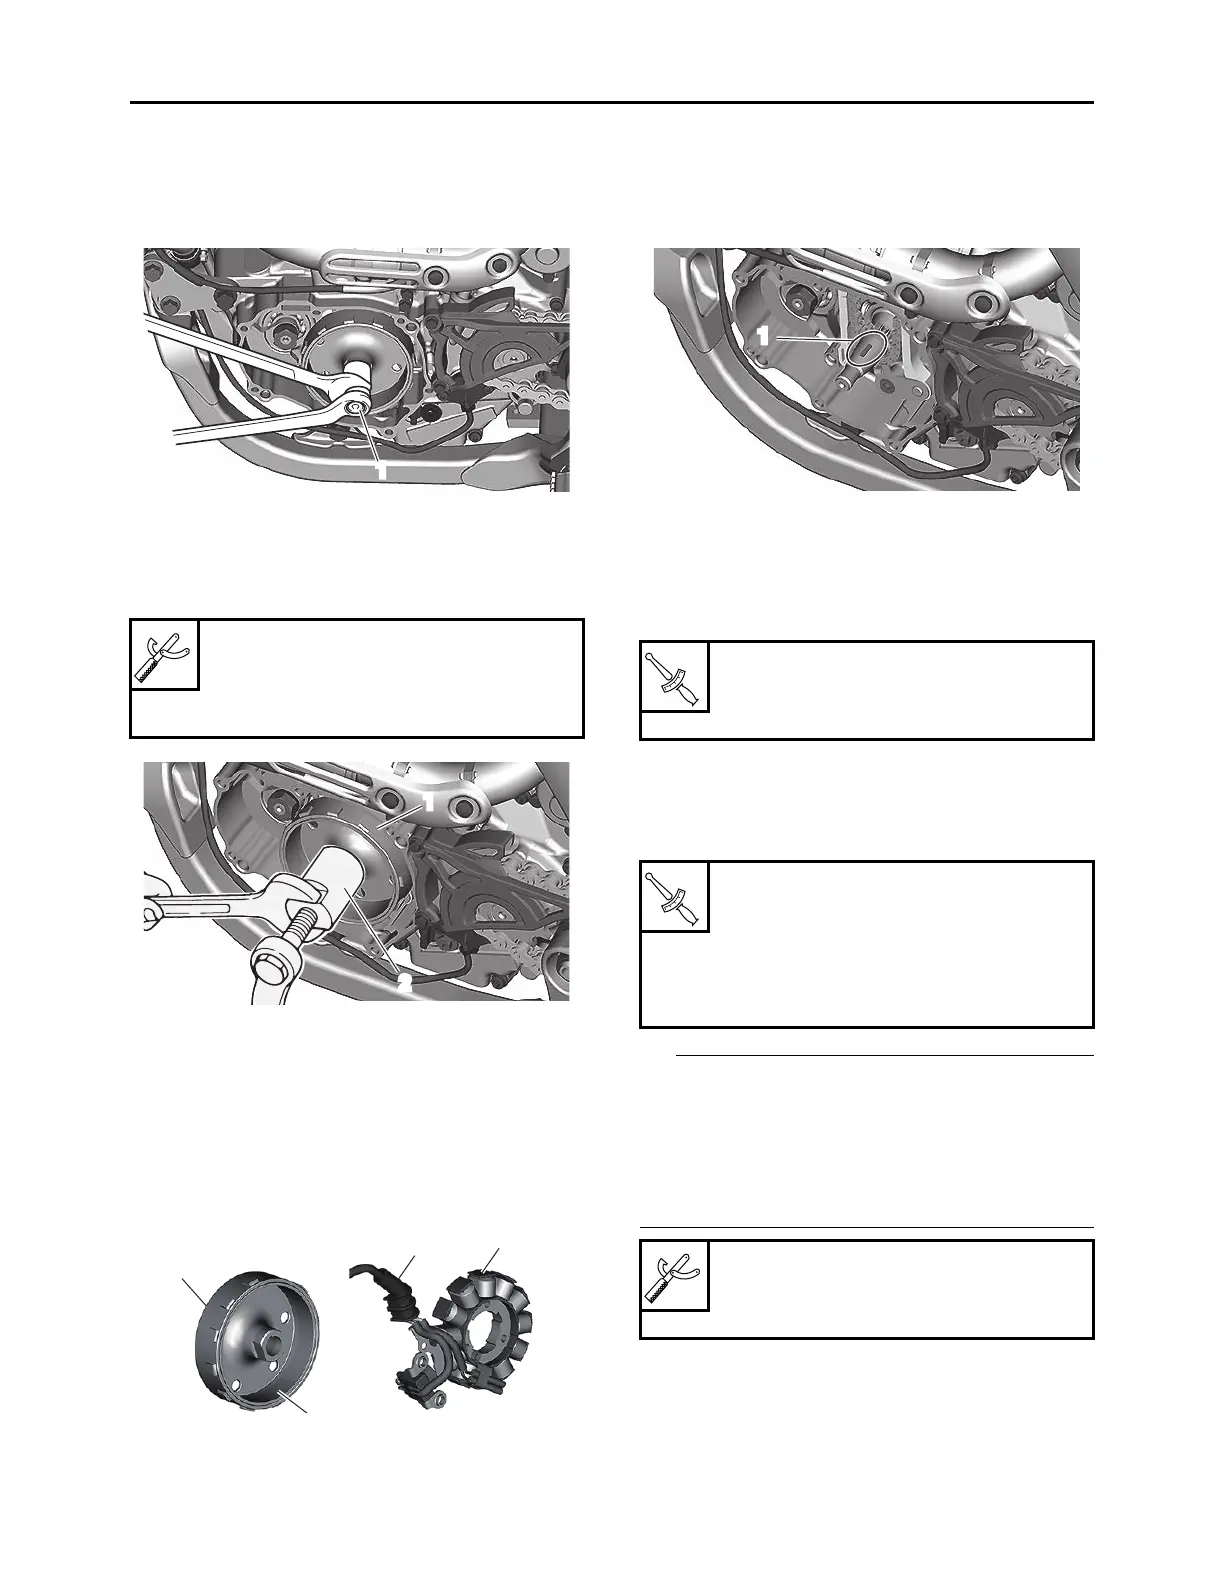
REMOVING THE GENERATOR
1. Remove:
• Nut (generator rotor) “1”
• Washer
2. Remove:
• Generator rotor “1”
(with the rotor puller “2”)
• Woodruff key
EAM30488
CHECKING THE GENERATOR
1. Check:
• Generator rotor “1” inner surface “a”
• Stator coil assembly “2” outer surface “b”
Damage Inspect the crankshaft runout and
crankshaft bearing.
EAM30377
CHECKING THE WOODRUFF KEY
1. Check:
• Woodruff key “1”
Damage Replace.
EAM30489
INSTALLING THE GENERATOR
1. Install:
• Stator coil assembly “1”
• Screw (stator coil assembly) “2”
• Crankshaft position sensor “3”
• Bolt (crankshaft position sensor) “4”
• Holder
• Bolt (holder)
• Apply the sealant to the grommet of the stator
coil assembly lead.
• Tighten the stator coil assembly screws using
the T25 bit.
• Pass the stator coil assembly lead through the
crankcase cover side.
Rotor puller
90890-04151
Rotor puller
YM-04151
1
1
2
1
a
2
b
Screw (stator coil assembly)
10 N·m (1.0 kgf·m, 7.4 lb·ft)
LOCTITE®
Bolt (crankshaft position sensor)
10 N·m (1.0 kgf·m, 7.4 lb·ft)
LOCTITE®
Bolt (holder)
8 N·m (0.8 kgf·m, 5.9 lb·ft)
LOCTITE®
Yamaha bond No. 1215
90890-85505
Three bond No. 1215®
1