ENGINE
3-7
EAM20135
ENGINE
EAM30226
ADJUSTING THE VALVE CLEARANCE
• This section is intended for those who have ba-
sic knowledge and skill concerning the servic-
ing of Yamaha motorcycles (e.g., Yamaha
dealers, service engineers, etc.). Those who
have little knowledge and skill concerning ser-
vicing are requested not to undertake inspec-
tion, adjustment, disassembly, or reassembly
only by reference to this manual. It may lead to
servicing trouble and mechanical damage.
• Make sure that the valve clearance is checked
or adjusted while the engine is cold (at room
temperature).
• While the valve clearance is checked or adjust-
ed, make sure that the piston is positioned in
the top dead center (TDC).
1. Remove:
• Seat
• Side cover (left/right)
• Air scoop (left/right)
Refer to “GENERAL CHASSIS” on page 4-1.
• Fuel tank
Refer to “FUEL TANK” on page 7-1.
• ECU
2. Remove:
• Spark plug
• Cylinder head cover
Refer to “CAMSHAFT” on page 5-14.
3. Remove:
• Timing mark accessing screw “1”
• Crankshaft end accessing screw “2”
• O-ring
4. Check:
• Valve clearance
Out of specification Regulate.
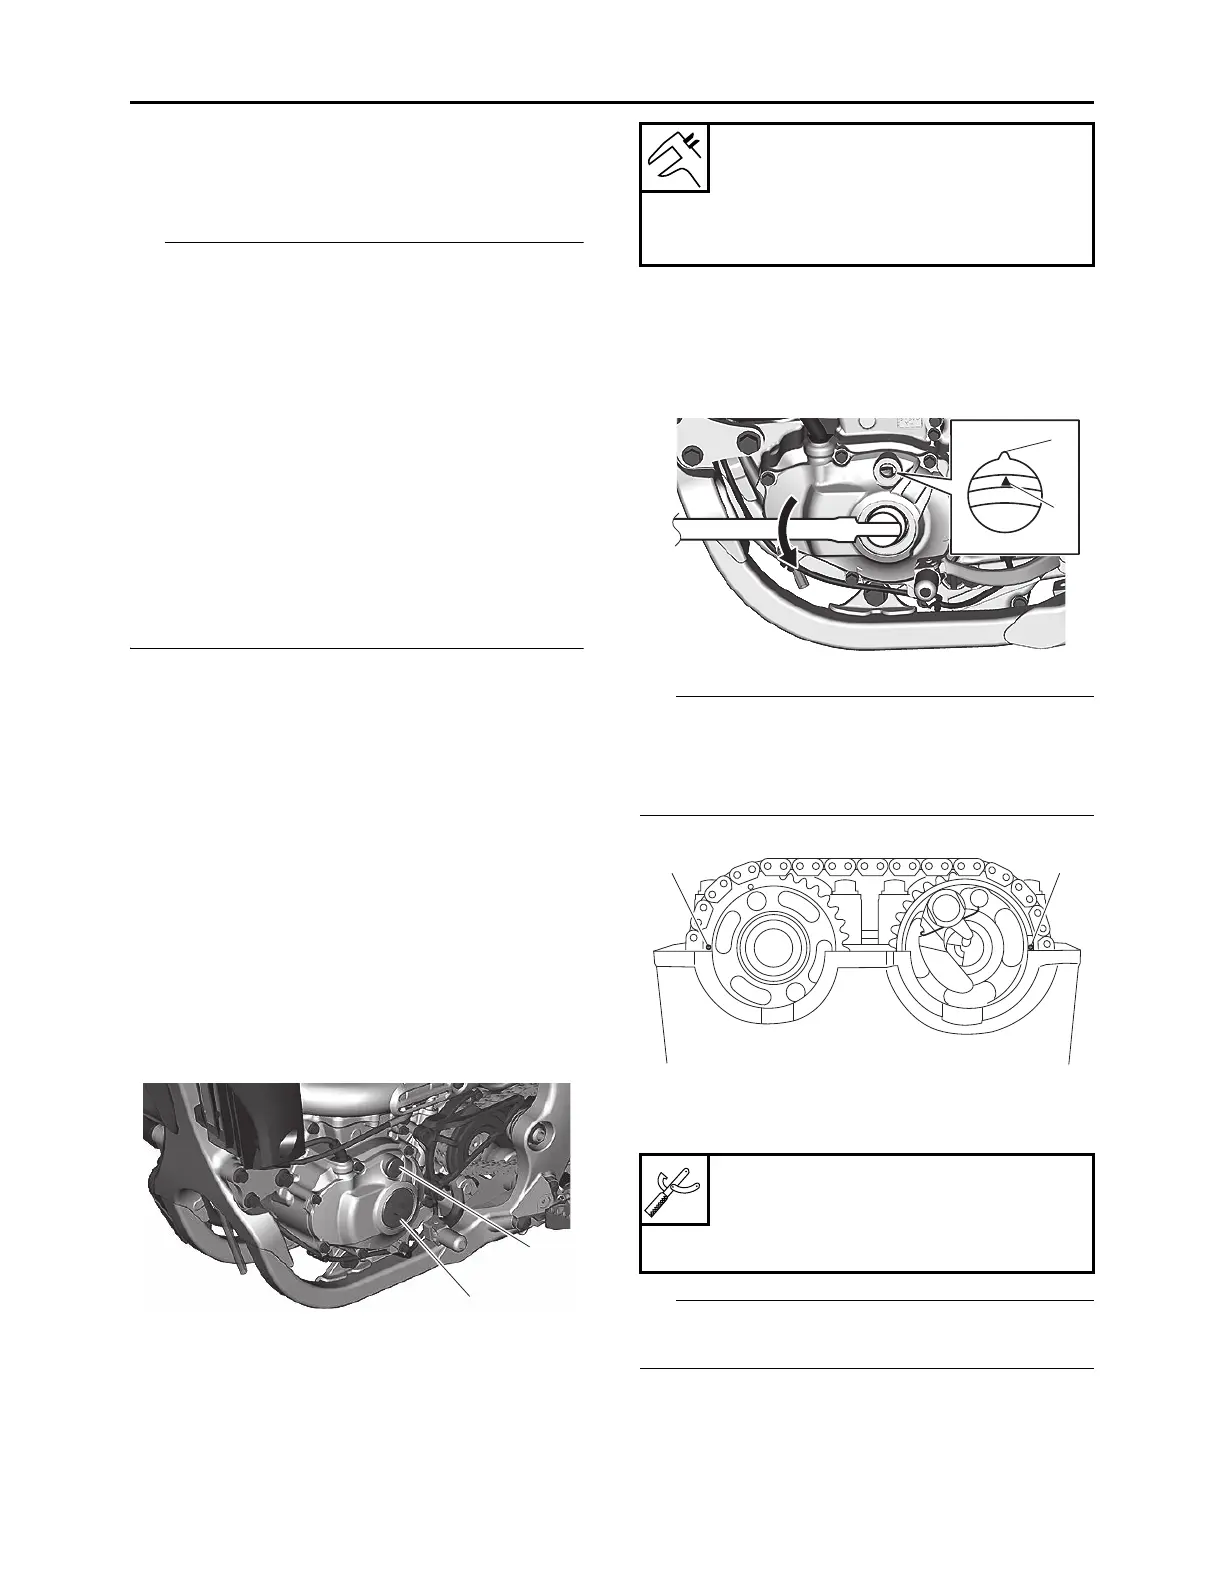
a. Turn the crankshaft counterclockwise with
a wrench.
b. Align the top dead center (TDC) mark “a”
on the generator rotor with the alignment
mark “b” on the crankcase cover.
Check that the alignment mark “c” on the cam-
shaft sprocket and the alignment mark “d” on the
intake camshaft sprocket are aligned with the
edge of the cylinder head.
c. Measure the valve clearance using a
thickness gauge “1”.
Record the measured reading if the clearance is
incorrect.
1
2
Valve clearance (cold)
Intake
0.12–0.19 mm (0.0047–0.0075 in)
Exhaust
0.17–0.24 mm (0.0067–0.0094 in)
Thickness gauge
90890-03268
Feeler gauge set
YU-26900-9
b
a
d
c