247Security Inc. | 4400 North Point Parkway, Suite # 158, Alpharetta, GA 30022, USA | 1-866-693-7492 | www.247securityinc.com
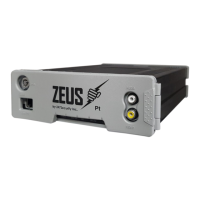
USER MANUAL, ZEUS Pt
22
3 CONNECTING TO DVR
3.1 IP CONFIGURATION
The DVR default IP address is 192.168.1.100. The DVR is set up with a STATIC IP address to allow for a
direct connection with a cross-over cable. During installation the DVR can be connected to a laptop
allowing the installer to preview the cameras for aiming purposes.
3.2 CONNECT CROSS-OVER CABLE
During installation the DVR can be connected to a laptop allowing the installer to preview the cameras
for aiming purposes. Using the grey cross-over cable shipped with the DVR, attach one end to the DVR
port labeled LAN and the other end to the LAN port on the laptop. To verify the correct cable is used
check the end of the cable for the “XOVER” label. Note: A patch cable (standard network cable) will not
work.
3.3 SETTING UP YOUR PC
3.3.1 USING WINDOWS 7
1. Click on the Start button in the lower left corner
2. Select control panel
3. Select and open Network and Sharing center
4. Select Change adapter settings
5. Right click on Local Area Connection
6. Go to properties and left click
7. Left click on Internet Protocol Version 4 (TCP/IPv4)
8. Left click on Properties
9. Record ANY numbers on this screen for your records if needed
10. Left click on Use the following IP Address button
11. In the IP address window type 192.168.1.55
12. Left click on Subnet mask and you should have 255.255.255.0
13. There should be no other numbers in the TCP/IP properties
14. Left click on OK
15. Left click on Close
3.3.2 USING WINDOWS 8
1. Drag the mouse pointer to the top or bottom right “hot corner” until the five Charms
appear along the right edge of the screen. Drag the mouse pointer and click on
Search (you can access the Search charm through the keyboard shortcut Windows
logo + Q), the search pane will pop out and from there you type Control Panel and
select it from the results to the left
2. Select and open Network and Internet
3. Select and open Network and Sharing center
4. Select Change adapter settings
5. Right click on Ethernet
6. Go to properties and left click
7. Left click on Internet Protocol Version 4 (TCP/IPv4)
8. Left click on Properties
9. Record ANY numbers on this screen for your records if needed