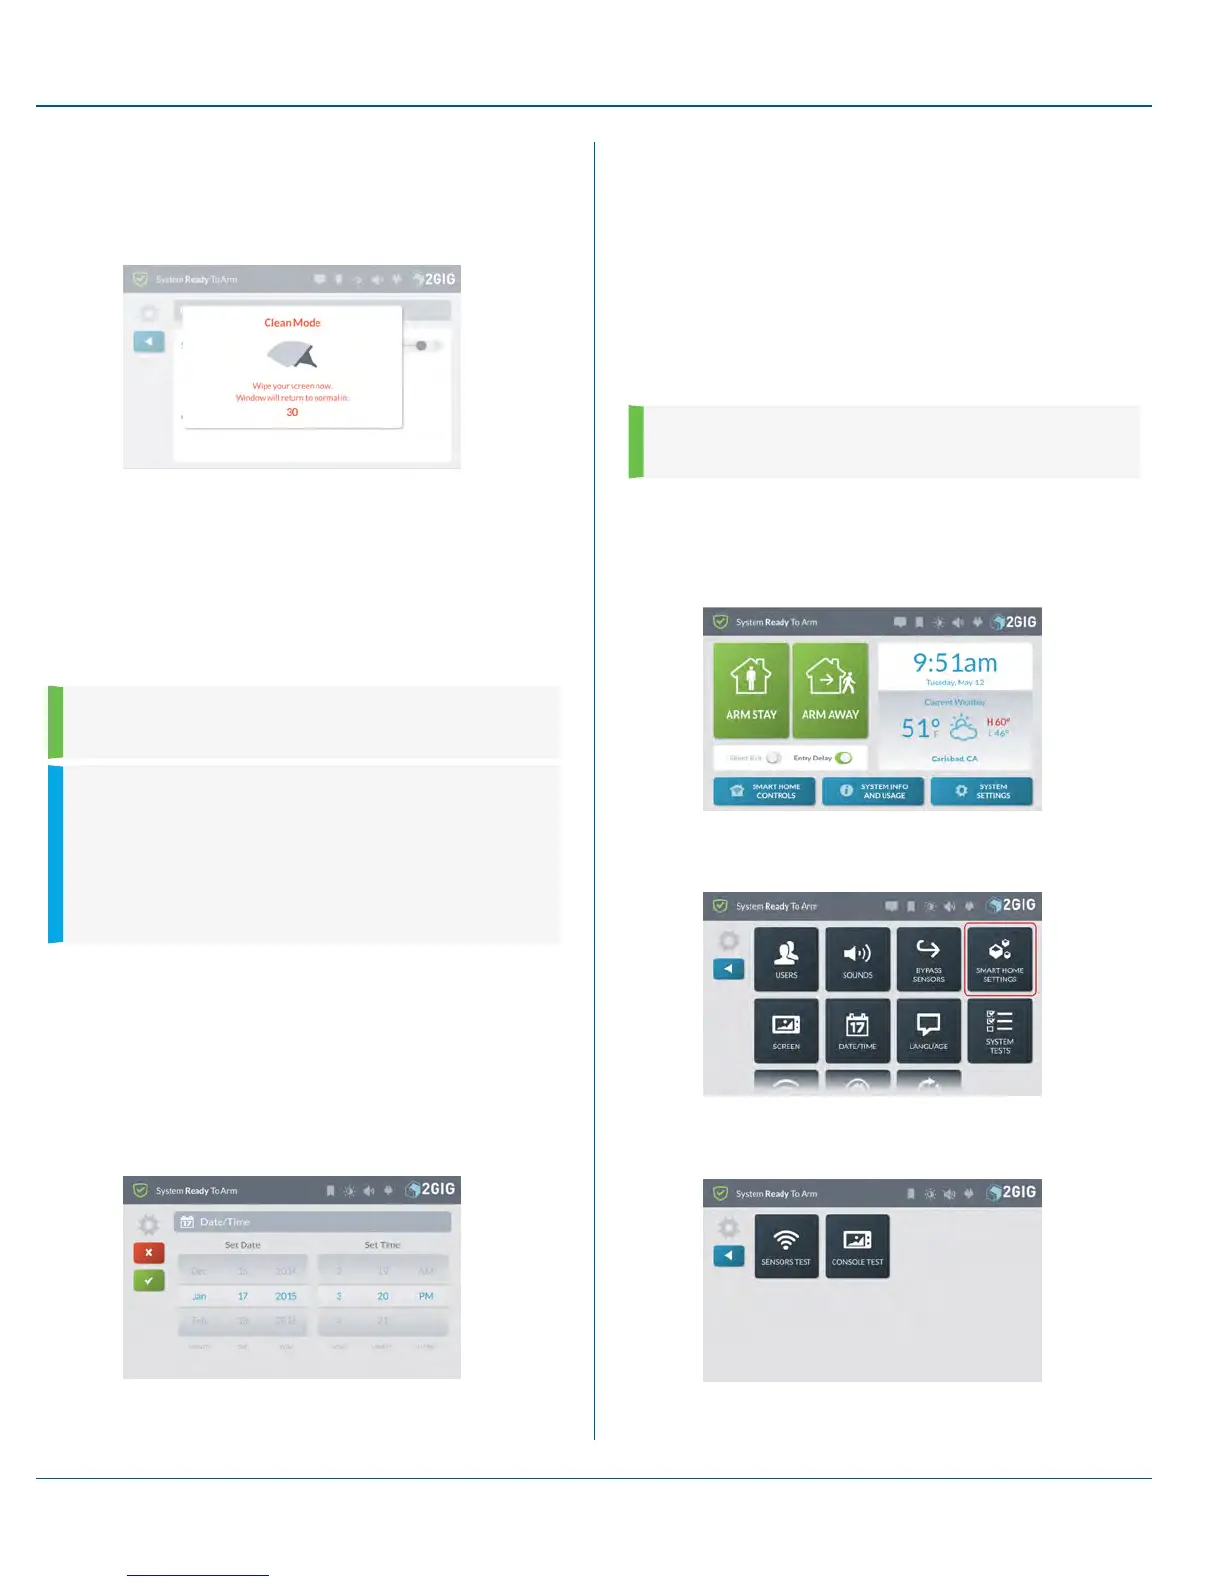
Figure 31 Screen—Clean Mode
A 30-second countdown timer appears and the system blocks all
touch interactions from inadvertently activating buttons during
cleaning.
Figure 32 Clean Mode
3. Wipe the touchscreen with a soft, dry, microfiber cloth that is
specially designed for cleaning sensitive surfaces.
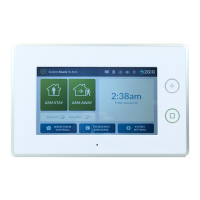
Date/Time
The Date/Time screen lets you modify the time displaying on the GC3
Panel's touchscreen.The date and time are also logged on system alarms
and reports.
NOTE: This feature is PIN-protected. To use this feature,
you must know the four-digit Master User Code.
IMPORTANT: If the system has a Cellular Radio Module
installed, the date and time will be set automatically by your
Alarm Provider's Central Station. For systems without
cellular capabilities, the installer will typically set the system
date and time during the installation process. The installer
may also program the system to automatically adjust for
Daylight Saving Time.
Set the Date/Time
To set the system date:
1. At the Home screen, tap System Settings.
2. At the System Settings menu, enter the system's Master User
Code.
3. Tap Date/Time.
The system reveals the Date/Time screen.
Figure 33 Date/Time Screen
4. Scroll through the date picker wheel select the appropriate
Month, Day, and Year.
5. Scroll through the time picker wheel to select the appropriate
Hour, Minute, and choose between AM/PM.
6. Tap ü when finished.
SystemTests
To ensure continued protection and proper system operations, it is
important to perform a sensor and console test on a weekly basis.
NOTE: This feature is PIN-protected. To use this feature,
you must know the four-digit Master User Code.
Navigate to System Tests
To navigate to the System Tests module:
1. At the Home screen, tap System Settings.
2. Enter the Master User Code to access the SystemSettings
menu.
3. Tap SystemTests.
This reveals the Systems Tests menu.
10 SystemSettings Proprietary &Confidential
77 Copyright © 2015 Nortek Security &Control LLC