7.2
Startup to standby
1. Make sure the cabinet door is closed
2. Switch the power on.
3. The MOTOR OFF lamp on the control panel illuminates when the system has completed
the hardware and software diagnostic test. This test
lasts about 30 seconds.
The following may occur after the start up routine is completed:
A. Normal start with presentation of the message " ABB ROBOT SYSTEM AT YOUR
SERVICE".
B. Presentation of a fault message.
If the MOTOR OFF- lamp flashes, read the error message on the programming unit display.
Actions to be taken to correct different errors are described in separate sections in the
Programming Manual or the Service Manual. Correct the cause of the fault message and
continue the start procedure as in case 1 above.
C. System parameters absent
See the chapter "System parameters".
Normally the robot starts up with the system parameters stored from the manufacturing. If
that's not the case and a the fault message "501 FAULT IN THE PARAMETER MEMORY,
RELOAD!" is displayed must the system parameters must from DISC be entered, ace. to chap.
5.5"Parameter error^.
The system floppy disc delivered with the system is used.
This disc contains system parameters with resolver data that was valid at delivery of the robot
system (according to chapter 8).
D. Specific system parameters.
Define the specific system parameters that is valid for the installation in question. Check and
entering of parameters is described in chapter 5 "System parameters".
Before switching to the MOTOR ON mode, the system parameters must be checked in
particular the commutating offset and the robot sync, offset, to avoid racing and the
risk of a breakdown.
1. After checking the system parameters the robot can be started.
From MOTOR OFF, as described in chapter 4.3 the robot system is switched to
MOTOR ON by pressing the enabeling device on the programming unit.
2. Robot with absolute measurement has a well known absolute position if
the robotis calibrated and is therefor directly ready for operation.
Calibration is described in the service manual.
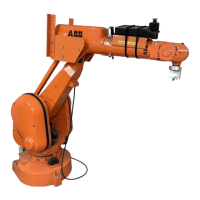
INSTALLATION
7:3