17
ADOBE ILLUSTRATOR CS2
User Guide
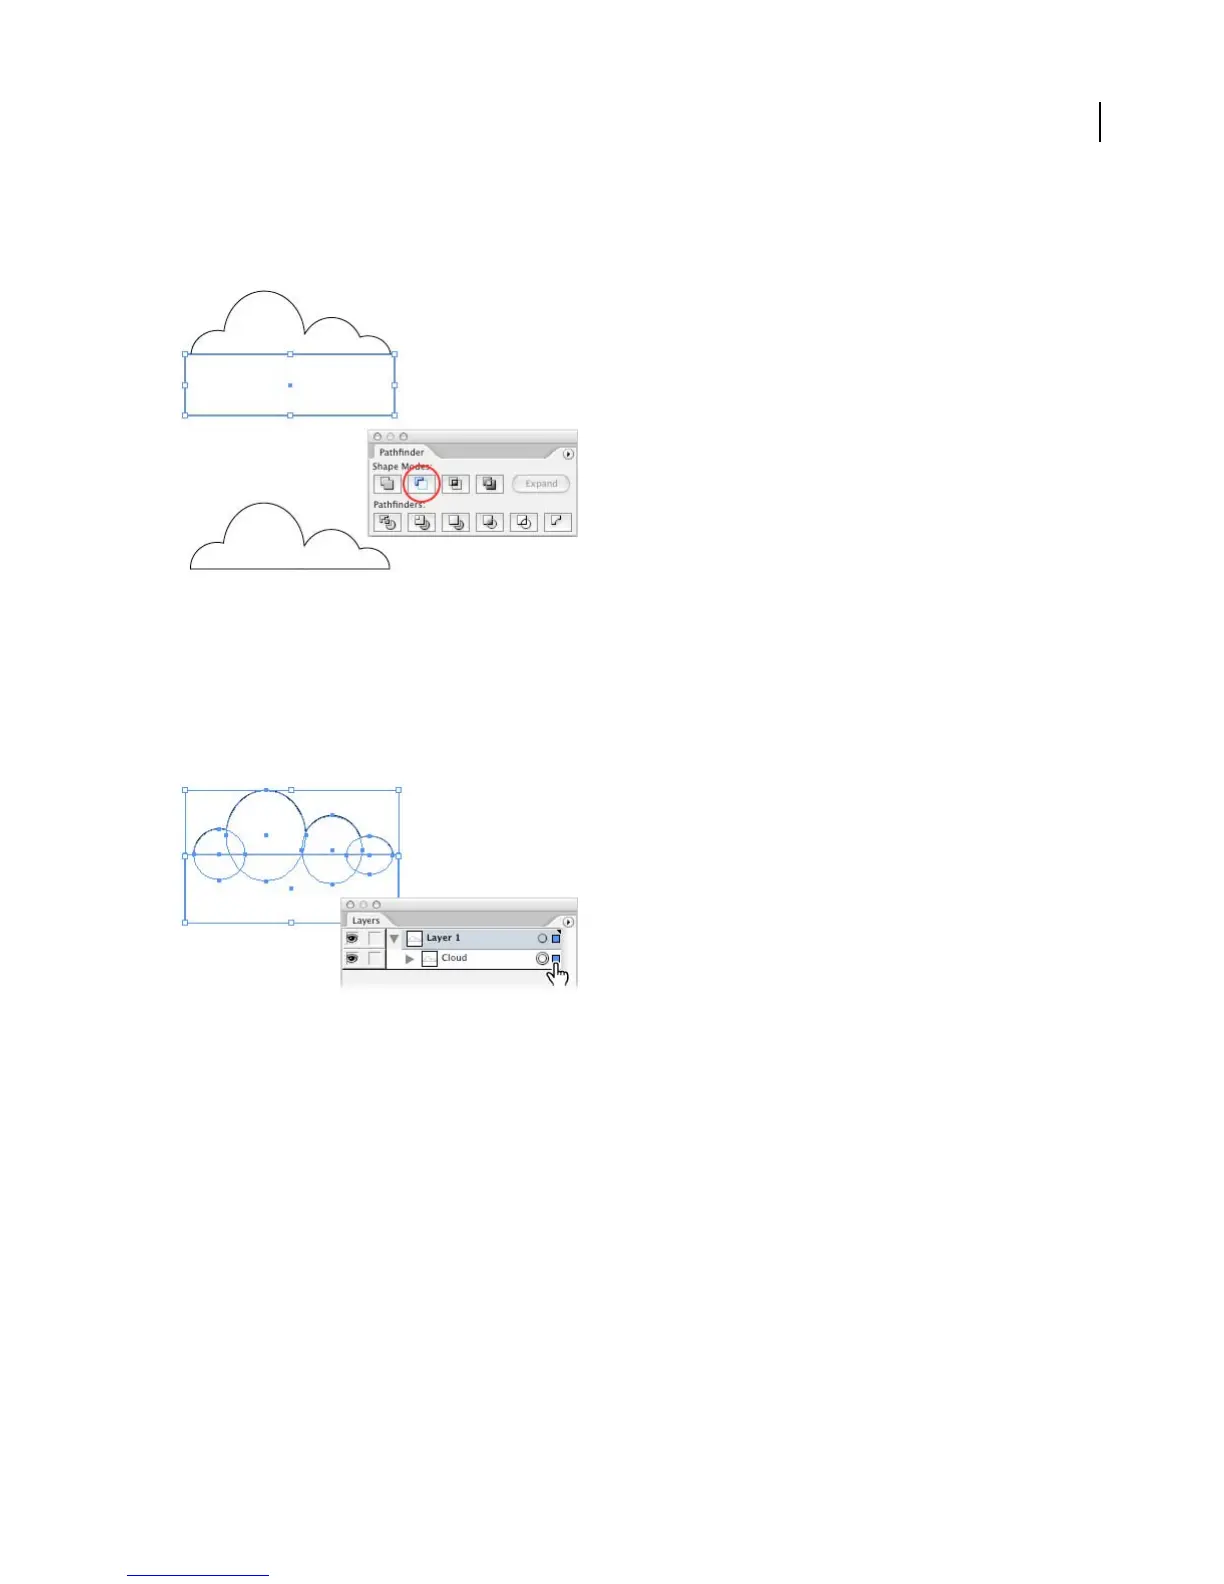
It may be difficult to tell what changed while all the shapes are selected, so click anywhere on the artboard to deselect
them. Now you can see that the rectangle has been subtracted from the ellipses. If you look in the Layers palette,
you’ll see that Illustrator created a new compound shape containing the rectangle and the first compound shape.
4. Rename the compound shape in the Layers palette.
Double-click the words “Compound Shape” in the Layers palette. Enter a more meaningful name for the shape, and
click OK. We named our shape “Cloud.”
The Layers palette is very useful for keeping track of the objects in a document. In addition, you can use it to select
objects by clicking in the selection column between the circle and the scroll bar. (See “About the Layers palette” on
page 278.)
5. Draw three nested circles.
You’ll use the circles to create a sun, so draw them in proportion to the cloud. Start by selecting the Ellipse tool, and
Shift+dragging to draw the outer circle. Then position the pointer over the center of the circle, and Shift+Alt+drag
(Windows) or Shift+Option+drag (Mac OS) to draw the middle circle. (Holding down the Alt or Option key lets you
draw the circle from the center outward.) Repeat again to draw the inner circle.
We named the circles “Outer Circle,” “Middle Circle,” and “Inner Circle” in the Layers palette.