18
ADOBE ILLUSTRATOR CS2
User Guide
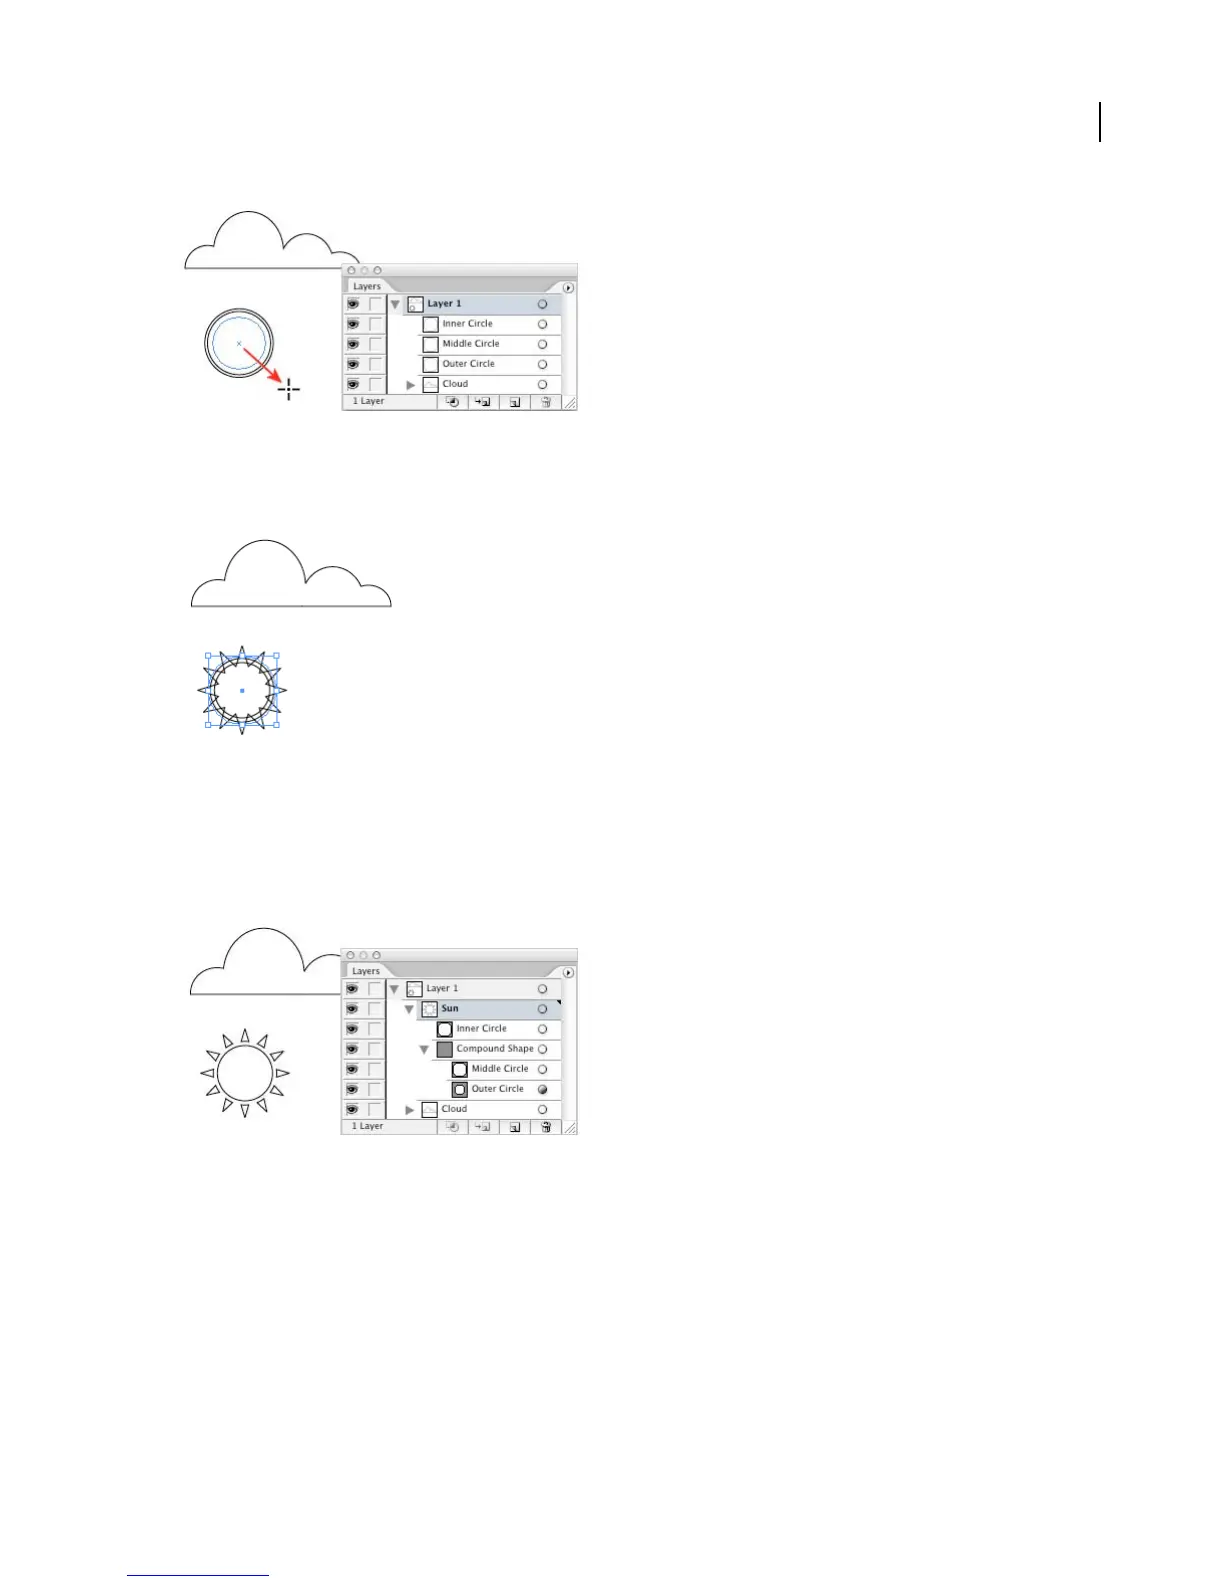
6. Create the sun’s rays.
Select the outer circle and choose Effect > Distort & Transform > Zig Zag. Select Preview, and adjust the values for
Size and Ridges Per Segment. When you’re satisfied with the results, click OK.
7. Make the sun a compound shape.
Select the outer circle, then hold down Shift and select the middle circle. (Holding down Shift lets you select multiple
objects.) Click the Subtract From Shape Area button in the Pathfinder palette to combine the two shapes. Hold down
Shift, select the inner circle, and click the Add To Shape Area button in the Pathfinder palette.
We named the compound shape “Sun” in the Layers palette.
8. Move the sun behind the cloud.
Select the sun, and choose Object > Arrange > Send Backward. Then use the Selection tool to drag the sun behind
the cloud.
Notice how the sun is now listed below the cloud in the Layers palette. This is because the Layers palette reflects the
stacking order of your artwork. You can change the stacking order by dragging objects up or down in the Layers
palette. (See “About the stacking order” on page 282.)