126 Agilent Restricted Agilent 5110/5100 ICP-OES Service Manual
4 Removal/ Installation, Replacement and Adjustment
Polychromator
12 When reassembling stabilizer do not overtighten the 6 screws that have insulators fitted
(Also ensure these are tightened before tightening the polychromator bolt to the chassis to
avoid misalignment).
13 Switch on instrument and ensure temperature stabilizes to 35°C and there are no errors.
Some minor intensity peaking may be required as per pre optics mirror replacement section.
Installations where the water cooling system is shared between the Agilent 5110 ICP-OES
instruments and other devices, the water cooling supply may be configured in parallel. Secure
both supply and return water-cooling lines at the instrument before servicing instrument.
5110 ICP-OES instruments require water-cooling systems. Before the water-cooling filter is
opened place a site supplied bucket beneath it to catch any water that may spill.
Periodic cleaning of the Agilent 5110 ICP-OES instruments water- cooling filter is required.
Remove the filter mesh element and clean it by running it under a tap before re-sealing the
system.
Polychromator
Removal of the Polychromator requires the removal of the instrument outer covers.
1 Switch off the instrument circuit breaker and remove the mains plug.
2 Switch off the instrument water cooler.
3 Open the water cooling filter assembly to release residual line pressure from the water
cooling system.
4 Turn-off all gas supplies to the instrument.
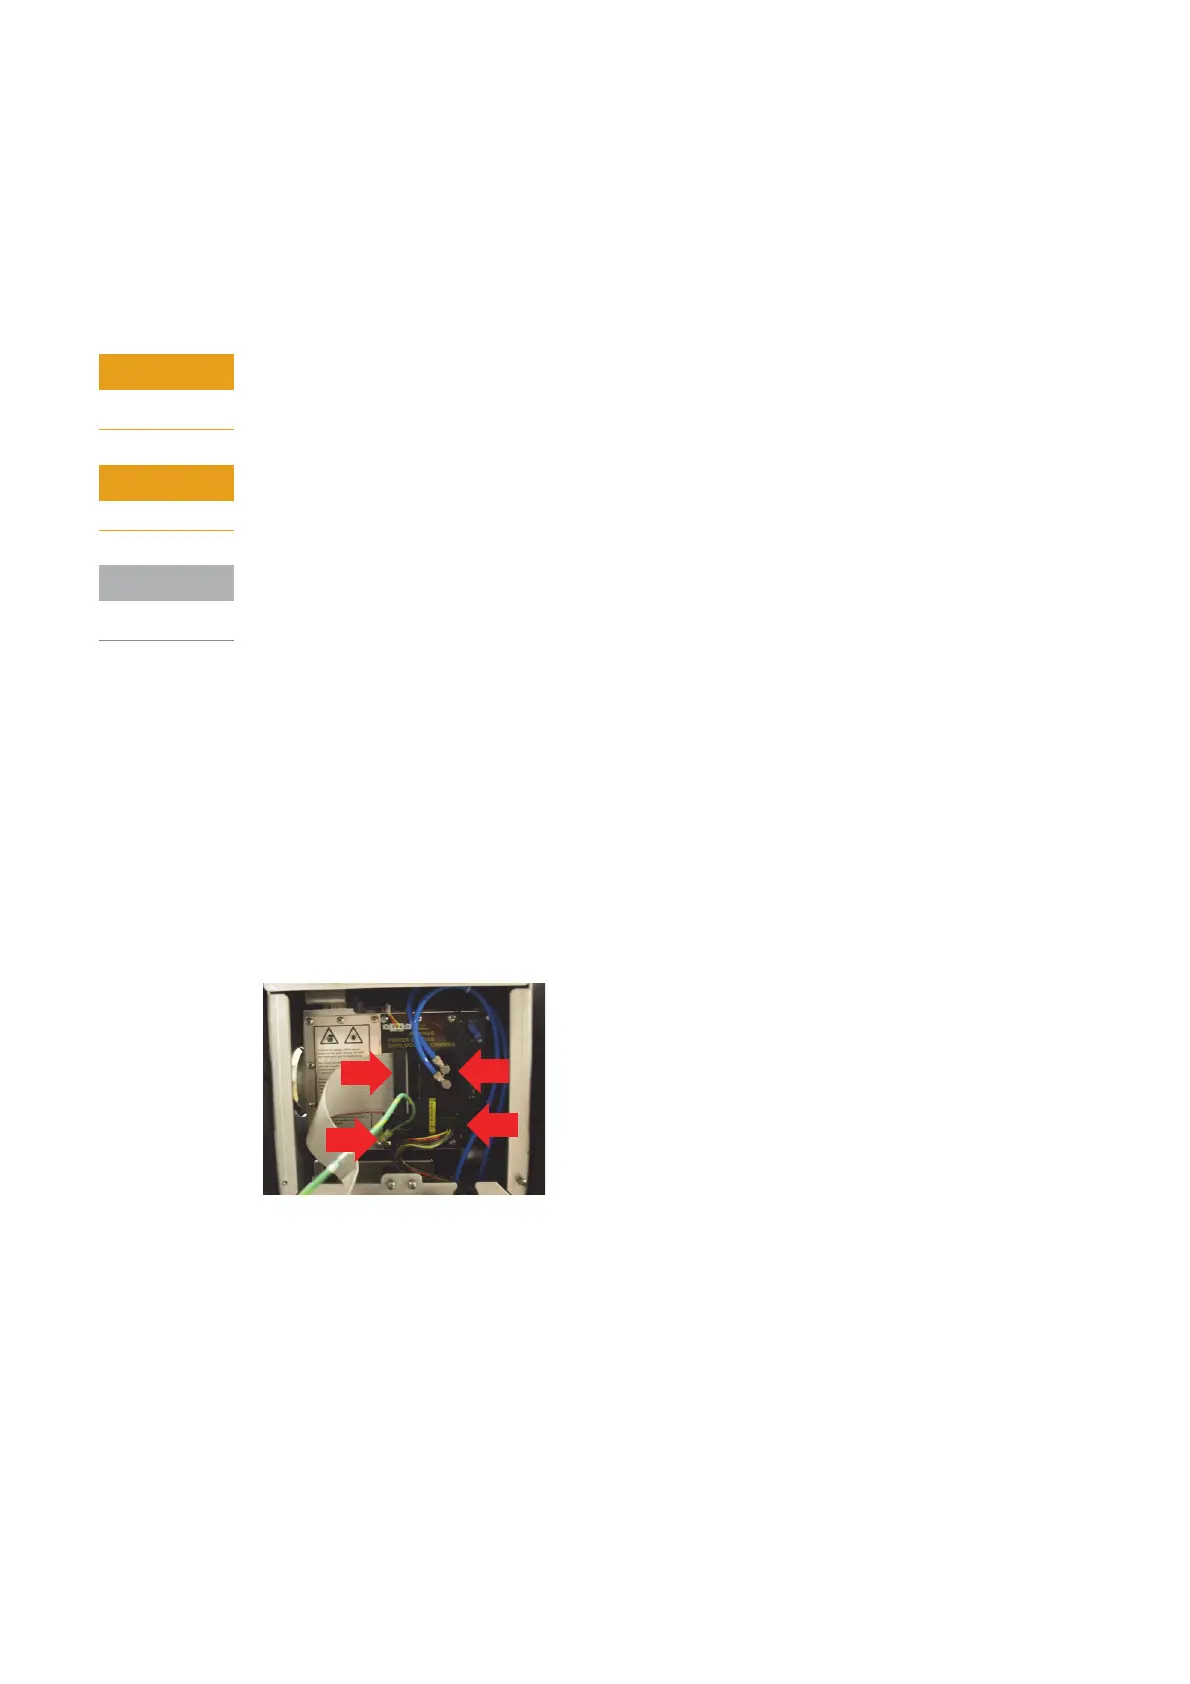
5 Disconnect the camera PCA ribbon cable (1) from end plate PCA.
6 Disconnect Camera control plug (2) 10J1.
7 Disconnect Polychromator oven earth lead (3).
8 Disconnect the water cooling supply and return lines (4).
 Loading...


