136 Agilent Restricted Agilent 5110/5100 ICP-OES Service Manual
4 Removal/ Installation, Replacement and Adjustment
Polychromator
19 Reassemble the replacement camera onto the plate. Lightly tension the 4 hex screws to
allow rotational movement in readiness for camera adjustment when fully assembled into
casting.
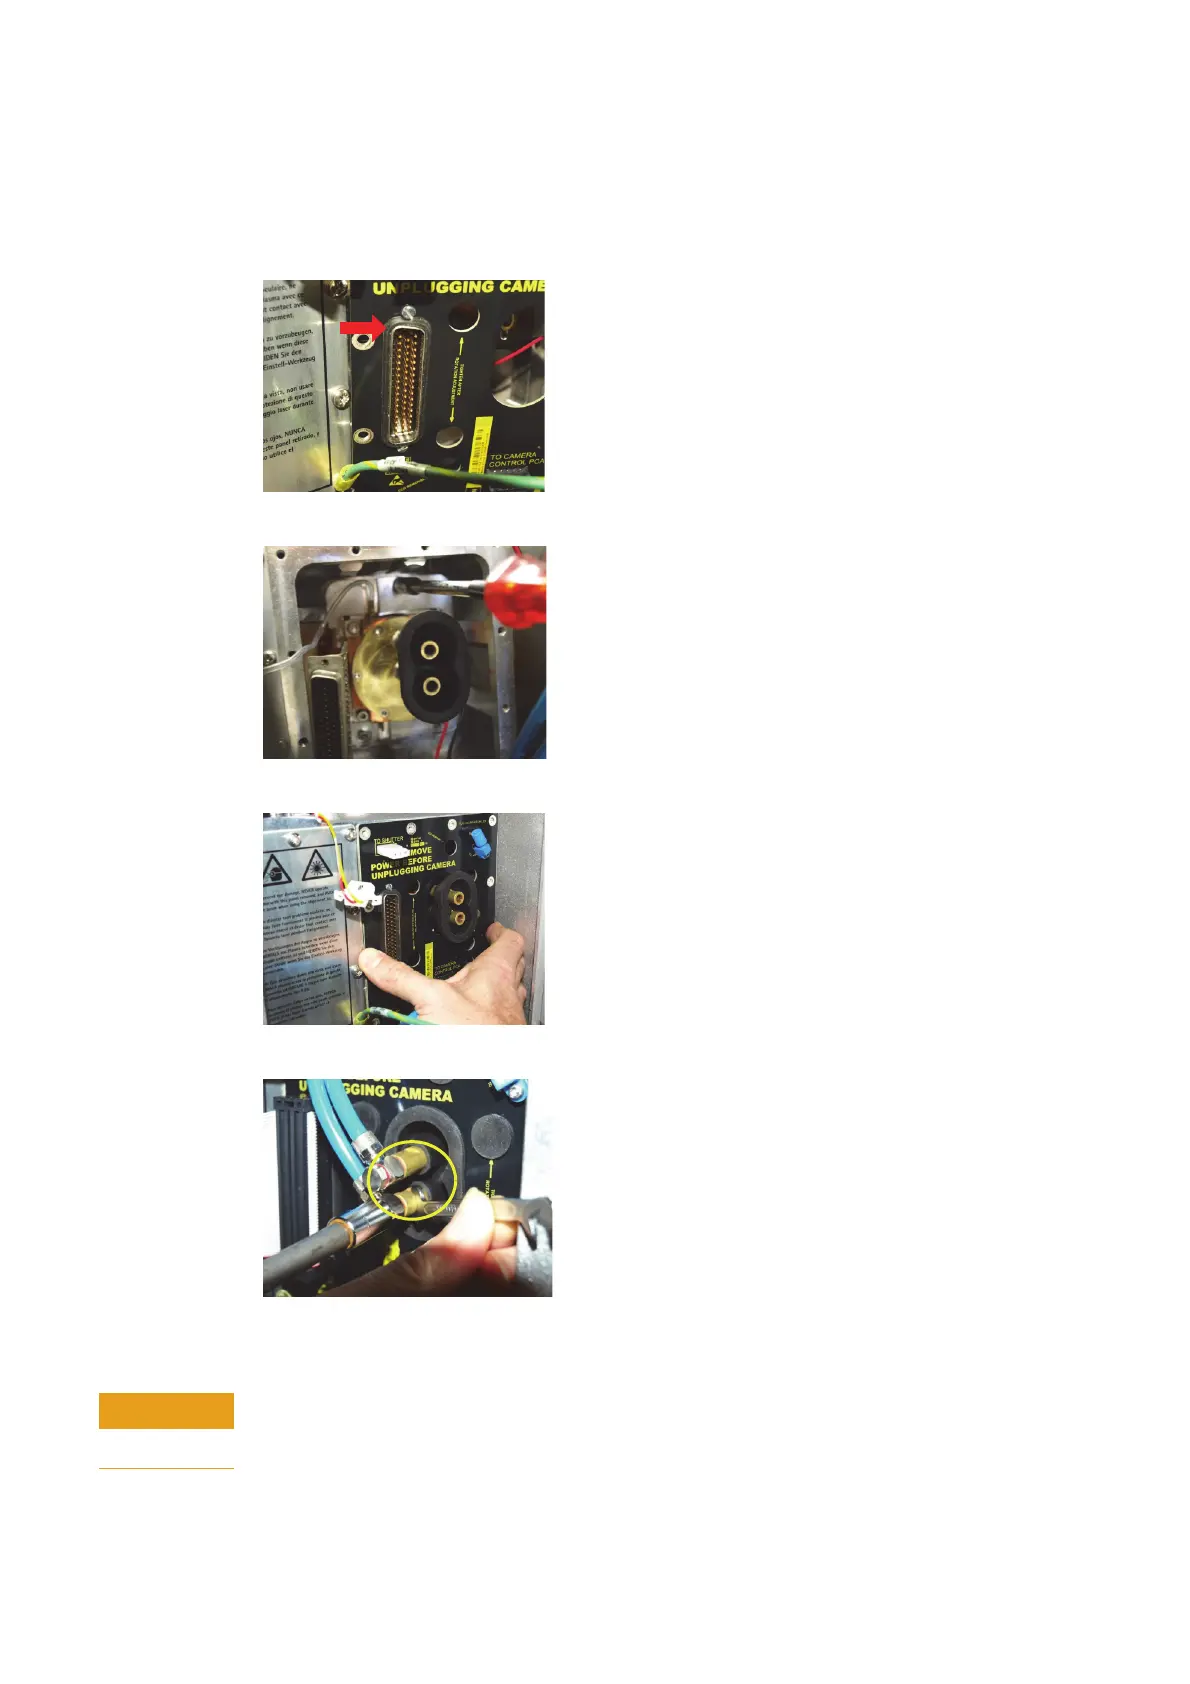
20 Assemble connector onto bracket and ensure rubber seal is positioned correctly.
21 Reassemble camera into casting and secure with 3 Nylock nuts.
22 Secure board to casting and correctly locate water connection grommet.
23 Secure water hose ensuring the water inlet nipple is connected to the bottom fitting.
Reconnect the power supply connectors and shutter connector.
Make sure the Copper section of the inlet tube is held firmly with a wrench when loosening or
tightening pipe fitting to prevent rotation of the pipe and subsequent damage to the water
seal at the camera end.
 Loading...


