Agilent N5181A/82A MXG Signal Generators User’s Guide 91
Basic Digital Operation (Option 651/652/654)
Using Waveform Markers
Placing a Marker on a Single Point
On the First Point
1. In the second Arb menu (page 87), press SetMarkers.
2. Highlight the desired waveform segment.
3. Select the desired marker number:
Press Marker 1 2 3 4.
4. Press Set Marker On First Point.
This sets a marker on the first point in the segment for the marker number selected in Step 3.
On Any Point
Use the steps described in “Placing a Marker Across a Range of Points” on page 89, but set both the
first and last marker point to the value of the point you want to set. For example, if you want to set
a marker on point 5, set both the first and last value to 5.
Placing Repetitively Spaced Markers
The following example sets markers across a range of points and specifies the spacing (skipped
points) between each marker. You must set the spacing before you apply the marker settings; you
cannot apply skipped points to a previously set range of points.
1. Remove any existing marker points (page 83).
2. In the second Arb menu (page 87), press SetMarkers.
3. Highlight the desired waveform segment.
4. Select the desired marker number:
Press Marker 1 2 3 4.
5. Set the first sample point in the range (in this example, 5):
Press Set Marker On Range Of Points > First Mkr Point > 5 > Enter.
6. Set the last marker point in the range. (The last marker point value must always be less than or
equal to the number of points in the waveform, and greater than or equal to the first marker
point, in this example, 25):
Press Last Mkr Point > 25 > Enter.
7. Enter the number of sample points that you want skipped (in this example, 1):
Press # Skipped Points > 1 > Enter.
8. Press Apply To Waveform > Return.
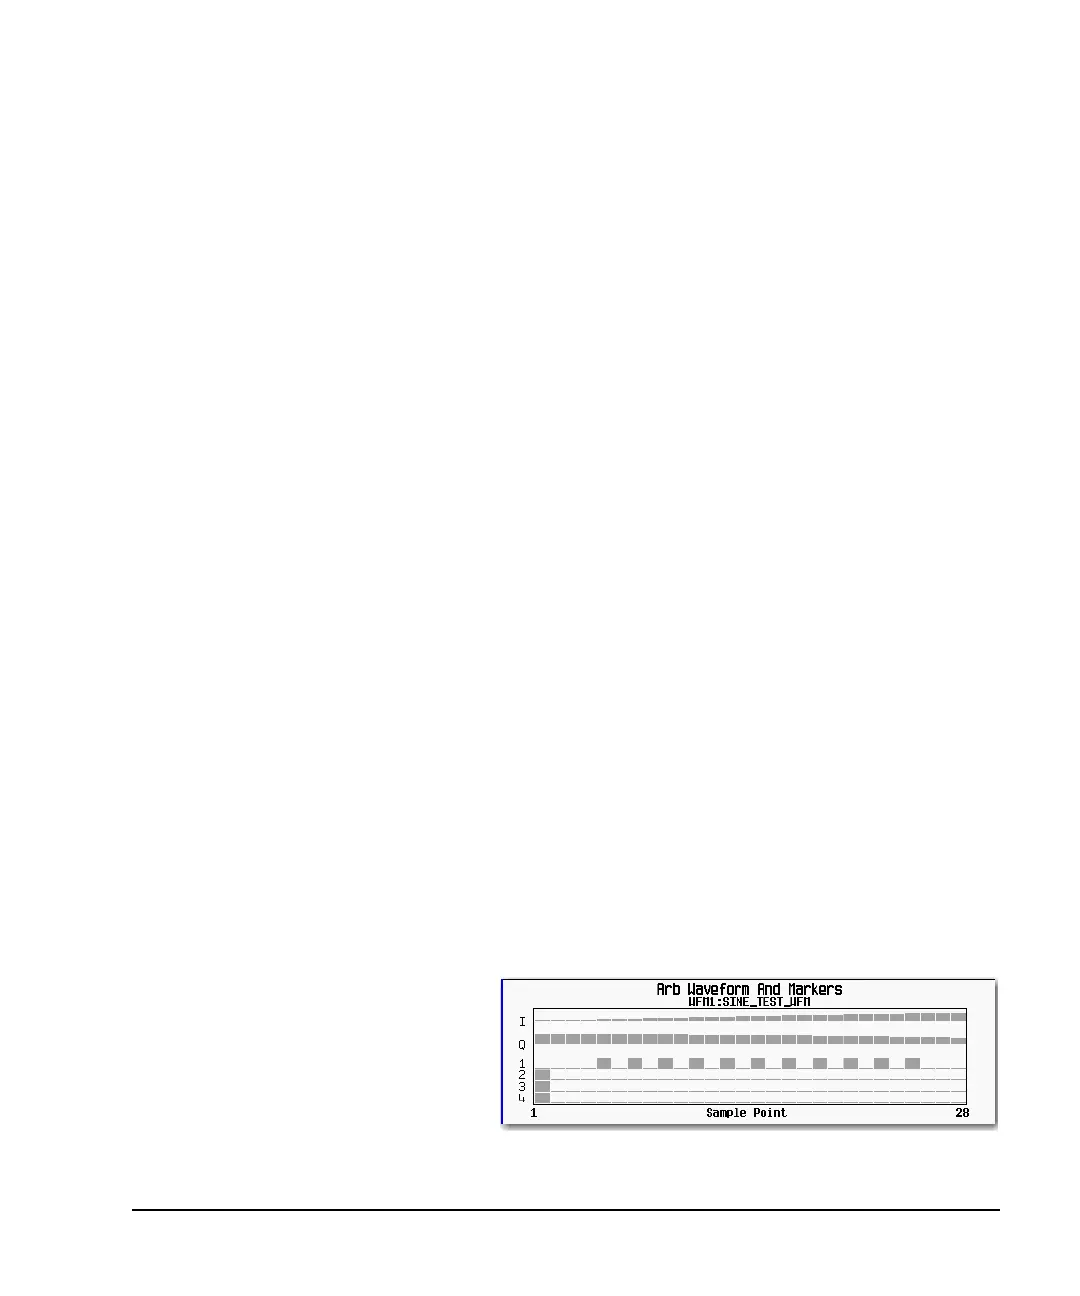
This causes the marker to occur on
every other point (one sample point is
skipped) within the marker point range,
as shown at right.
How to view markers is described on
page 88.
One application of the skipped point
feature is the creation of a clock signal
as the EVENT output.
 Loading...