17
Chapter 1: PlateLoc introduction
PlateLoc User Guide
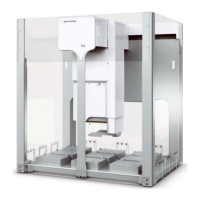
Lab automation
system workflow
The following table presents the basic steps for operating the PlateLoc in
a Velocity11 lab automation system. When optimizing the seal quality,
repeat steps 8 through 9.
Note: The steps for installing and operating the PlateLoc in a third-party
lab automation system might differ. For details, refer to the third-party
user documentation.
Related topics
Step Procedure See...
1 Turn on the PlateLoc. “Turning on and turning off the
power” on page 42
2 Turn on the air. “Turning on and turning off the
air” on page 44
3 Gas-Purging PlateLoc only. Turn
on the argon.
“Turning on and turning off the
argon (Gas-Purging Platelocs
only)” on page 47
4 Optional. Adjust the touchscreen.
❑ “Tilting and stowing the
touch screen” on page 49
❑ “Adjusting the touch screen
contrast” on page 51
5 Load the seal. “Loading and unloading a roll of
seal” on page 53
6 Create PlateLoc profiles. “Creating and managing profiles
(lab automation systems only)”
on page 59
7 Establish communication with
the PlateLoc.
“Establishing communications
with the PlateLoc (lab
automation systems only)” on
page 62
8 Create protocols and set task
parameters.
Velocity11 lab automation system
software user guide, such as the
VWorks User Guide
9 Start the protocol run (seal
cycles).
“Starting the seal cycle” on
page 72
For more information about... See...
Workflow for installing and
operating the PlateLoc in a third-
party automation system
The third-party product documentation
Using ActiveX control to configure
third-party lab automation
software to interface with the
PlateLoc
“Integrating the PlateLoc into third-
party systems” on page 99
 Loading...