EasyManua.ls Logo

Agilent Technologies Bravo Platform - User Manual

Agilent Technologies Bravo Platform
296 pages
Print Icon
To Next Page IconTo Next Page
Loading...
Bravo Platform
User Guide
Original Instructions

Table of Contents

Other manuals for Agilent Technologies Bravo Platform

Questions and Answers

  • W
    williamsjohnAug 14, 2025
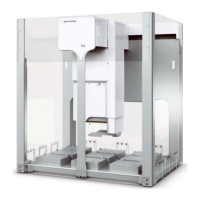
    What to do if the Agilent Technologies Laboratory Equipment gripper drops labware?
    • V
      Vanessa SalazarAug 14, 2025
      If the Agilent Technologies Laboratory Equipment gripper holds the labware loosely, doesn't keep it level, or drops it during movement, first, verify the labware definition is correct. Then, gently clean the gripper pads with a soft, water-dampened cloth, check for wear, and ensure proper alignment. Finally, visually inspect the gripper fingers to ensure they are aligned and not bent.
  • K
    Krista WiseAug 17, 2025
    How to troubleshoot if Agilent Technologies Laboratory Equipment Bravo Platform does not turn on?
    • E
      Eric PerezAug 17, 2025
      If the Agilent Technologies Laboratory Equipment Bravo Platform does not turn on, ensure the site meets all electrical requirements. Verify you're using the Agilent-supplied power cord and plug, and inspect the cord and connections to ensure a proper connection to the power source. If the fuse blows immediately after replacement, stop using the device and contact Agilent Automation Solutions Technical Support.
  • J
    Jeremy LongAug 20, 2025
    Why does Agilent Technologies Laboratory Equipment grip too high or low on labware?
    • A
      angelaburnsAug 20, 2025
      If the Agilent Technologies Laboratory Equipment robot attempts to grip too high or low on the labware, verify that the Bravo gripper range in the labware definition is correct and check that the location teachpoint is correct.
  • J
    Jose BatesAug 25, 2025
    What to do if Agilent Technologies Laboratory Equipment Bravo Platform cannot be initialized?
    • J
      Jake CunninghamAug 25, 2025
      If the Agilent Technologies Laboratory Equipment Bravo Platform cannot be initialized, start by checking the Ethernet cable connections. Next, in the software, ensure that the device is configured correctly and that the Bravo profile is correctly set for the device, including the IP address.
  • T
    Timothy JohnsonAug 27, 2025
    Why is Agilent Technologies Laboratory Equipment movement rough or strained?
    • C
      Christine WolfeAug 27, 2025
      If the Agilent Technologies Laboratory Equipment head or gripper movement is rough, strained, or noisy, this could be due to the location requiring a gripper teachpoint adjustment. Also, the Bravo Platform might require service; in that case, contact Agilent Automation Solutions Technical Support.
  • R
    Ricky PalmerAug 30, 2025
    What causes Agilent Technologies Laboratory Equipment gripper to fail picking labware?
    • M
      murphysamuelAug 30, 2025
      If the Agilent Technologies Laboratory Equipment gripper cannot pick or place labware at a location, verify that the correct labware is on the deck, is in good condition, and corresponds to the selected labware definition.
  • A
    Amanda TorresSep 3, 2025
    How to fix Agilent Technologies Laboratory Equipment liquid not pumping?
    • T
      twallerSep 3, 2025
      If the Agilent Technologies Laboratory Equipment liquid fails to pump into or drain from an autofilling reservoir, inspect the Pump Module tubing and connections, and replace them if necessary.
  • M
    Michael LunaSep 6, 2025
    Why isn't Agilent Technologies Laboratory Equipment labware sitting level?
    • D
      Danielle MaySep 6, 2025
      If the Agilent Technologies Laboratory Equipment labware does not sit level within the platepad, verify that the setscrews in the platepad tabs are recessed and not protruding into the plate nest, as an obstruction might be preventing proper seating.
  • S
    Steven MorrisSep 10, 2025
    What causes flooding in Agilent Technologies Laboratory Equipment?
    • V
      victoria65Sep 10, 2025
      If the Agilent Technologies Laboratory Equipment liquid in the wash trays or reservoirs is overflowing, inspect the tubing for kinks. If necessary, recalibrate the Weigh Station.

Summary

1. Introduction

Safety notes

Safety warnings and precautions for operating the Bravo Platform.

About the Bravo Platform

Overview of the Bravo Platform's capabilities and applications.

Hardware overview

Description of the Bravo Platform's primary hardware components.

Connection panel description

Details of the Bravo Platform's rear connection panel ports.

Liquid-handling heads

Information on interchangeable liquid-handling heads for the Bravo Platform.

Software overview

Overview of Bravo Diagnostics and VWorks software for platform operation.

2. Setting up the Bravo Platform

Workflow for setting up the Bravo Platform

General workflow for installing and configuring the Bravo Platform.

Starting up and shutting down

Procedures for safely powering the Bravo Platform on and off.

Creating or adding a Bravo device

Steps to add a Bravo device to the VWorks software configuration.

Opening Bravo Diagnostics

Instructions for accessing the Bravo Diagnostics software.

Creating and managing profiles

How to create, manage, and update Bravo Platform profiles.

Initializing the device

Procedure to establish communication between the computer and the Bravo Platform.

Setting teachpoints

How to set and verify teachpoints for precise head positioning.

Verifying the gripper setup

Procedure to check and adjust the gripper's y-axis offset and operations.

Configuring external robot access

How to configure concurrent or exclusive access for external robots.

3. Preparing for a protocol run

Workflow for preparing a protocol run

Steps for preparing the Bravo Platform for a protocol run.

Emergency stops

Procedures for using the emergency stop button to halt motion.

Planning for the protocol run

How to review the protocol and determine necessary preparations.

About performing mock runs

Guidance on using mock runs for troubleshooting and verification.

4. Maintenance and troubleshooting

Routine maintenance and cleaning

Guidelines for regular cleaning and preventative maintenance.

Cleaning up after a run

Post-run procedures to clean the Bravo Platform.

Changing the Bravo head

Procedures for uninstalling and installing different liquid-handling heads.

Testing the safety equipment

How to test the emergency stop and light curtain safety features.

Replacing the fuse

Steps to replace the main fuse in the Bravo Platform's power switch.

Retracting tip box stripper pins

How to retract tip box stripper pins for specific tasks.

Manually moving the head or gripper

Procedures for manually moving the head or gripper by disabling motors.

Recovering from a head collision

Steps to take after a head collision occurs.

Troubleshooting hardware problems

Common hardware issues and their recommended solutions.

Troubleshooting hardware-related error messages

Solutions for common error messages encountered with the Bravo Platform.

Reporting problems

How to report hardware, software, or user guide issues.

5. Using diagnostics software

Homing the liquid-handling head

Procedure for returning the liquid-handling head to its home position.

Jogging the liquid-handling head

How to move the liquid-handling head in small increments using the Jog/Teach tab.

Using the Move and Approach commands

Instructions for moving the head to teachpoints or approach heights.

Using the gripper controls

How to use the Gripper tab controls for gripper movement and configuration.

Performing a task using Bravo Diagnostics

How to perform tasks like Tips On, Aspirate, Mix, and Dispense.

A. Accessories and platepads

Bravo accessories overview

Description of available accessories and platepads for the Bravo Platform.

Installing and setting up an Orbital Shaking Station

Procedures for installing and configuring the Orbital Shaking Station.

Installing and setting up a Vacuum Filtration Station

Procedures for installing and setting up the Vacuum Filtration Station.

Installing and configuring a Magnetic Bead Accessory

Procedures for installing and configuring the Magnetic Bead Accessory.

Setting up the Thermal Station (cooling pad)

Procedures for installing and setting up the Thermal Station cooling pad.

Installing a Heating Shaking Station

Procedures for installing the Heating Shaking Station.

Installing and configuring the Peltier Thermal Station

Procedures for installing and configuring the Peltier Thermal Station.

(Bravo SRT only) Setting up an LT tip box location

Specific setup for LT tip box locations on the Bravo SRT.

B. Autofilling accessories

Autofilling station overview and setup workflow

Overview of autofilling stations and their setup workflow.

Configuring an autofilling station for the Bravo Platform

How to configure the autofilling function for the Bravo Platform.

Setting up a Weigh Station

Calibration instructions for the Weigh Station.

C. Setting up the Barcode Reader

About setting up the Barcode Reader

Description of the Barcode Reader and its setup workflow.

Installing or removing the Barcode Reader

Procedures for installing and uninstalling the Barcode Reader.

Creating a profile for the Barcode Reader

Steps to add and initialize a profile for the Barcode Reader.

Specifying the Barcode Reader location

How to specify the Barcode Reader's location in the Bravo device file.

Testing and optimizing barcode scanning

Procedures to test and optimize barcode scanning performance.

D. AssayMAP Bravo Platform

AssayMAP Bravo Platform overview

Overview of the AssayMAP Bravo Platform and its components.

Bravo 96 AM Head overview

Description of the Bravo 96AM Head components and features.

AssayMAP cartridge overview

Overview of AssayMAP cartridges, racks, and receiver plates.

Installing and using the Bravo 96 AM Head

Guidelines for handling, installing, and using the Bravo 96AM Head.

Verifying the setup in the Protein Sample Prep Workbench

Workflow for verifying the setup of AssayMAP Bravo Platform installation.

Opening the Workbench and accessing the utilities

How to open and access utilities in the Protein Sample Prep Workbench.

Requirements for partial-head liquid handling

Guidelines for performing partial-head liquid handling tasks with the 96AM Head.

E. Diagnostics quick reference

Bravo Diagnostics Dialog Box Reference

Quick reference to the controls and features of the Bravo Diagnostics dialog box.

Tabbed Reference Pages in Diagnostics

Reference for Configuration, External Robots, IO, Jog/Teach, Gripper, Profiles, Processes tabs.

Task Parameter Reference

Description of parameters for various tasks like Aspirate, Dispense, Mix, etc.

Agilent Technologies Bravo Platform Specifications

General IconGeneral
Automation TypeAutomated
ApplicationsGenomics, Proteomics, Cell Biology, Drug Discovery
Pipetting TechnologyAir displacement
SoftwareBravo Control Software
Power Requirements100-240 V AC, 50/60 Hz
TypeLiquid Handling Platform
CompatibilityStandard microplates
ThroughputHigh throughput

Related product manuals